
Introduction
Postmark is a powerful email delivery service designed specifically for transactional emails, ensuring high deliverability rates and reliable performance. By integrating Postmark with GoSMTP, a widely-used WordPress plugin for SMTP configuration, you can effortlessly send transactional emails from your WordPress website using Postmark's advanced API. This comprehensive guide will walk you through the step-by-step process of integrating GoSMTP with Postmark's free plan, enabling you to enhance your email communication without any financial commitment.
Installing & Configuration with Postmark
To begin, make sure you have installed and activated the GoSMTP plugin.
After Installing GoSMTP, you can easily configure the plugin's settings. Just Go to GoSMTP » Settings in your WordPress dashboard and navigate to the SMTP Settings tab.
After Installing GoSMTP, you can easily configure the plugin's settings. Just Go to GoSMTP » Settings in your WordPress dashboard and navigate to the SMTP Settings tab.

To get started, follow these steps to configure the GO SMTP plugin in WordPress:
Basic configuration
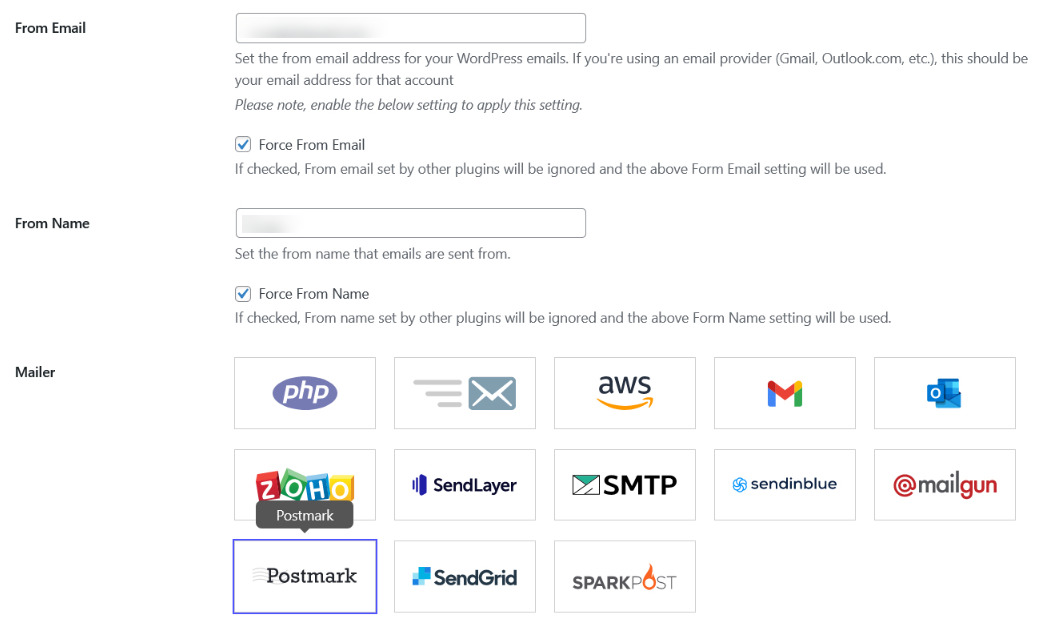
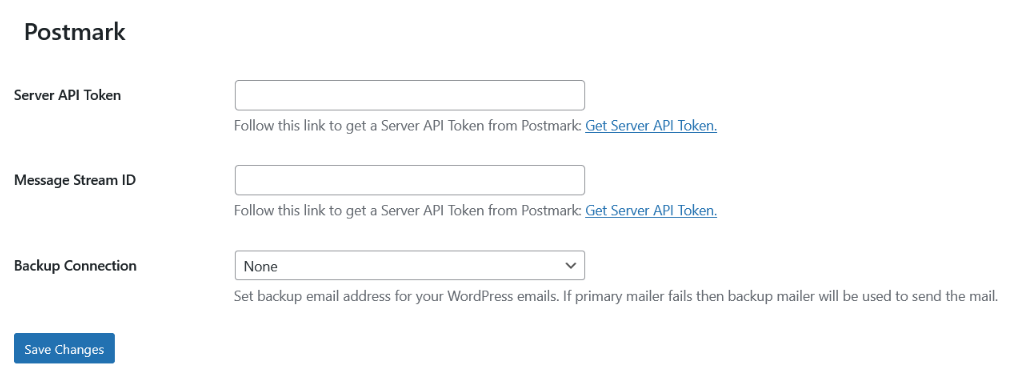
Once you've selected Postmark as the mailer in GoSMTP settings, you'll come across two essential fields: Server API Token and Message Stream ID. These fields need to be populated with the relevant information from your Postmark account to complete the integration and enable seamless email delivery using Postmark's API. Here's a step-by-step guide to help you with the process:
Setting up Postmark API Key
To get started with Postmark, you'll need to set up your account, choose a plan, and create a Sender Signature (verified address) to use as your "From Email" in GoSMTP. Here's a detailed step-by-step guide to help you through the process:
Start by visiting Postmark's official website (postmarkapp.com) and navigate to their Pricing page. Here, you'll find comprehensive information about the available plans and their respective features, allowing you to make an informed decision.
If you're interested in one of the paid plans, you can use Postmark's cost calculator to estimate your monthly charges based on your expected email volume. However, for the purpose of this guide, we'll assume you want to start with a free trial, which allows you to explore Postmark's functionalities without any cost commitment.
If you're interested in one of the paid plans, you can use Postmark's cost calculator to estimate your monthly charges based on your expected email volume. However, for the purpose of this guide, we'll assume you want to start with a free trial, which allows you to explore Postmark's functionalities without any cost commitment.
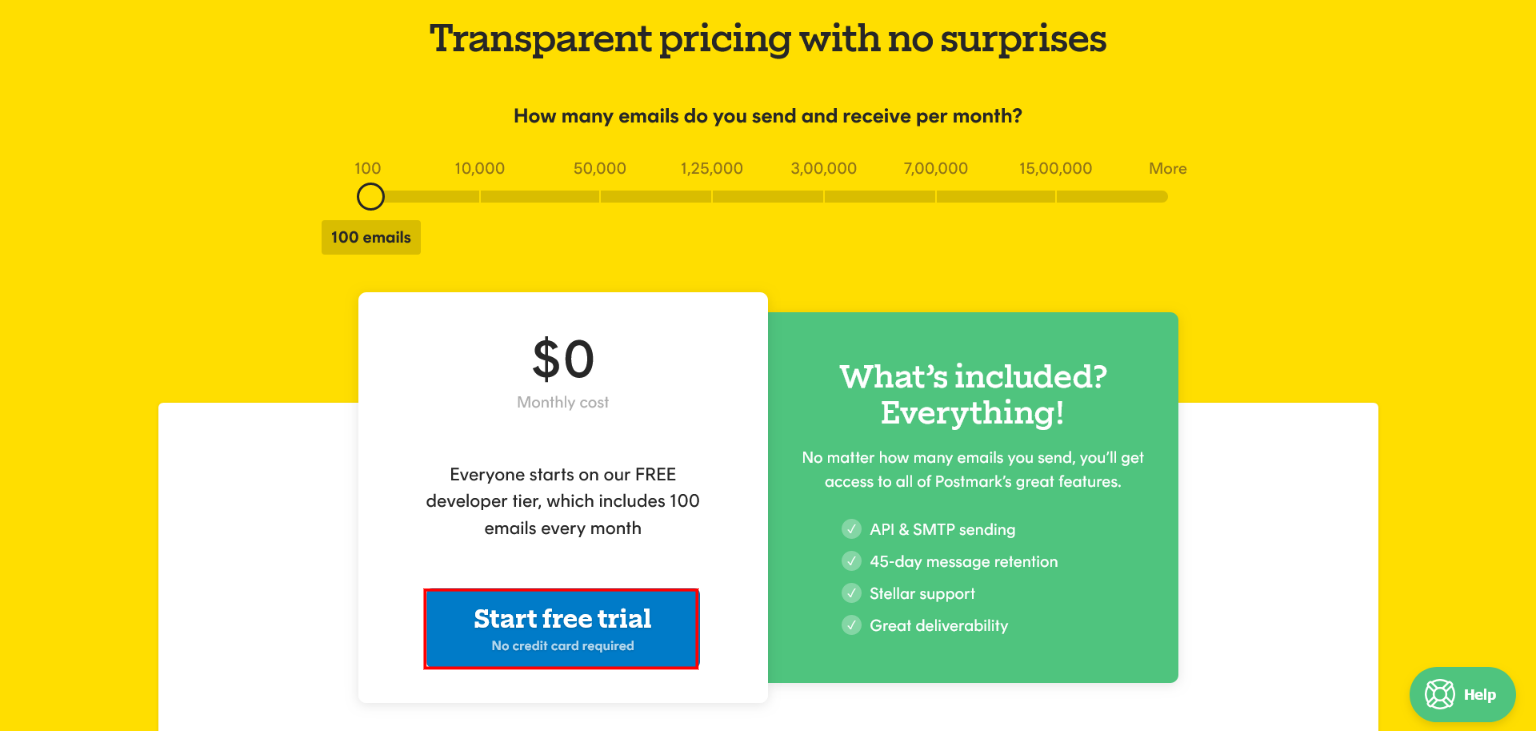
This will prompt you to sign up for a developer plan, which is perfect for testing and exploring Postmark's capabilities. Follow the straightforward registration process, providing the required information to create your account.

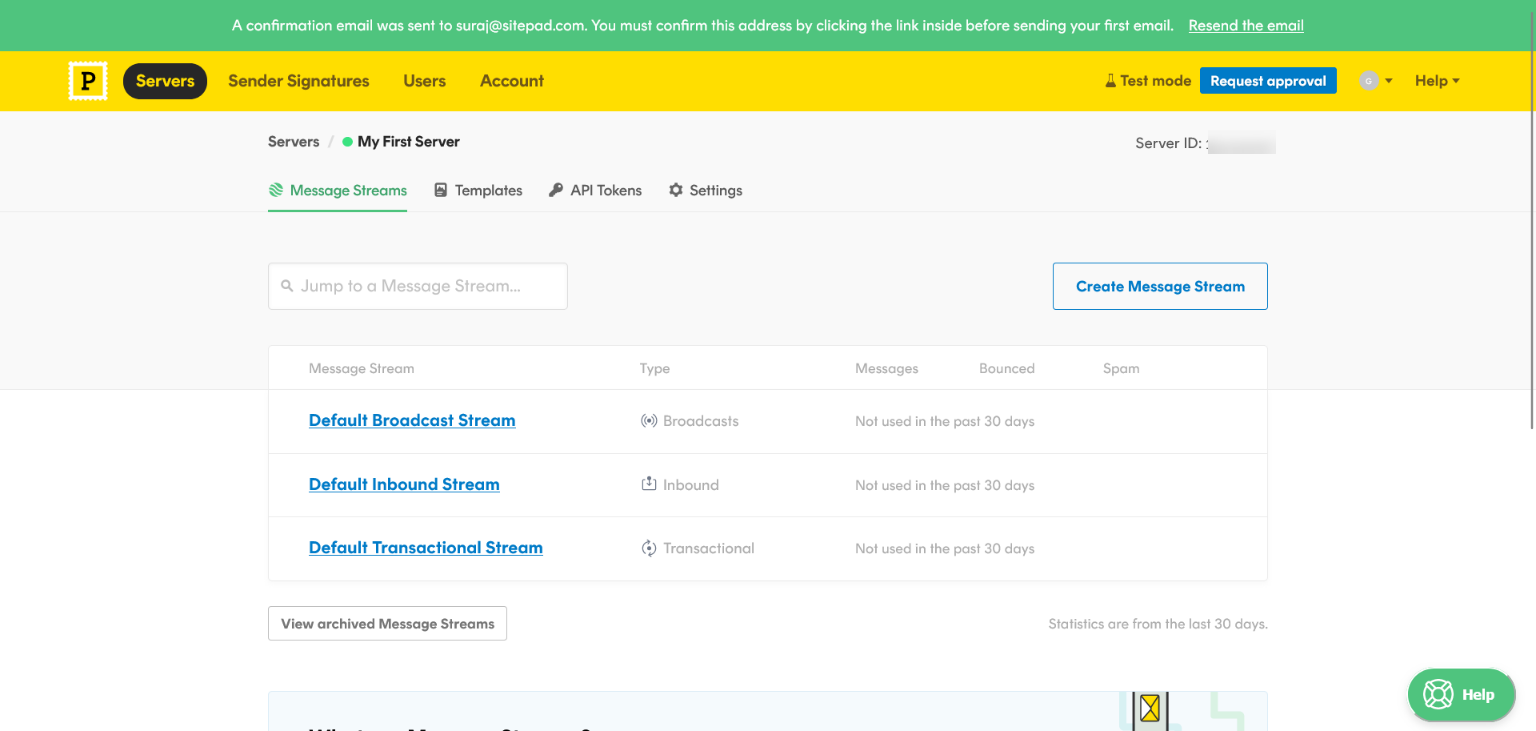
Now, Postmark will send a verification email to the address you
provided during registration. Upon receiving the verification email, follow the instructions provided to verify your email address. This typically involves clicking on a verification link within the email. Once you have successfully verified your email address, you can start using Postmark's powerful features to streamline your email communication and enhance the deliverability of your messages.

After you click the "Confirm Sender Signature ", you'll be directed to the Postmark dashboard, where you'll gain access to their comprehensive set of tools and features for managing your email delivery needs.
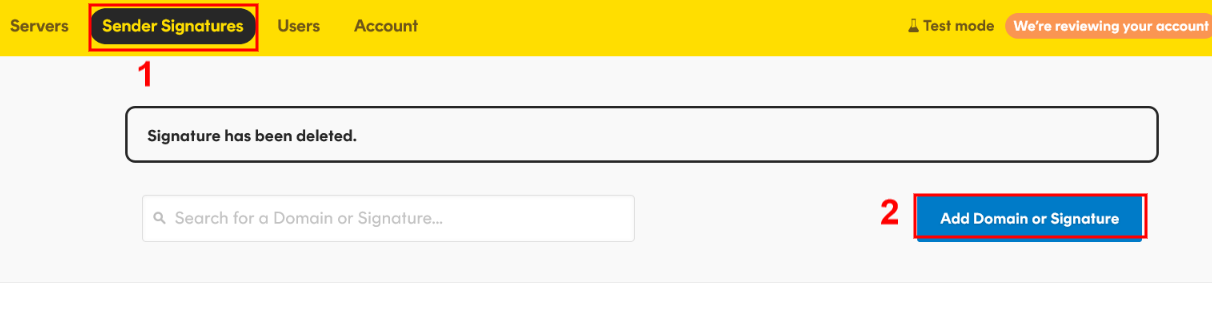
From the left-hand menu, click on "Sender Signatures." Here, you'll manage the email addresses you want to use as the "From Email" in your GoSMTP settings and click "Add Domain or Signature" button.
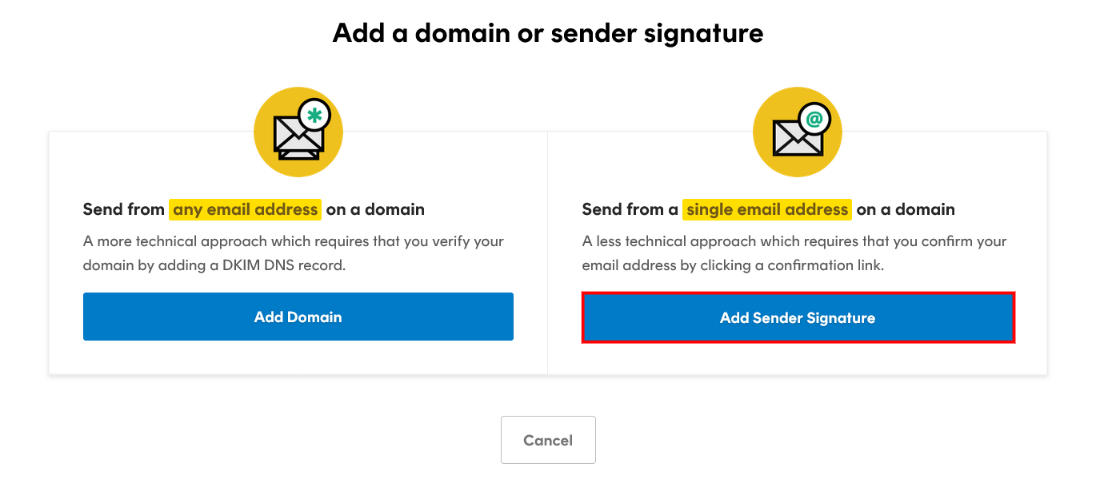
In the "Add a domain or Sender Signatures" section, click the "Add Sender Signature" button to initiate the process of adding a new verified sender address. This is an essential step to ensure your emails are sent from a trusted source.
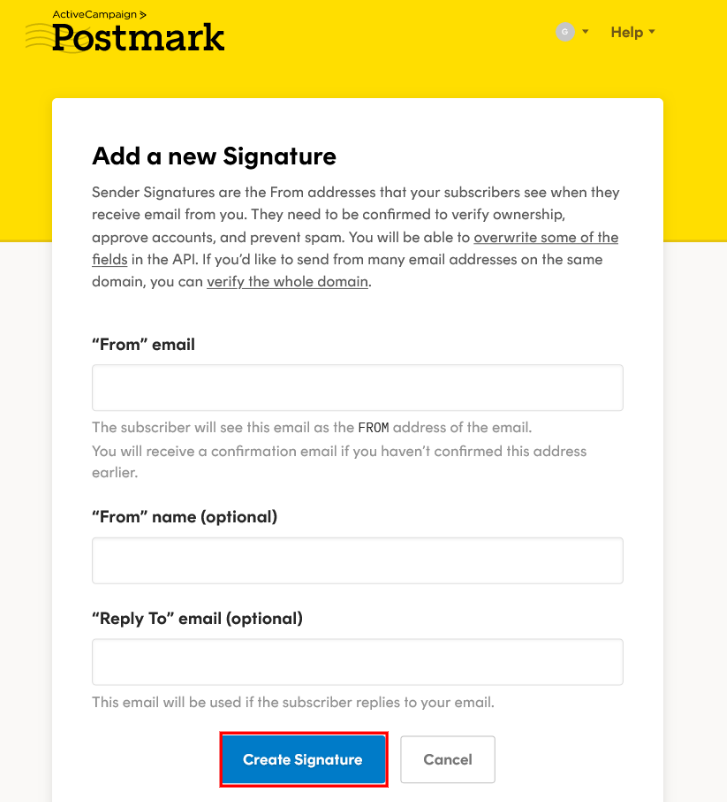
In the "Add Sender Signature" form, provide the email address you wish to use as the "From Email" in your GoSMTP configuration.
Optionally, you can add a friendly name to help recipients easily identify your emails.
Optionally, you can add a friendly name to help recipients easily identify your emails.
Once you have added the sender signature, Postmark will automatically send a verification email to the email address you provided.
Check your inbox for the verification email and click on the verification link to confirm the legitimacy of your email address.
Once verified, the status of your sender signature will change to "Verified," indicating that it is now ready for use.
Check your inbox for the verification email and click on the verification link to confirm the legitimacy of your email address.
Once verified, the status of your sender signature will change to "Verified," indicating that it is now ready for use.
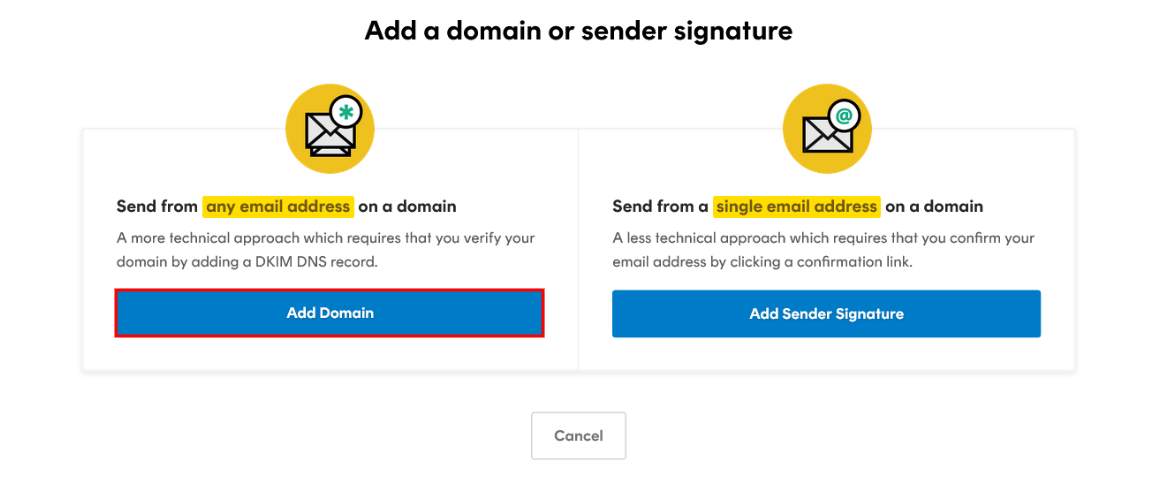
Again Go to "Sender Signatures" from the left-hand menu. Click "Add Domain or Signature" button. In the "Domains" section, click the "Add Domain" button to start adding and verifying your domain.
In the "Add Domain" form, enter the domain you want to verify. For example, if your website is "yourwebsite.com," enter "yourwebsite.com" in the domain field.
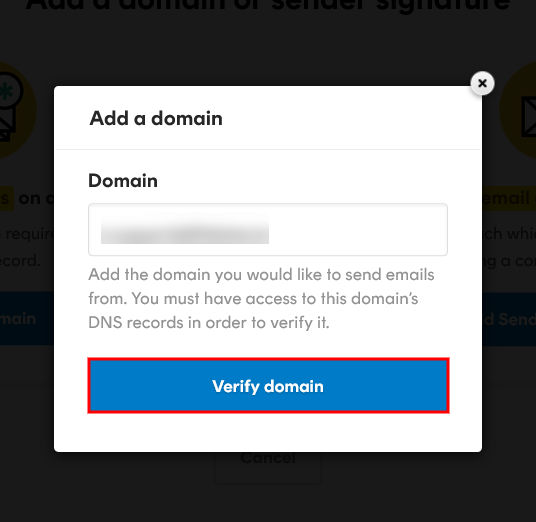
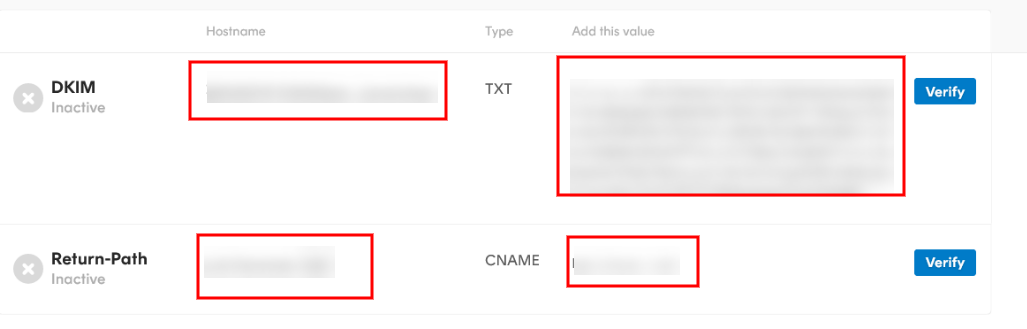
Once you have entered the domain details, Postmark will display the required DNS records that need to be added to your domain's DNS settings
Carefully copy the provided DNS records, including the CNAME, TXT, and MX records.
To add DNS records on your server, follow these steps:
Carefully copy the provided DNS records, including the CNAME, TXT, and MX records.
To add DNS records on your server, follow these steps:
- Access your domain registrar or hosting provider's DNS management panel, where you can make changes to your domain's DNS settings.
- Add the CNAME, TXT, and MX records provided by Postmark in the appropriate sections of your domain's DNS configuration.
- Save the changes to update your domain's DNS settings.
After adding the DNS records, return to the Postmark dashboard and click the "Verify Domain" button next to the domain you just added.
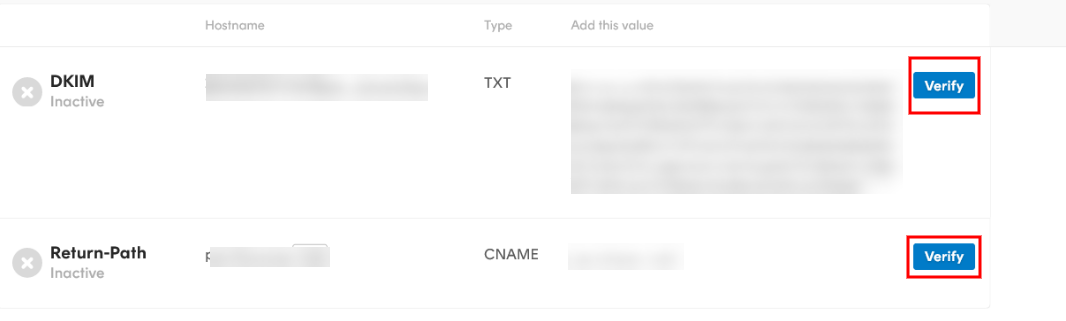
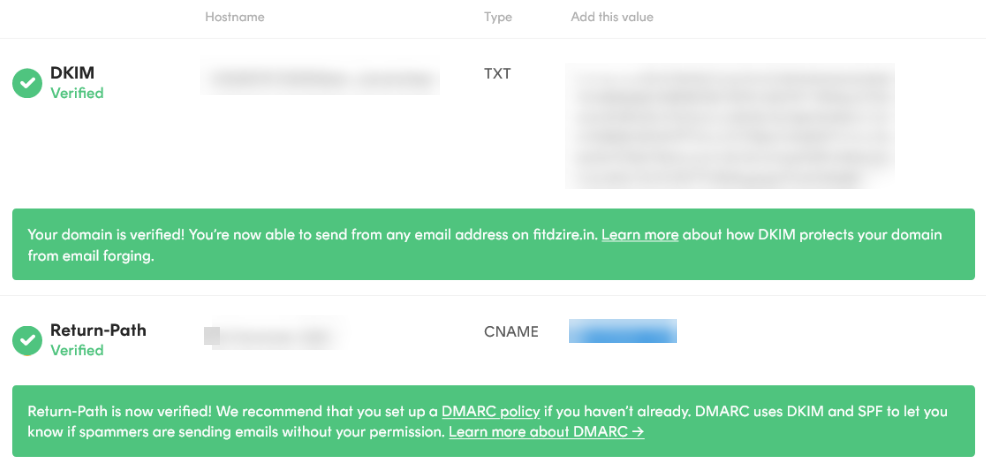
Once the verification process is complete, the status of your domain will change to "Verified," indicating successful domain verification.
Congratulations! You have now completed both the Sender Signature and Domain Verification steps with Postmark. Your sender signature is verified, and your domain is authenticated, ensuring optimal email deliverability and enhancing the reputation of your email communications.
Congratulations! You have now completed both the Sender Signature and Domain Verification steps with Postmark. Your sender signature is verified, and your domain is authenticated, ensuring optimal email deliverability and enhancing the reputation of your email communications.
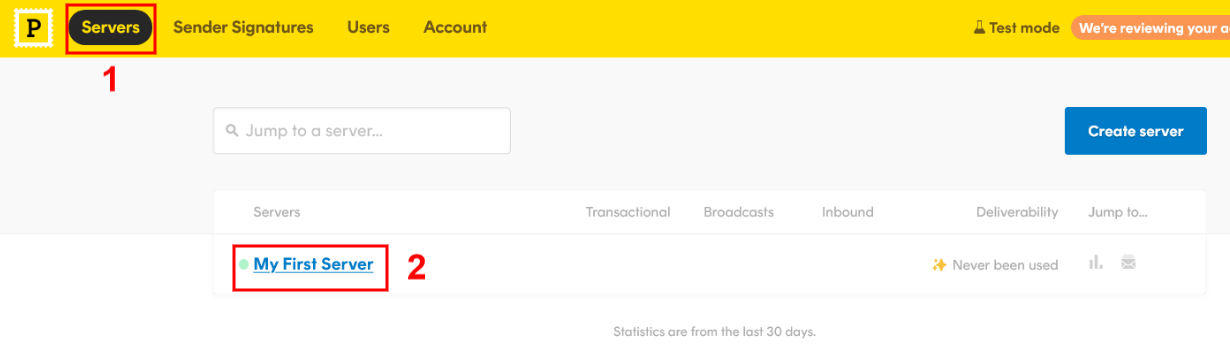
In your Postmark dashboard, From the left-hand menu, click on "server." Here, you'll see the Postmark Default server just click on it.
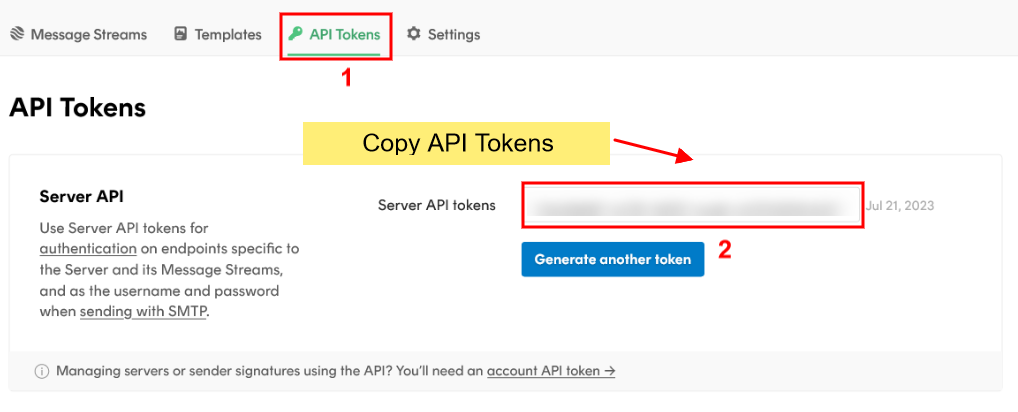
Navigate to the "API Tokens" or "API Keys" section, where you'll find the option to create a new API token.
Generate a new API token by following the on-screen instructions. Ensure that you copy the API token securely, as you'll need it for the integration.
Generate a new API token by following the on-screen instructions. Ensure that you copy the API token securely, as you'll need it for the integration.
Postmark allows you to manage your email messages efficiently through Message Streams. Message Streams are a way to group messages based on their purpose or origin, and they can help you organize your email communications effectively.
From the left-hand menu, click on "Message Streams."
In the "Message Streams" section, click the "Add Message Stream" button to start creating a new stream.
In the "Message Streams" section, click the "Add Message Stream" button to start creating a new stream.

In the "Add Message Stream" form, provide a descriptive name for your new Message Stream. This name should reflect the purpose or origin of the messages you'll be sending through this stream.
Once you have entered the necessary details, click the "Save" or "Create" button to save the new Message Stream.
Once you have entered the necessary details, click the "Save" or "Create" button to save the new Message Stream.
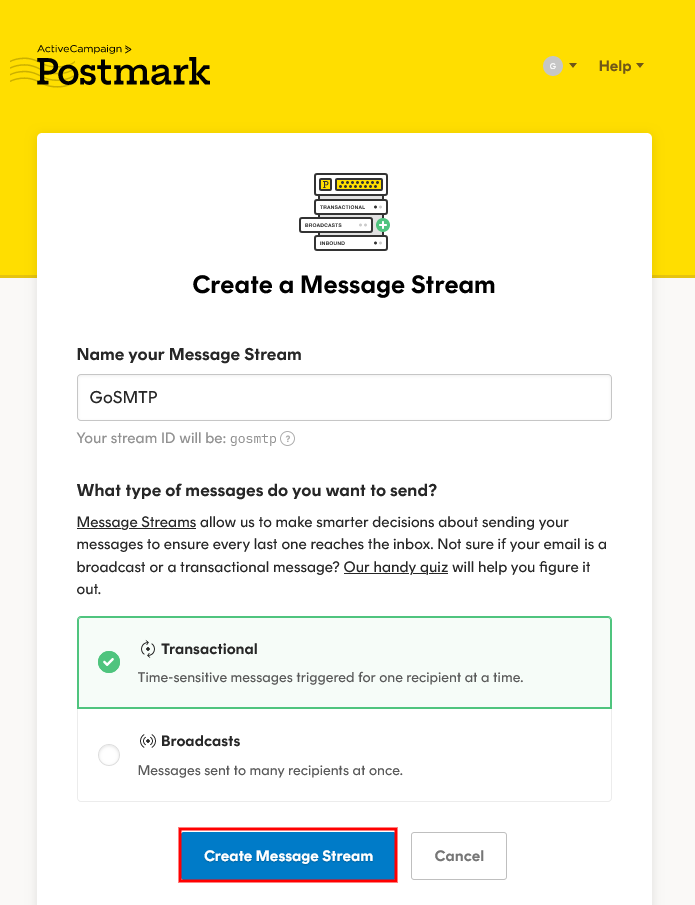
Once you have entered the necessary details, click the "Save" or "Create" button to save the new Message Stream. Ensure
that you copy the Message Stream, as you'll need it for the
integration.

Mailer configuration
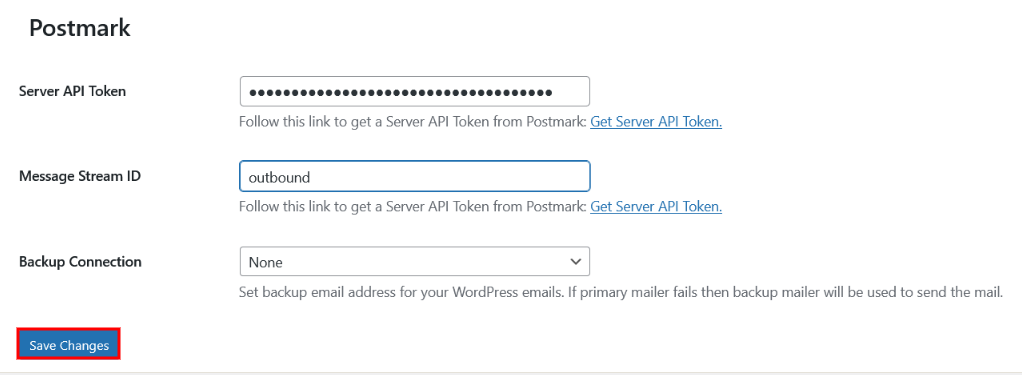
Within the settings, locate the field where you need to enter the Postmark API key. Here, you'll paste the Server API token and Message Stream ID that you previously copied from your Postmark account.
After pasting both the server API Token and Message Stream ID, click the "Save Settings" button to apply the changes.
After pasting both the server API Token and Message Stream ID, click the "Save Settings" button to apply the changes.
With this integration, you can rest assured that your emails will be delivered reliably and efficiently to your recipients, enhancing your email communication experience. If you encounter any questions or concerns during the setup process, Postmark's support team is readily available to assist you. Enjoy the smooth and efficient email delivery provided by GoSMTP and Postmark!
Send test Mail
After successfully configuring the mail settings, it's time to test your email functionality. Send a test email to verify whether it will be delivered successfully or encounter any issues. This test will determine whether your mail setup is functioning properly.
Freqently Asked Question
Yes, Postmark offers a free plan for developers, allowing you to send up to 100 emails per month. This is an excellent option for testing and small-scale projects.
Postmark's infrastructure and delivery optimization ensure that your emails have a higher chance of reaching recipients' inboxes and not being marked as spam.
To verify your sender identity, add a "Sender Signature" in your Postmark account. Follow the steps to verify your domain or email address to ensure proper email authentication.