
Introduction
SparkPost, now a part of MessageBird, is a powerful email delivery service that offers a comprehensive API for sending transactional emails. Integrating SparkPost API with GoSMTP allows you to improve email deliverability and streamline your email sending process. This detailed documentation will guide you through the steps of integrating SparkPost (A MessageBird Company) API with GoSMTP.
Installing & Configuration with Sparkpost
To begin, make sure you have installed and activated the GoSMTP plugin.
After Installing GoSMTP, you can easily configure the plugin's settings. Just Go to GoSMTP » Settings in your WordPress dashboard and navigate to the SMTP Settings tab.
After Installing GoSMTP, you can easily configure the plugin's settings. Just Go to GoSMTP » Settings in your WordPress dashboard and navigate to the SMTP Settings tab.

To get started, follow these steps to configure the GO SMTP plugin in WordPress:
Basic configuration
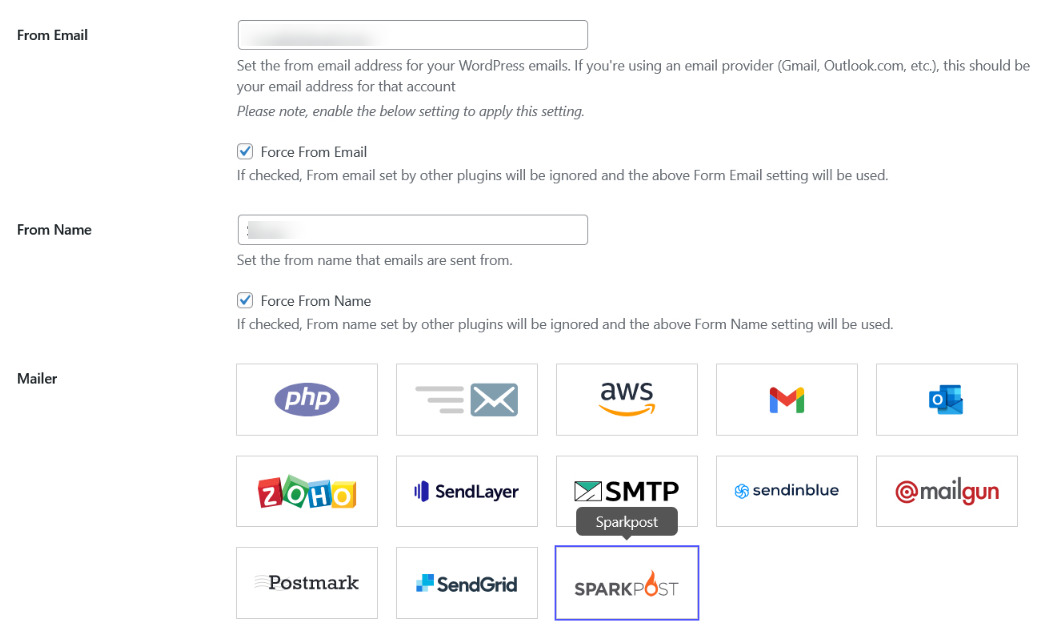
Once you've selected SparkPost as the mailer in GoSMTP settings, just fill in two fields: API key and domain region. Get the required info from your SparkPost account, and you're all set! This will enable seamless email delivery using SparkPost's API. Keep it simple and efficient!
Obtain SparkPost API Key
Let's get started with SparkPost integration into GoSMTP for efficient email delivery. We'll walk you through each step to ensure a seamless experience, from creating your account to setting up the API.
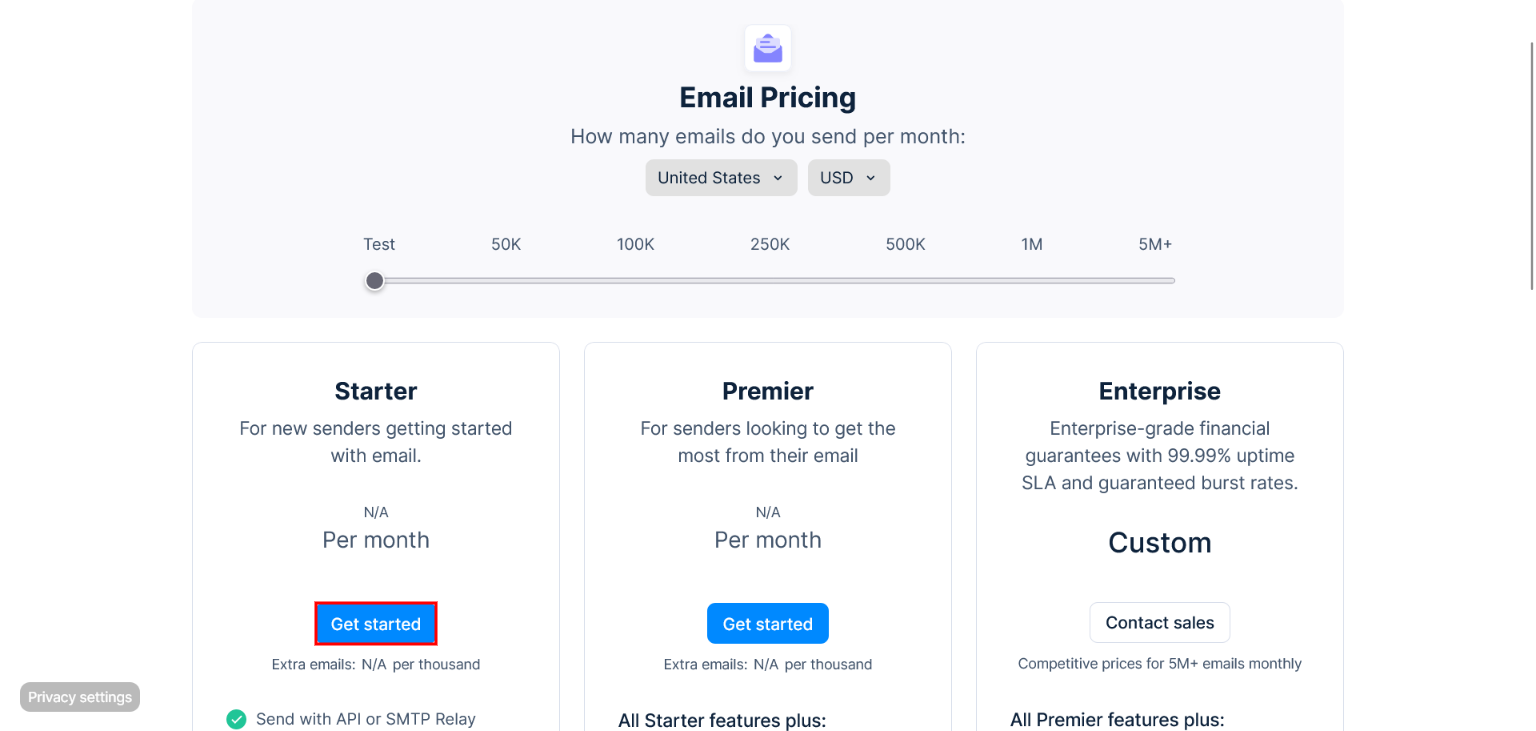
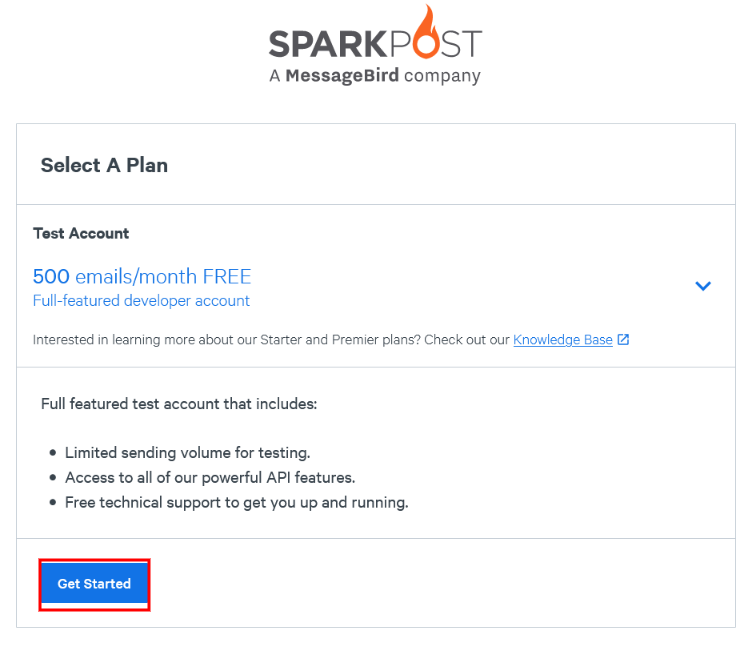
To get started with MessageBird Email (formerly SparkPost), go to the MessageBird Email Pricing page at messagebird.com/pricing/email-sending. Here, you'll find the available plans for email sending. You can choose the plan that best fits your needs and requirements.
For our demonstration purposes, we'll be selecting the free plan, which is ideal for testing and exploring the features of MessageBird Email without any financial commitment. The free plan often comes with certain limitations on the number of emails you can send per month or other features.
Once you've chosen your plan, you can continue with the setup process to integrate MessageBird Email with GoSMTP and enjoy seamless email delivery using their robust API.
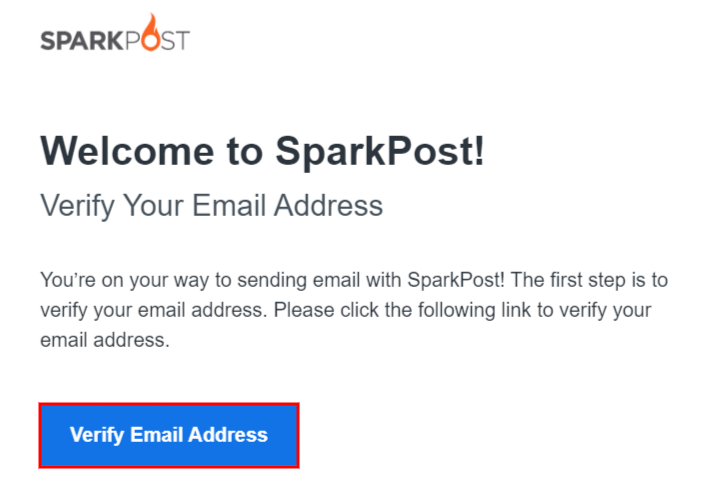
Now you will be redirected to sign up for a new account. The registration process is straightforward and should only take a few minutes. You won't need to provide any credit card information during the signup.
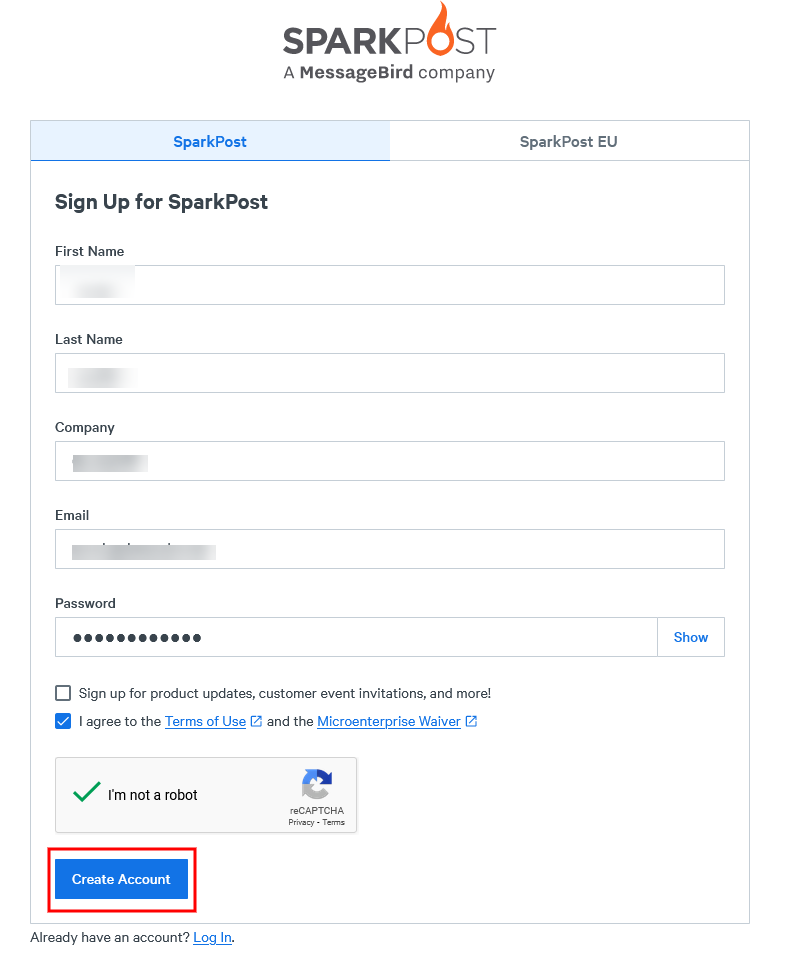
After signing up, check your inbox for a verification email from SparkPost. Click on the confirmation link in the email to verify your email address and proceed to the next step.
Click on "Get Started".
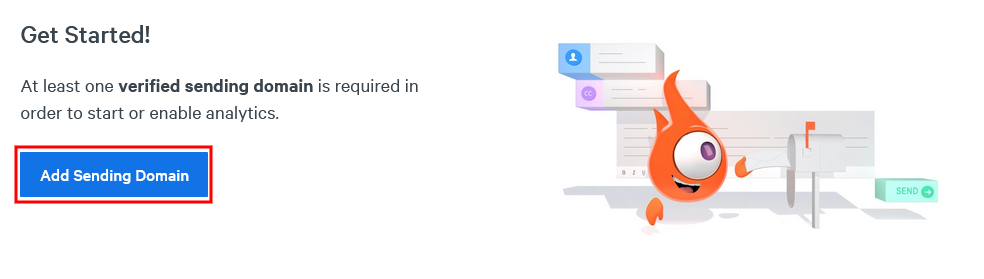
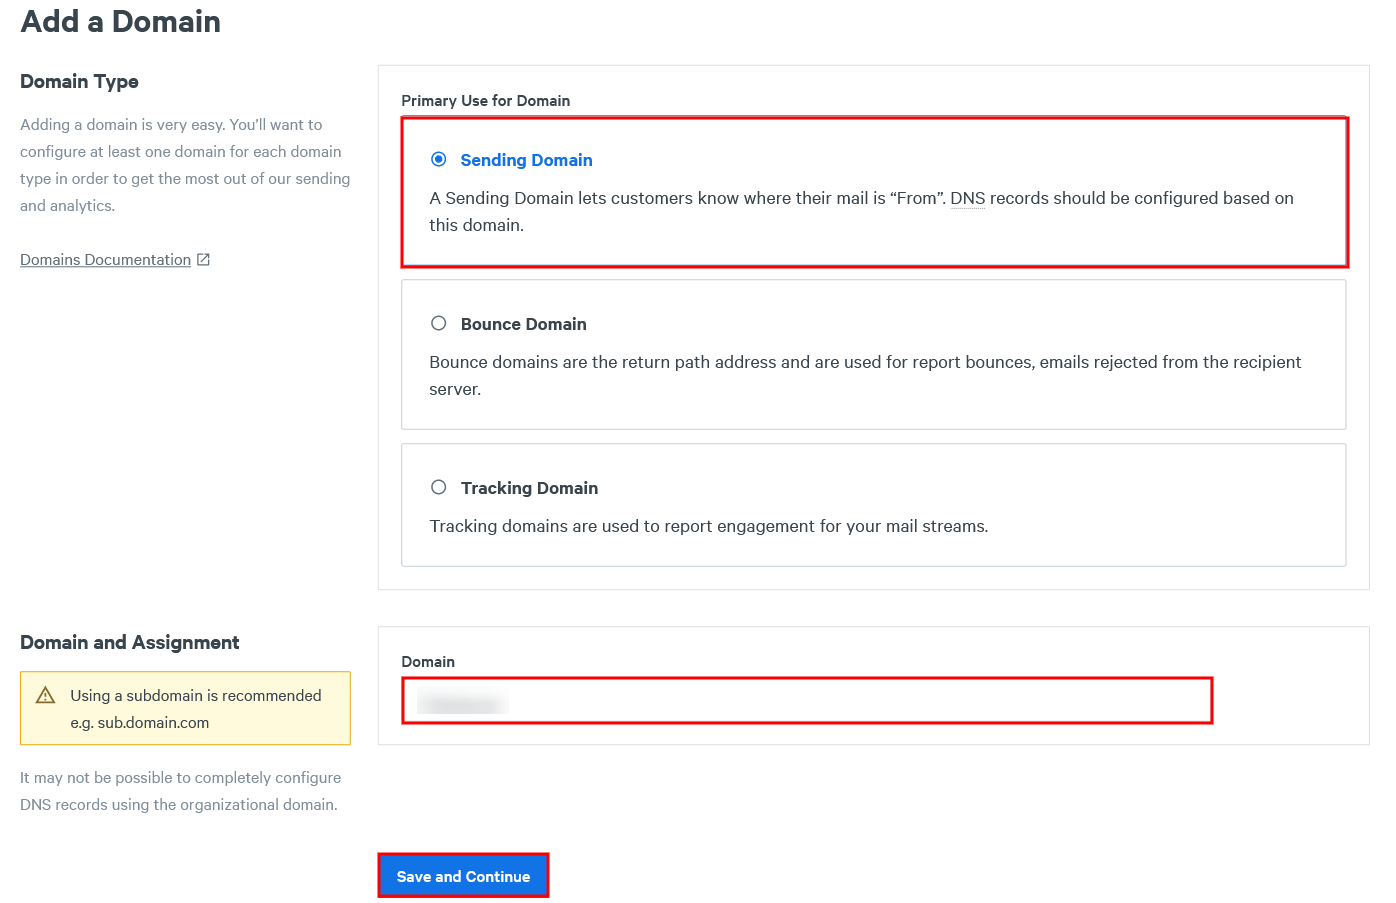
On the Sending Domains page, click the "Add a Domain" button.
Again Click on "Add Sending Domain"button to start the process of adding your domain.
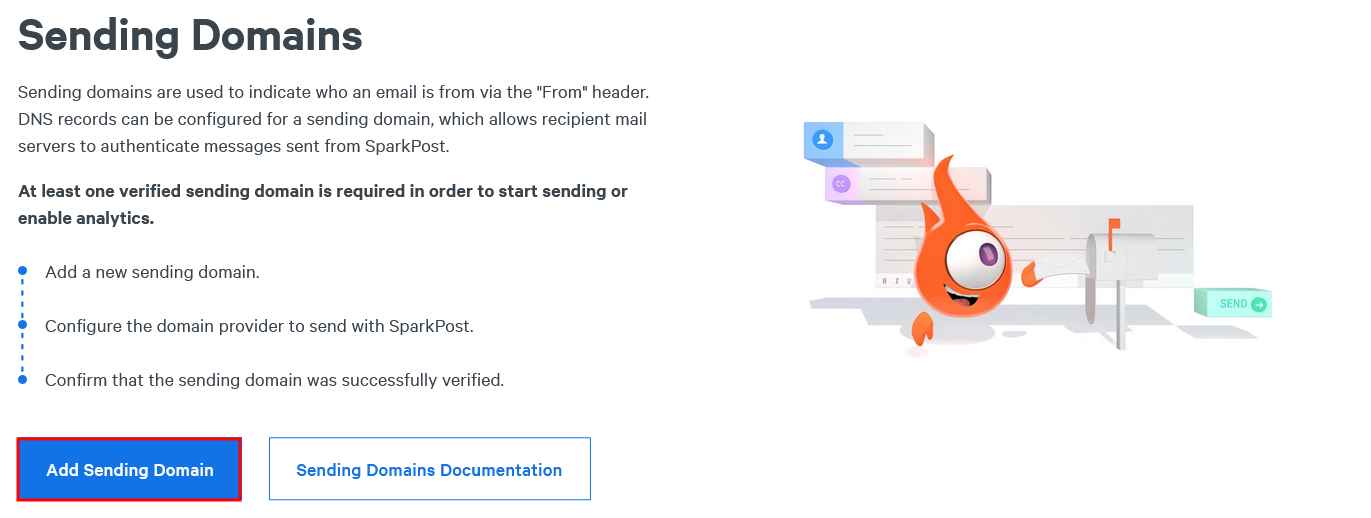
In the pop-up window that appears, Select Domain Type to Sending Domain and enter the domain name that you want to use for sending emails. This domain should match the domain you plan to use as your "From" email address.
After completing the domain verification process in SparkPost, you may encounter a domain alignment popup. Simply click "Yes" to proceed. This step is necessary to ensure that your sending domain is correctly aligned with SparkPost, further enhancing the deliverability of your emails.

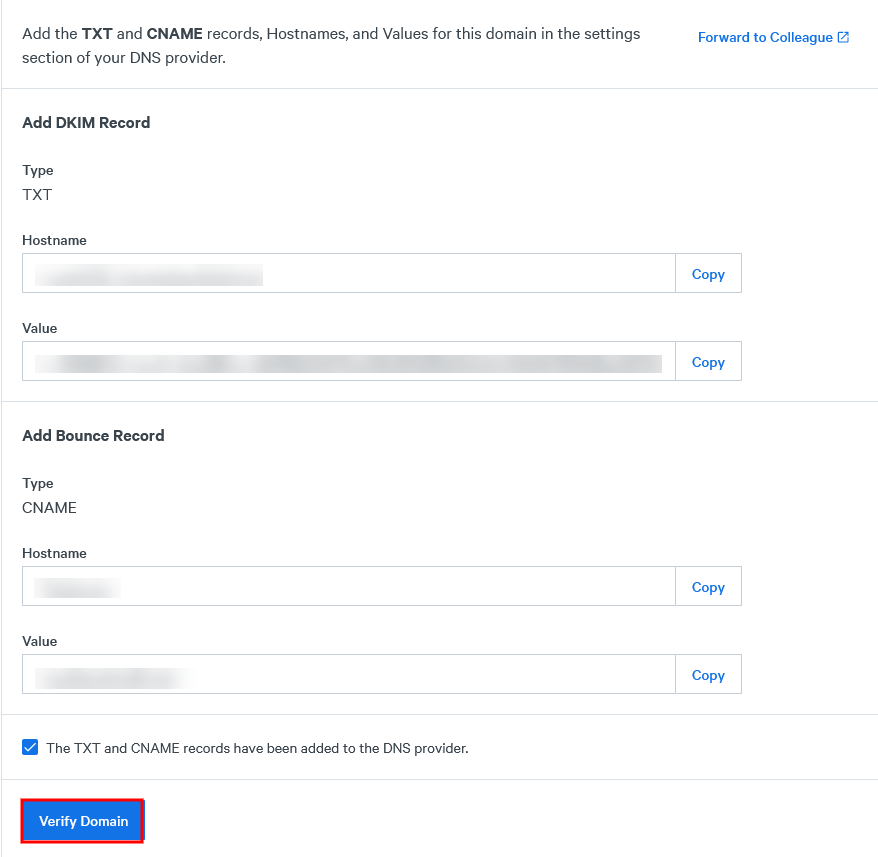
After completing the domain alignment in SparkPost, you'll be presented with the DNS records that need to be added to your server. These DNS records play a crucial role in verifying your domain and enhancing email deliverability.
To proceed, carefully copy the provided DNS records from SparkPost. Open a new browser tab or window and log in to your server's DNS management system. This is typically provided by your hosting provider or domain registrar.
Locate the DNS settings for the domain you are verifying, and then add the DNS records you copied from SparkPost. Take your time to ensure the accuracy of the information you enter, as any discrepancies may result in failed verification.
Once you've added the DNS records, save the changes in your DNS management system. Then, return to SparkPost and click the "Verify" button. SparkPost will then attempt to verify the DNS records you provided.
Please note that DNS record changes can take some time to propagate across the internet. This process can take anywhere from a few minutes to several hours, so don't worry if the verification status is not updated immediately.
Keep an eye on the verification status in SparkPost, and once it shows that the DNS records have been successfully verified, you'll receive a confirmation notification.
After verification, your domain's status will change to "Verified" in the Sending Domains list. You are now ready to use this domain for sending emails through SparkPost.
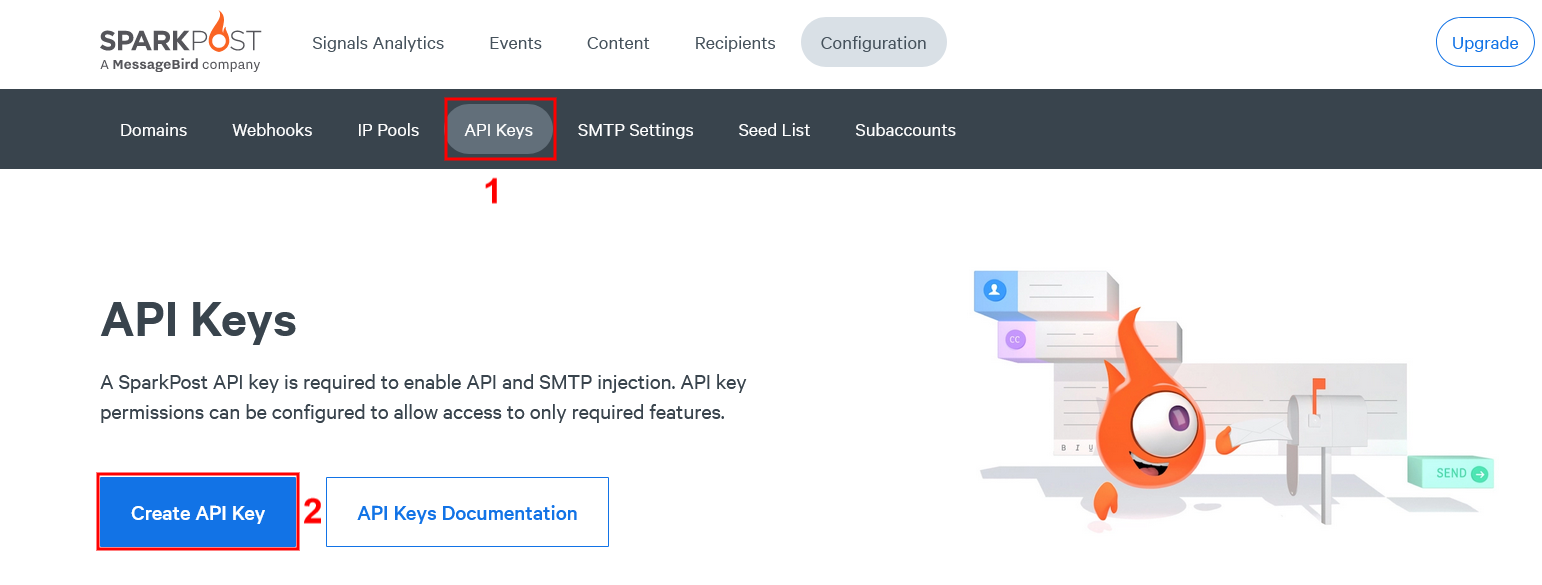
Once you have successfully completed the domain verification process and ensured that your DNS records are correctly set up in SparkPost, the next step is to navigate to the API Keys section in your SparkPost account. This is a crucial step as it allows you to generate an API key that will enable secure communication between your GoSMTP and SparkPost accounts.
To create API key go to the API Keys section in your SparkPost account. Here, you can create a new API key by clicking on the "Create API Key" button.
To create API key go to the API Keys section in your SparkPost account. Here, you can create a new API key by clicking on the "Create API Key" button.
Give your API key a name that helps you identify it later and click on "Create API Key".
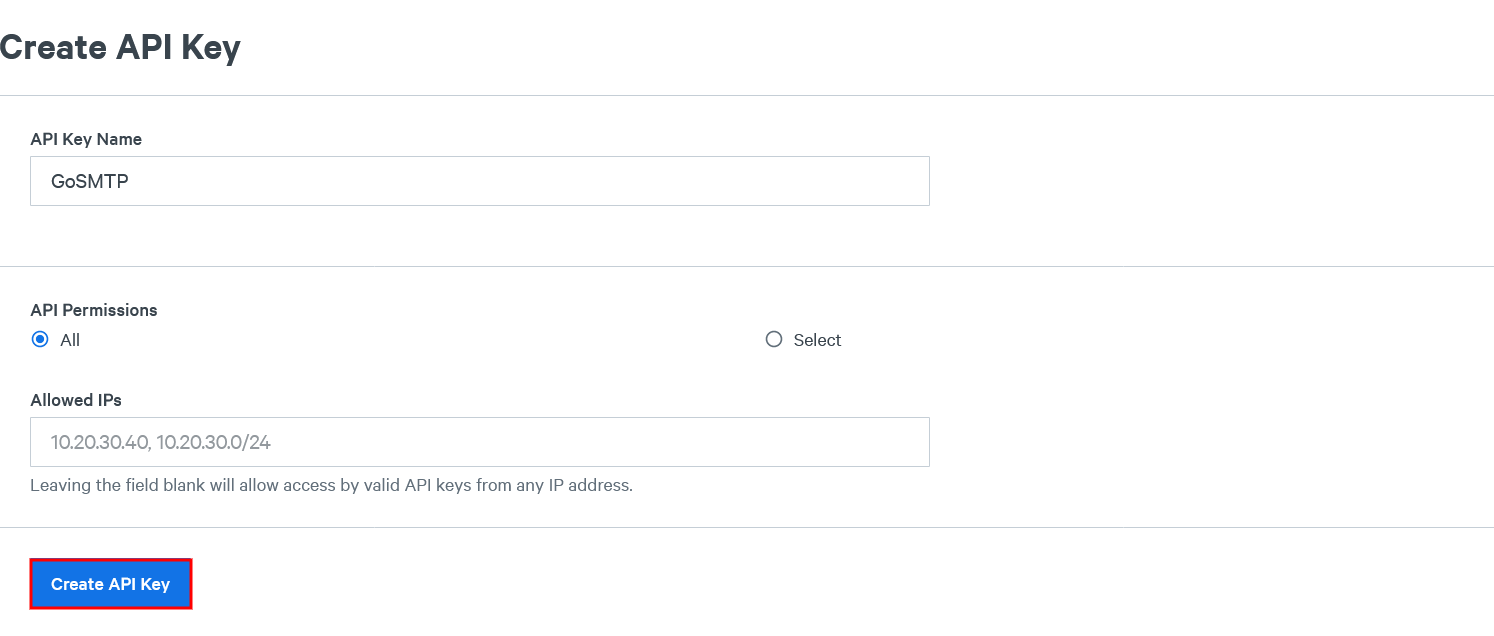
Once your API key is generated, make sure to copy it and store it in a safe place. This key will be used to authenticate your GoSMTP integration with SparkPost.

Mailer configuration
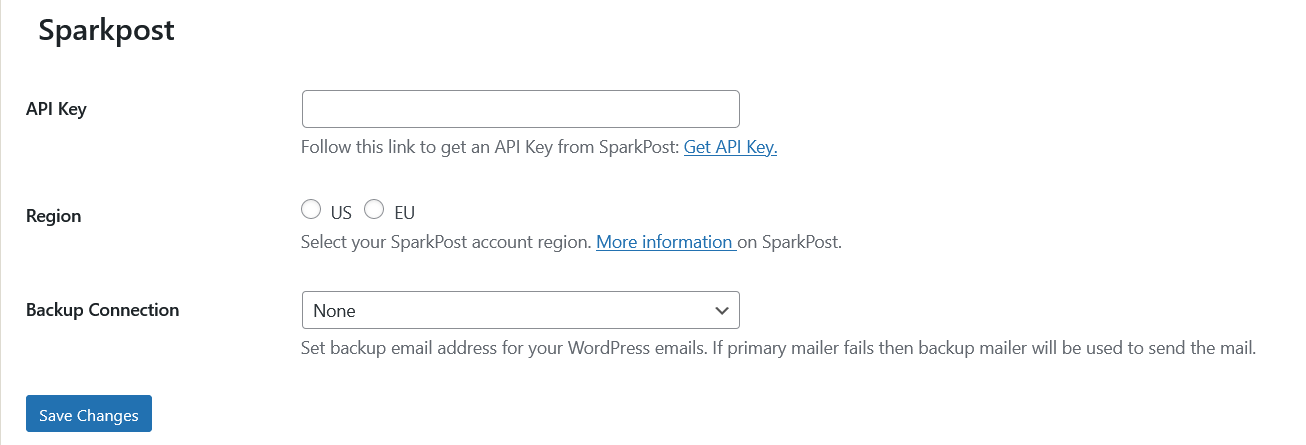
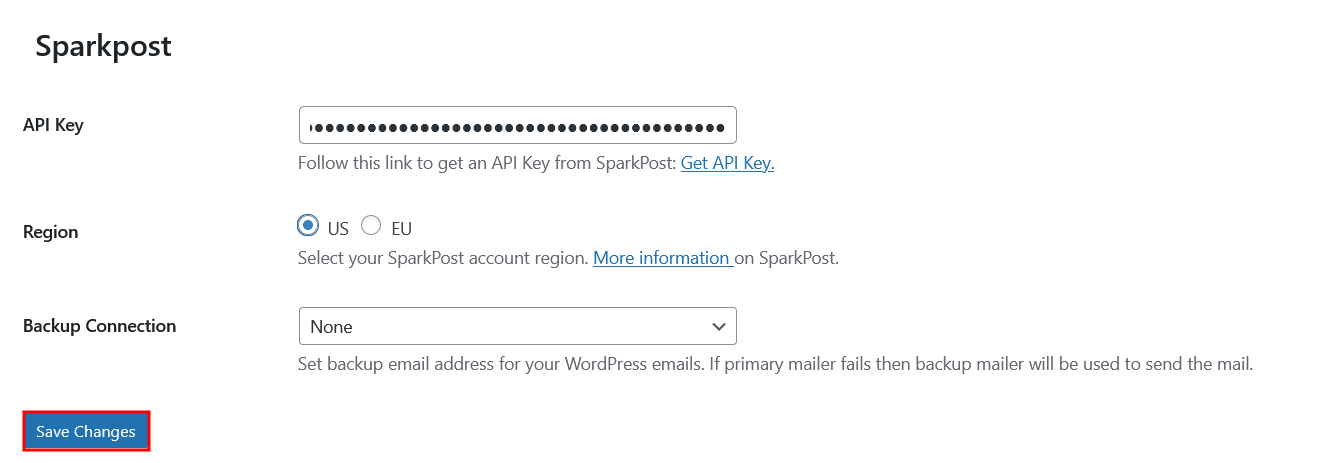
In your WordPress dashboard, go to GoSMTP settings. Paste the API key you copied from your SparkPost account into the designated field in GoSMTP settings. This step will connect GoSMTP with SparkPost, enabling you to send emails using their API.
Additionally, in the GoSMTP settings, you'll find a field for the domain region. Choose the appropriate region (usually either US or EU) based on your site's location and hosting.
Once you've entered your API key and selected the domain region, don't forget to save your GoSMTP settings. This will apply the changes and complete the integration process
Congratulations! You have now successfully integrated SparkPost (A MessageBird Company) with GoSMTP. You can now start sending emails with enhanced deliverability and reliability using the power of SparkPost's API.
Send test Mail
After successfully configuring the mail settings, it's time to test your email functionality. Send a test email to verify whether it will be delivered successfully or encounter any issues. This test will determine whether your mail setup is functioning properly.
Freqently Asked Question
SparkPost offers a variety of plans, including a free plan, to cater to different email volume needs. The free plan allows you to send a limited number of emails per month. However, for higher email volumes or additional features, there are paid plans available. You can check SparkPost's website for detailed pricing information.
API keys are sensitive information, much like passwords, and should be handled with care. Never share your API key publicly or expose it in your application's frontend code. Instead, securely store the API key on your server or in environment variables.
Domain verification is a process that ensures that you have ownership and control over the domain used in your "From" email addresses. This verification enhances email deliverability and prevents email spoofing. It involves adding specific DNS records to your domain's settings, which are provided by SparkPost during the integration process.