
Introduction
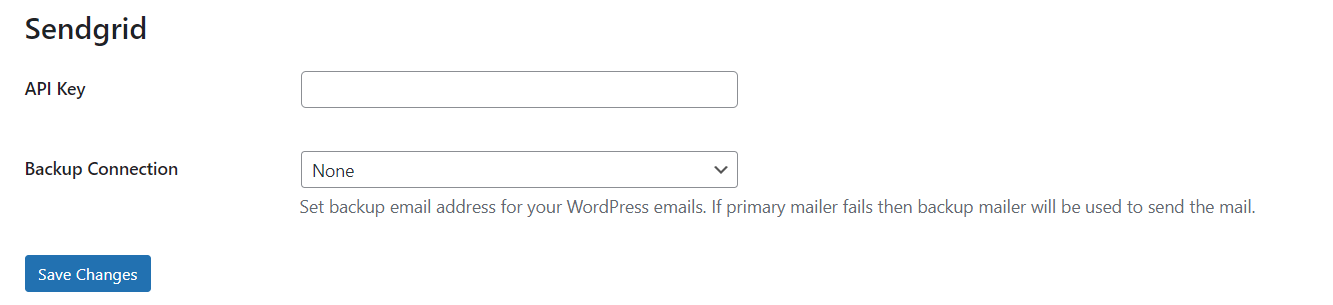
Once you choose SendGrid as the mailer in GoSMTP settings, you'll find a field to add the API key. Generate the API key in your SendGrid account and paste it there. This connects GoSMTP with SendGrid, enabling you to send emails effortlessly using their API.
Installing & Configuration with SendGrid
To begin, make sure you have installed and activated the GoSMTP plugin.
After Installing GoSMTP, you can easily configure the plugin's settings. Just Go to GoSMTP » Settings in your WordPress dashboard and navigate to the SMTP Settings tab.
After Installing GoSMTP, you can easily configure the plugin's settings. Just Go to GoSMTP » Settings in your WordPress dashboard and navigate to the SMTP Settings tab.

To get started, follow these steps to configure the GO SMTP plugin in WordPress:
Basic configuration

Once you choose SendGrid as the mailer in GoSMTP settings, you'll find a field to add the API key. Generate the API key in your SendGrid account and paste it there. This connects GoSMTP with SendGrid, enabling you to send emails effortlessly using their API.
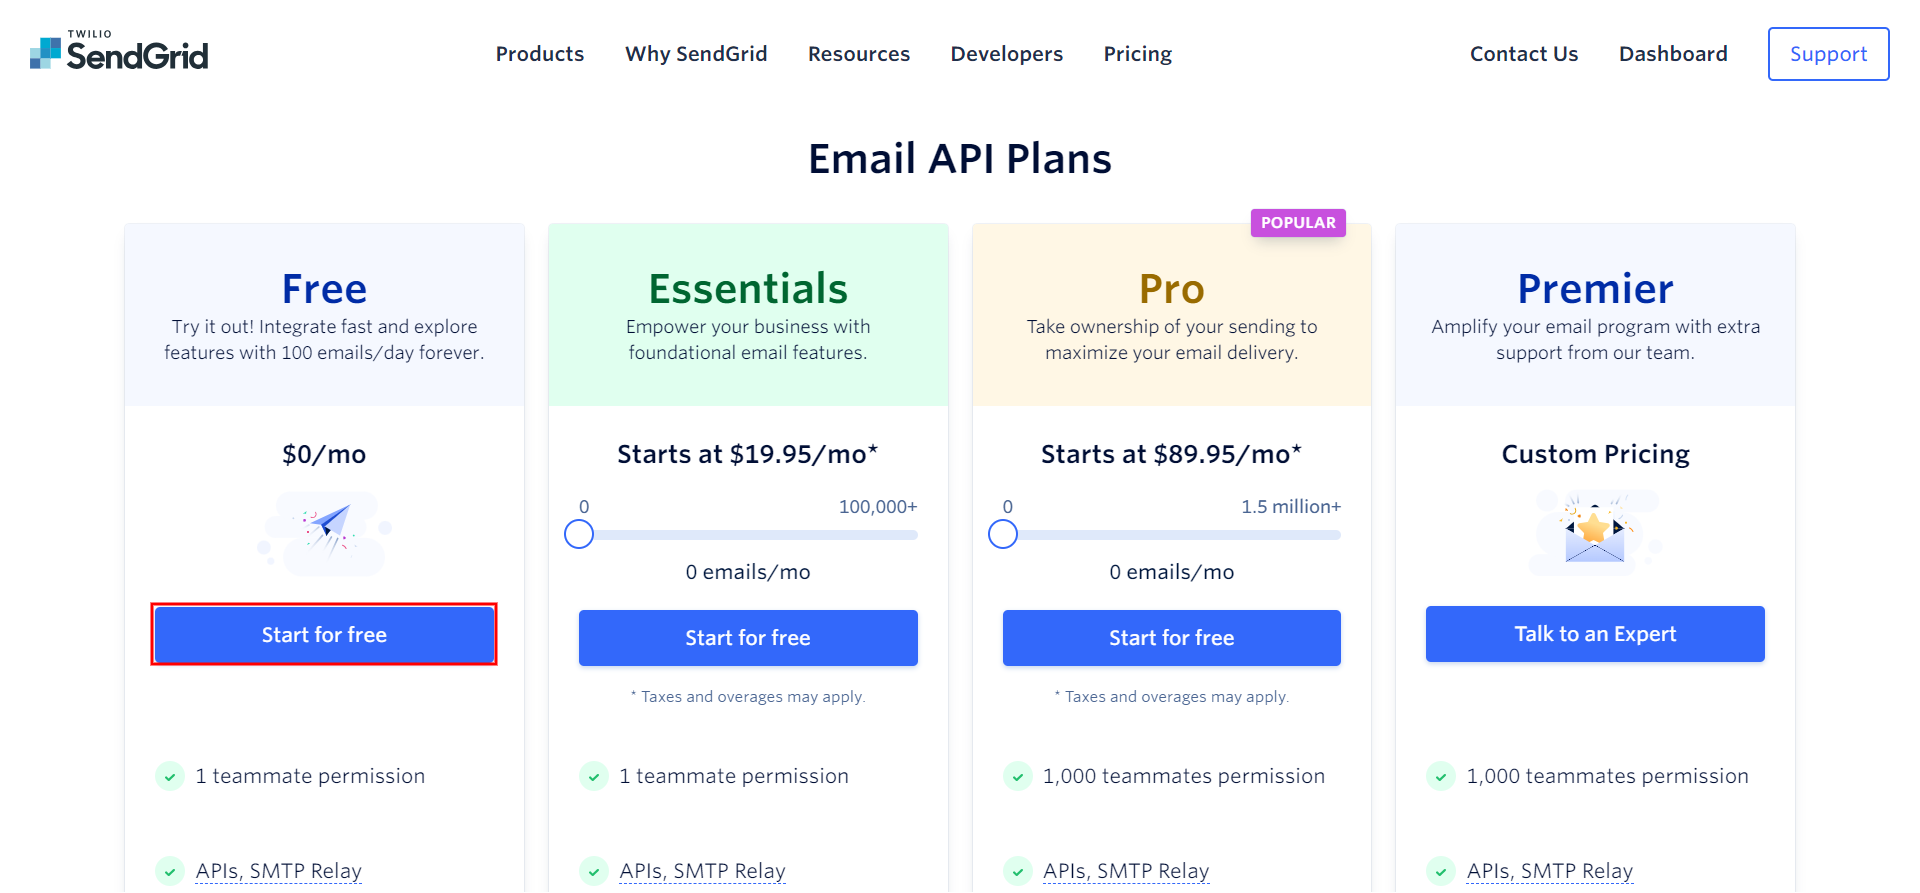
SendGrid offers four plans: Free, Essentials, Pro, and Premier. We're starting with the Free Plan for testing, but you can choose any other plan as needed.
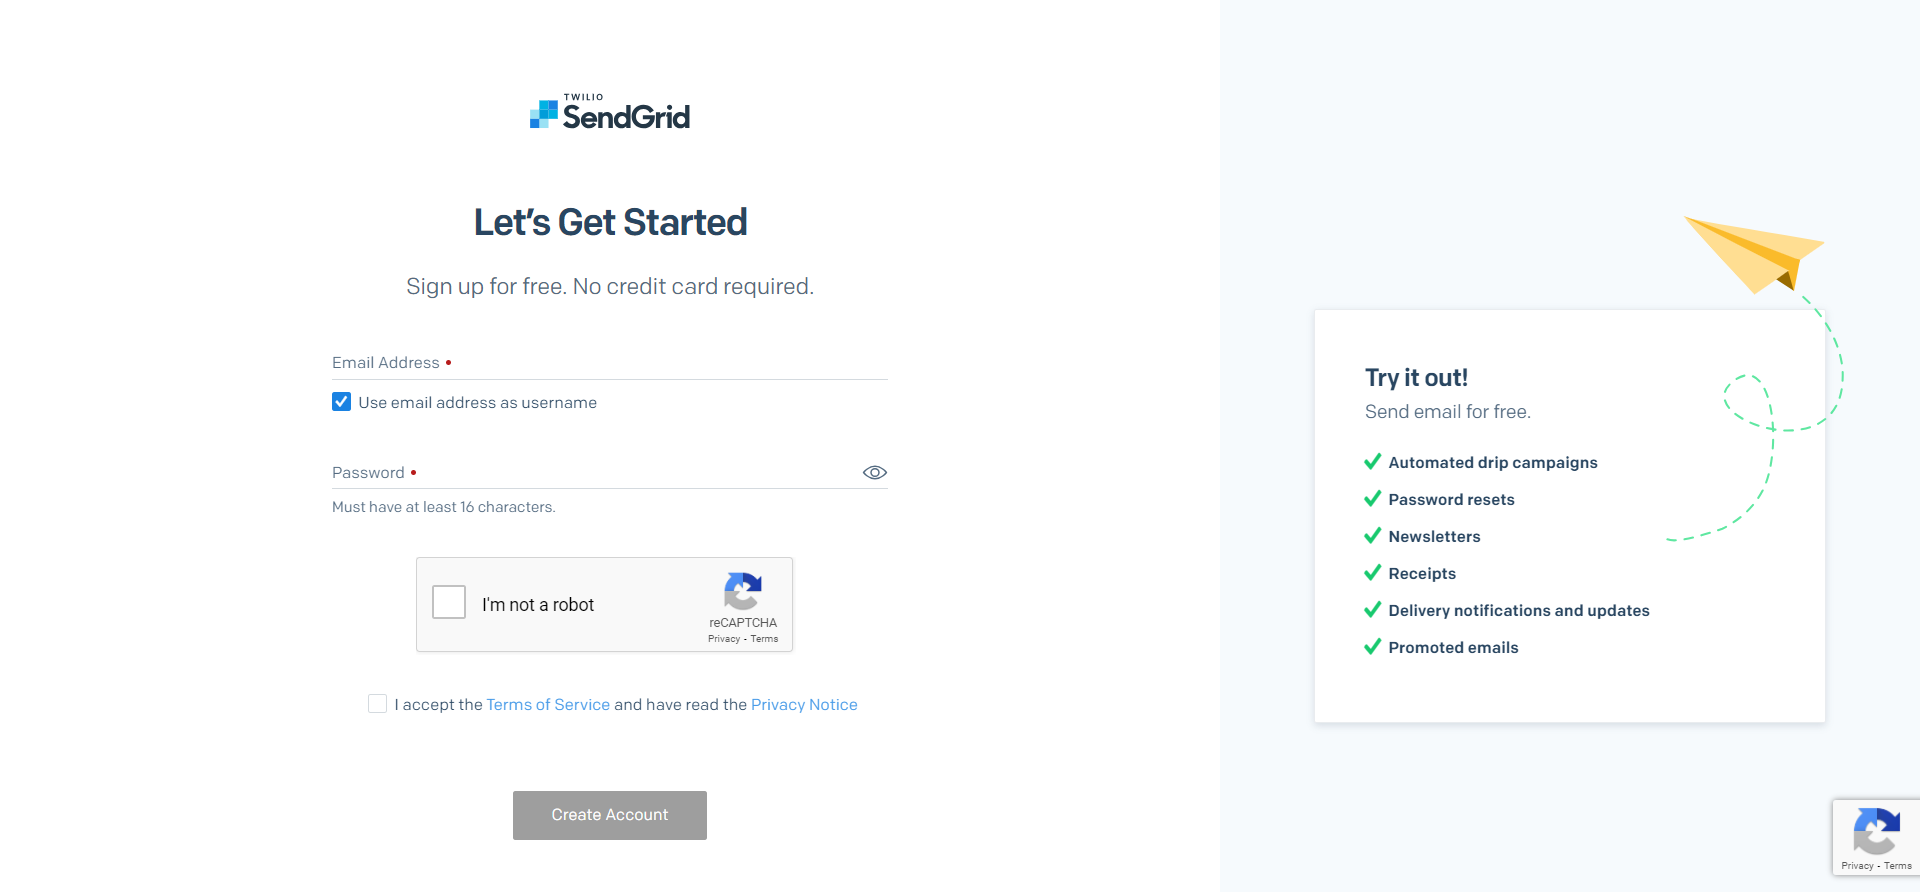
After that you will see regrestration page or If you already have sendgrid account visit SendGrid's website (sendgrid.com) and sign in for an account. The registration process is straightforward and typically requires your email address, company details, and contact information.
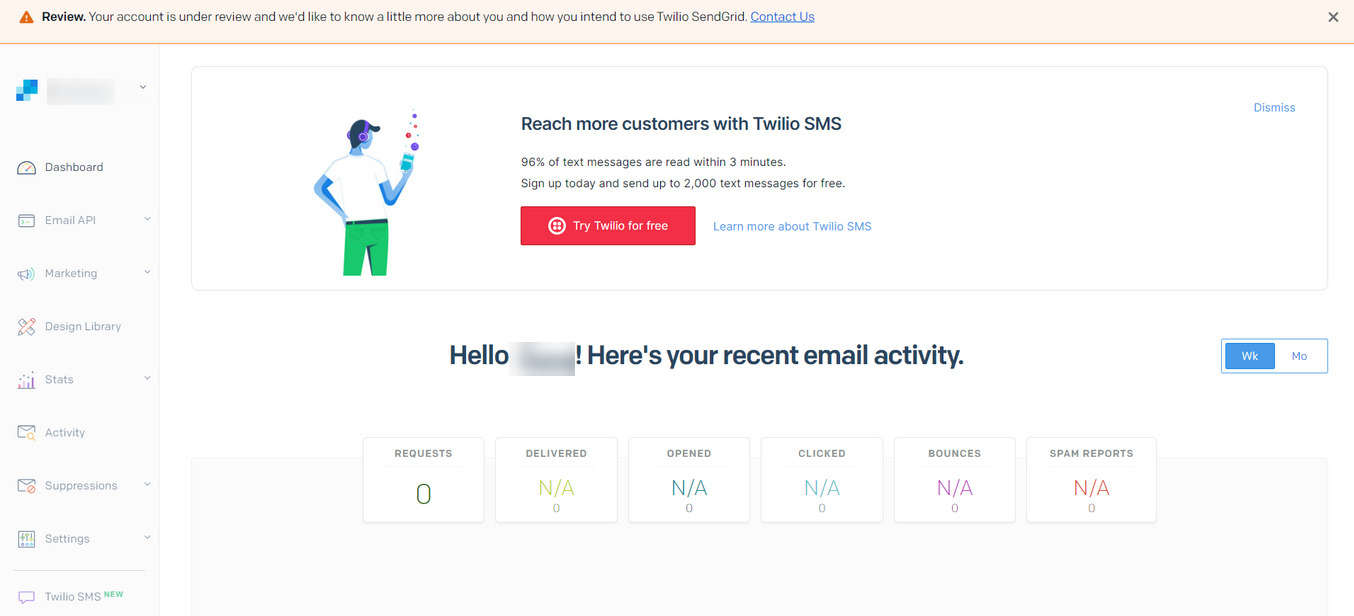
Once registered, log in to your SendGrid account using the credentials you created during sign-up. You will be directed to the SendGrid dashboard, where you can manage your email settings.
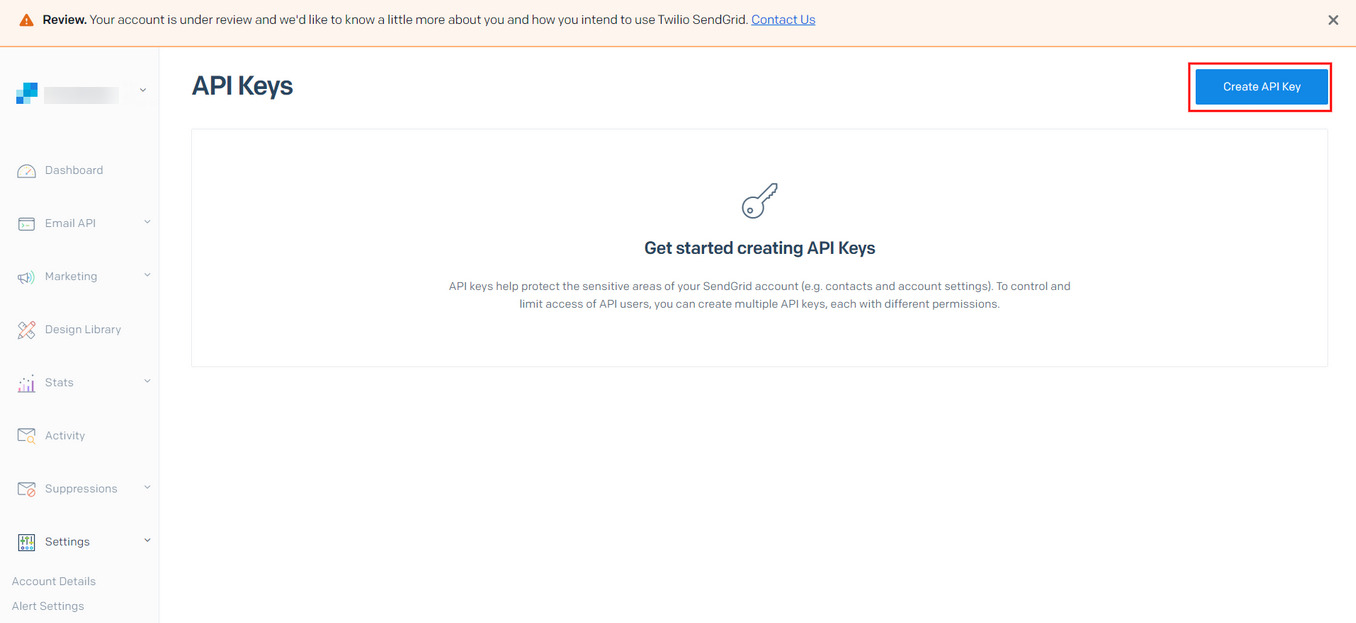
In the SendGrid dashboard, navigate to "Settings" and then "API Keys." This is where you manage API keys, which are necessary for integrating SendGrid's API with GoSMTP.

Click on "Create API Key" to generate a new API key.
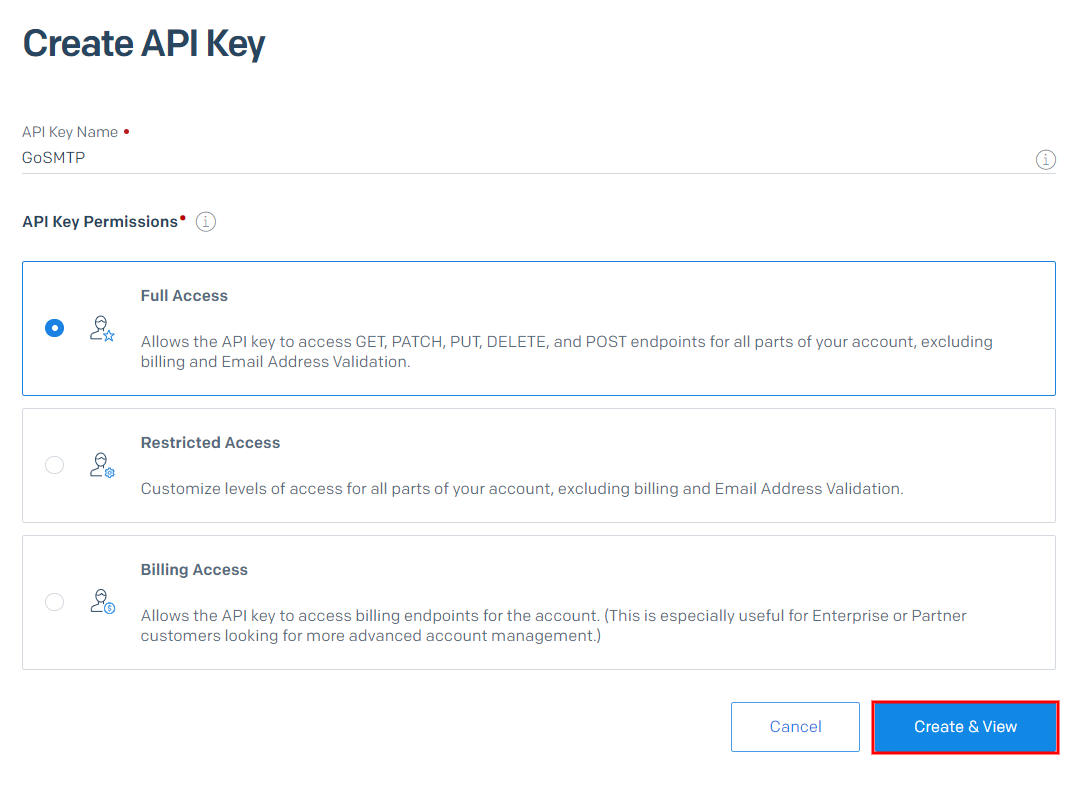
After clicking "Create API Key" you will see a registration form for API integration.This is where you manage API keys, which are necessary for integrating SendGrid's API with GoSMTP. To register your API key in Sendgrid, follow these steps:
API Key Name: Give the key a descriptive name (e.g., GoSMTP API Key) to easily identify its purpose.
API Key Permissions: Choose the appropriate permissions for the API key based on your needs. For GoSMTP integration, "Mail Send" permission is essential to send emails through the API.
Save the API key securely.
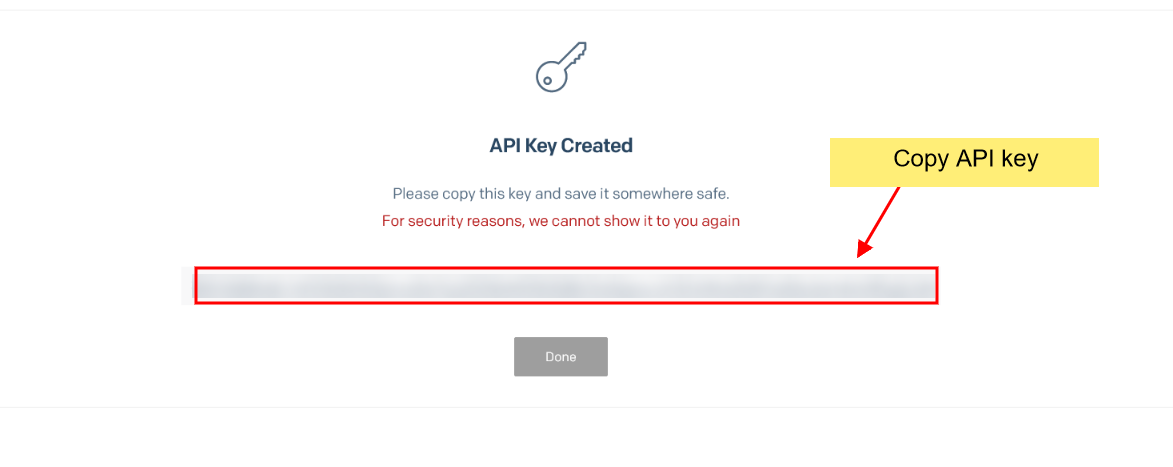
Copy it to your clipboard. Treat this key as a sensitive credential, as it grants access to your SendGrid account.
Mailer configuration
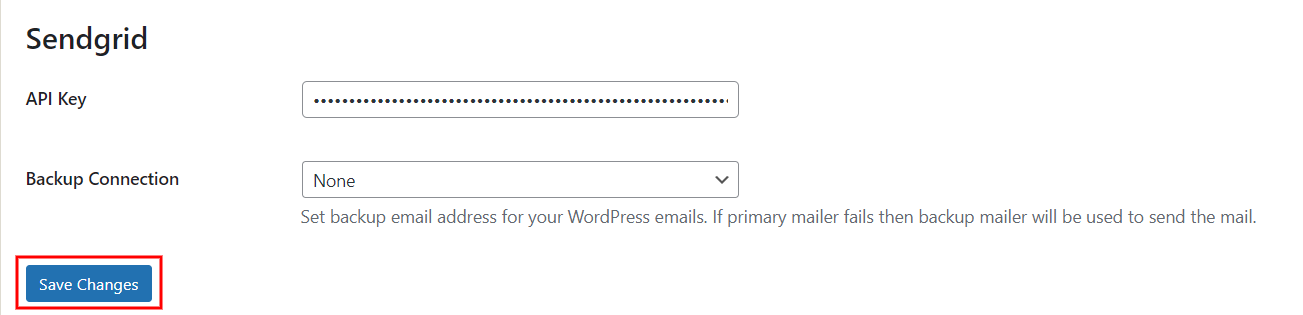
Within the GoSMTP settings, find the field where you are required to enter the SendGrid API key. This is where you'll paste the API key you copied in Step 2. After entering the API key, save the GoSMTP settings to apply the changes
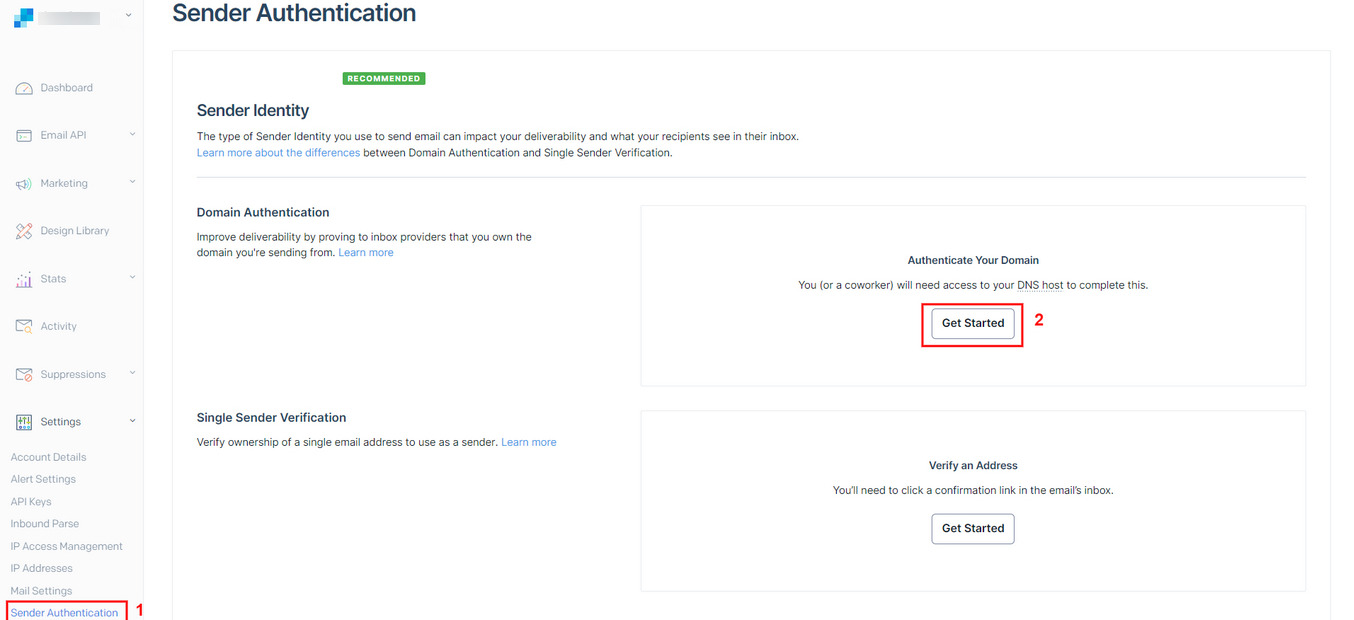
Setting up Sender Identity with SendGrid for Reliable Email Delivery
To begin sending emails with SendGrid, it's crucial to set up a sender identity, which establishes the authenticity of your email communications. SendGrid offers two options for sender identity: creating a Single Sender identity or authenticating your website's domain. Let's delve deeper into each option and explore the benefits of domain authentication:
To begin sending emails with SendGrid, it's crucial to set up a sender identity, which establishes the authenticity of your email communications. SendGrid offers two options for sender identity: creating a Single Sender identity or authenticating your website's domain. Let's delve deeper into each option and explore the benefits of domain authentication:
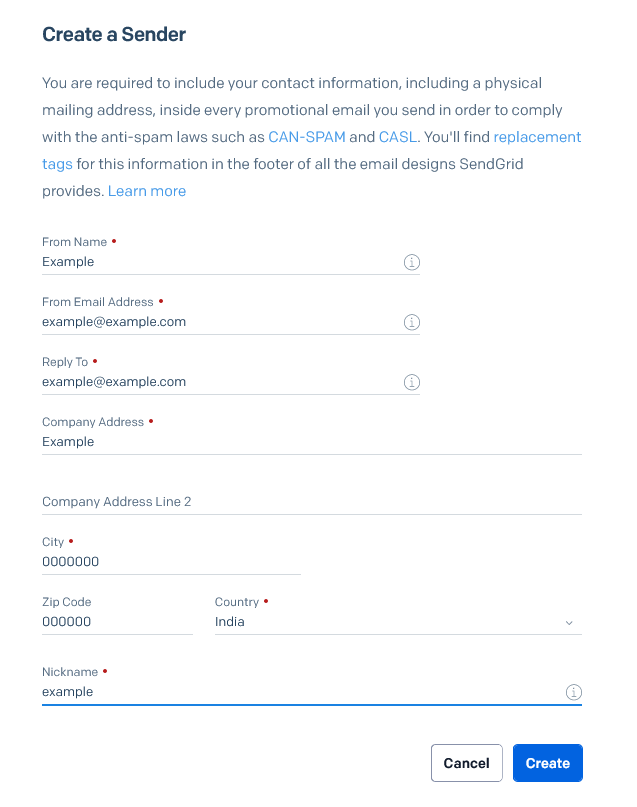
Steps to Create a Single Sender Identity
Navigate to "Settings" > "Sender Authentication" > "Single Sender Verification">"Get Started":

Add Your Sender Information:
- Enter the email address you wish to use as the sender (e.g., yourname@example.com).
- Provide your sender name and any relevant details.
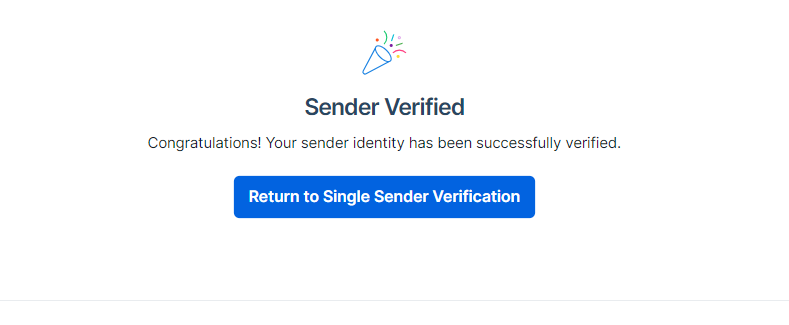
Verify Ownership: Follow the verification process to confirm that you own the email address provided.
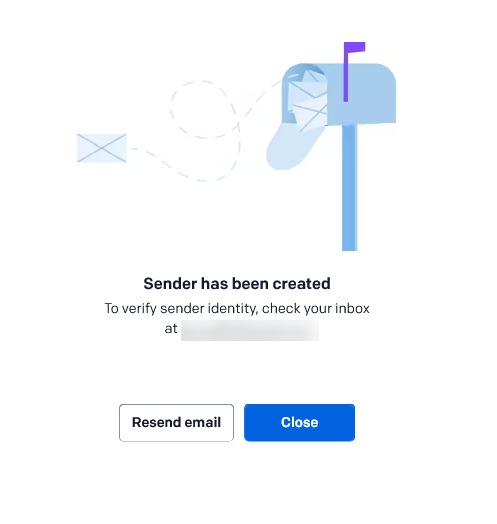
Check your email inbox for a verification link sent by SendGrid.

Click the link to complete the verification of your Single Sender identity.
Authenticating your website's domain is a more robust approach, offering several advantages in terms of email deliverability and reliability. Domain authentication establishes a trusted relationship between your domain and SendGrid, increasing the chances of your emails reaching recipients' inboxes and reducing the likelihood of being marked as spam.
Steps to Authenticate Your Domain:
Navigate to "Settings" > "Sender Authentication" > "Domain Authentication":
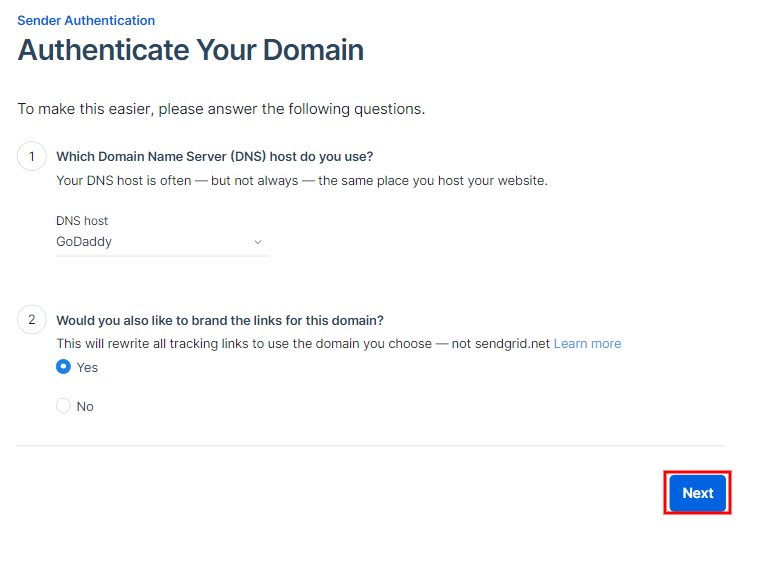
In the authentication form, you'll find two fields:
Which Domain Nameserver Do You Use?: Enter the server name you want to authenticate (e.g., yourdomain.com).
Would You Also Like to Brand the Link for Your Domain?: Select "Yes" if you want to brand the links with your domain name.
Click next.
Which Domain Nameserver Do You Use?: Enter the server name you want to authenticate (e.g., yourdomain.com).
Would You Also Like to Brand the Link for Your Domain?: Select "Yes" if you want to brand the links with your domain name.
Click next.
Enter your domain (e.g., yourdomain.com) and click "Next."
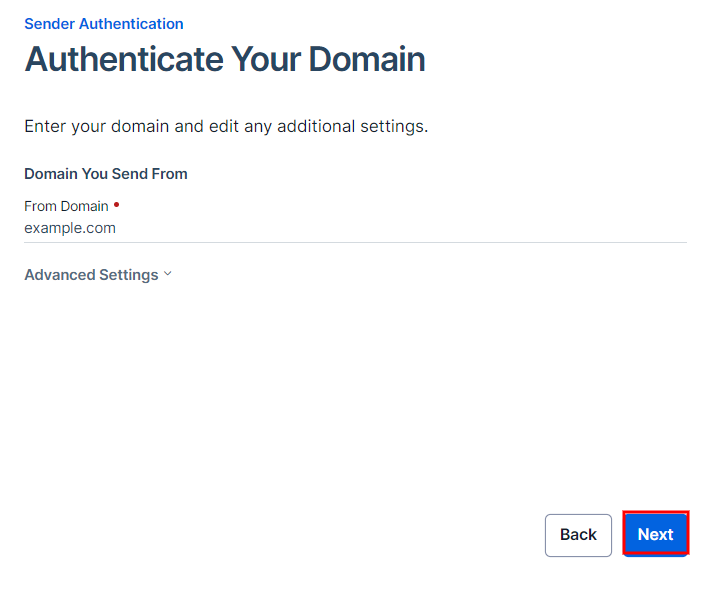
SendGrid will provide you with DNS records (CNAME) to add to your domain's DNS settings.
1) Access your domain registrar or DNS hosting provider's website.
2) Add the CNAME records provided by SendGrid to your domain's DNS settings and save the changes.
3) Return to SendGrid's "Domain Authentication" page.
4) Click the "Verify" button next to your domain to check for the DNS records.
1) Access your domain registrar or DNS hosting provider's website.
2) Add the CNAME records provided by SendGrid to your domain's DNS settings and save the changes.
3) Return to SendGrid's "Domain Authentication" page.
4) Click the "Verify" button next to your domain to check for the DNS records.

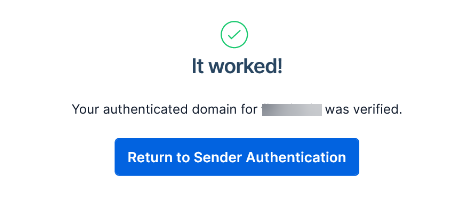
Once verified, DKIM will be active for your domain and you will see the below message.
While Single Sender identity is convenient for certain use cases, we highly recommend authenticating your domain for more reliable and consistent email delivery. By following the domain authentication process, you establish a secure and trustworthy connection between your website and SendGrid, ensuring your emails are delivered effectively and fostering stronger engagement with your audience.
By selecting the appropriate sender identity option and following the steps outlined above, you'll set the foundation for successful email campaigns with SendGrid. The enhanced deliverability and authentication provided by domain authentication will positively impact your email communication, helping you achieve higher engagement rates and successful interactions with your recipients.
Send test Mail
After successfully configuring the mail settings, it's time to test your email functionality. Send a test email to verify whether it will be delivered successfully or encounter any issues. This test will determine whether your mail setup is functioning properly.
Freqently Asked Question
Yes, SendGrid provides email authentication methods like DKIM and SPF. These authentication protocols help verify the authenticity of your emails, reducing the chances of them being marked as spam and increasing deliverability.
Yes, SendGrid offers domain authentication, which is highly recommended for better email deliverability. By authenticating your domain, you establish trust between your domain and SendGrid, improving the chances of your emails reaching recipients' inboxes.
In case of email delivery issues, check your SendGrid and GoSMTP configurations, ensure proper domain authentication, and verify that the email content complies with anti-spam guidelines. You can also review SendGrid's logs and error messages to identify potential issues.