
Introduction
Amazon Simple Email Service (Amazon SES) is a powerful cloud-based platform widely recognized for efficiently sending both marketing and transactional emails. When seamlessly integrated with GoSMTP, Amazon SES can significantly elevate the deliverability rates of your email campaigns. This comprehensive guide will meticulously walk you through the entire setup process, ensuring the successful amalgamation of Amazon SES and GoSMTP for optimized email communication within your WordPress site.
Amazon SES stands as a versatile cloud-driven email sending service, custom-crafted for businesses seeking impeccable email delivery solutions. In this guide, our primary focus centers on harnessing Amazon SES's capabilities to bolster the email deliverability prowess of your WordPress website.
Amazon SES stands as a versatile cloud-driven email sending service, custom-crafted for businesses seeking impeccable email delivery solutions. In this guide, our primary focus centers on harnessing Amazon SES's capabilities to bolster the email deliverability prowess of your WordPress website.
Please Note
To begin, make sure you have installed and activated the GOSMTP plugin.
After verifying your license, you can easily configure the plugin's settings. Just Go to GOSMTP » Settings in your WordPress dashboard and navigate to the SMTP Settings tab.
After verifying your license, you can easily configure the plugin's settings. Just Go to GOSMTP » Settings in your WordPress dashboard and navigate to the SMTP Settings tab.

To get started, follow these steps to configure the GO SMTP plugin in WordPress:
Basic configuration
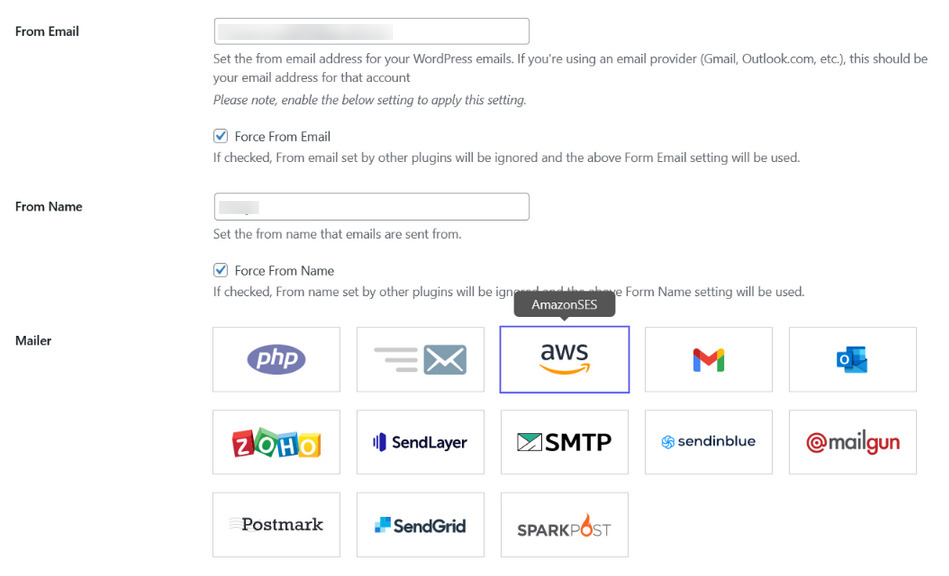
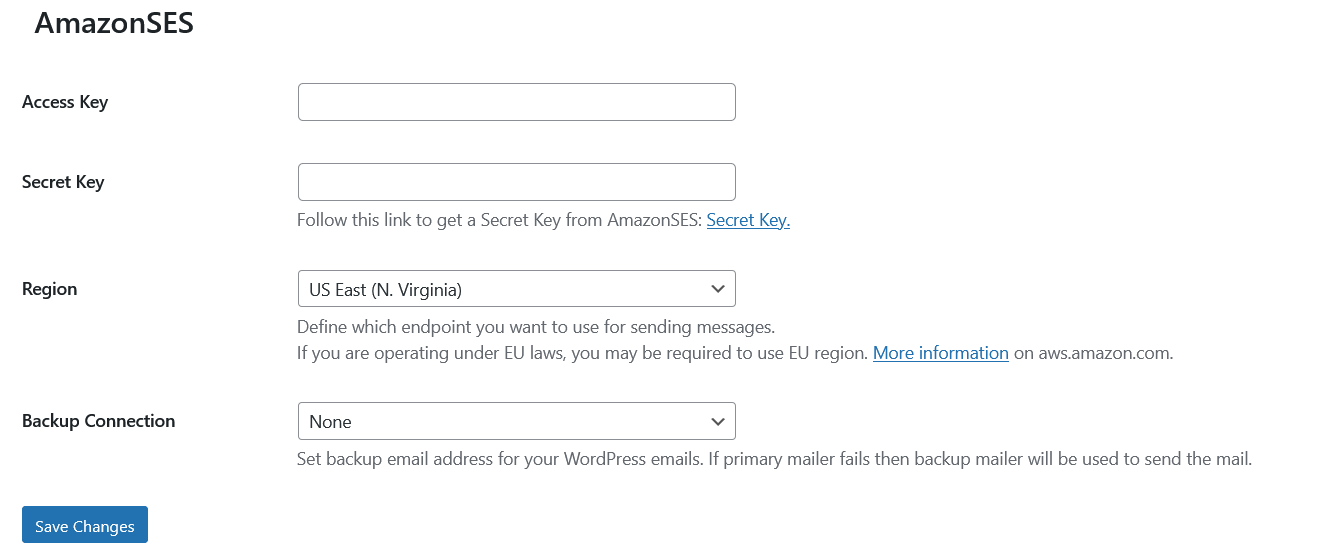
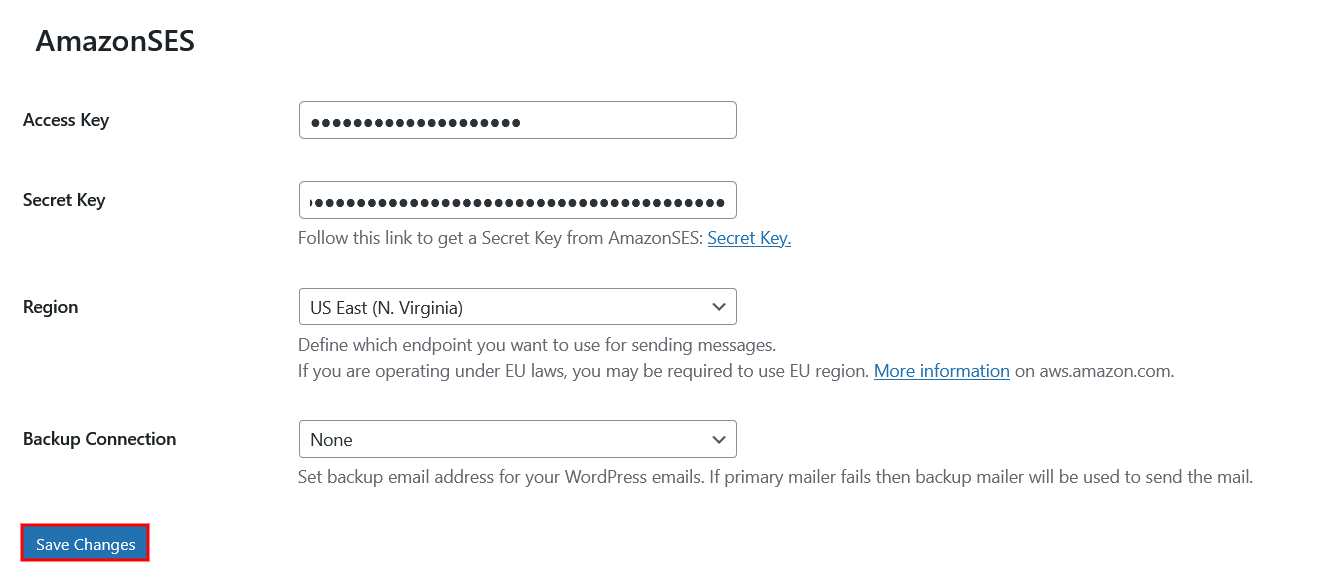
After selecting the AmazonSES, you'll see a new section called AmazonSES. Within this section, you'll find settings called Access Key and Secret key.
To obtain the necessary information for these fields, you'll need to create a users using your AWS account. Don't worry, no coding is required, and we'll guide you through the process in the next step.
Configuring Your Amazon AWS Account
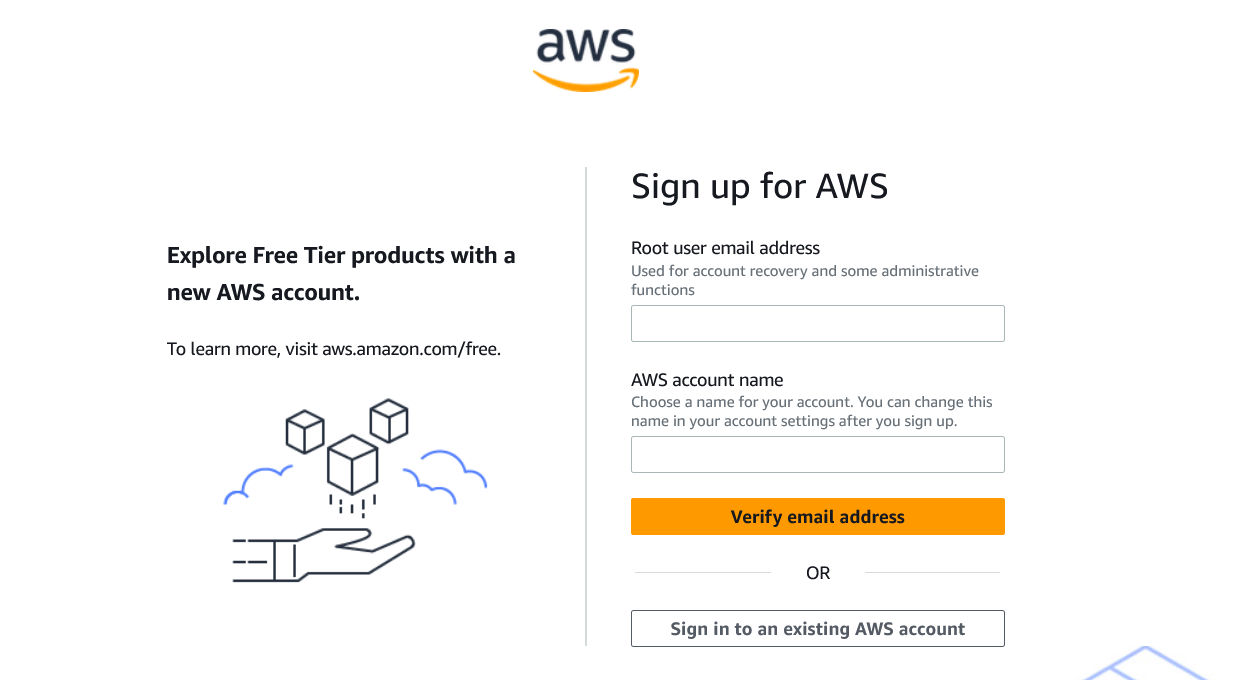
Begin by creating a free Amazon Web Services (AWS) account. Please note that during the account setup process, you'll be required to provide your credit card information, although this guide doesn't necessitate the use of paid services.
Upon signing up, AWS will try to determine your region based on your address. If unsure, you'll need to choose the nearest region manually.

Currently supported regions in AmazonSES are given below.
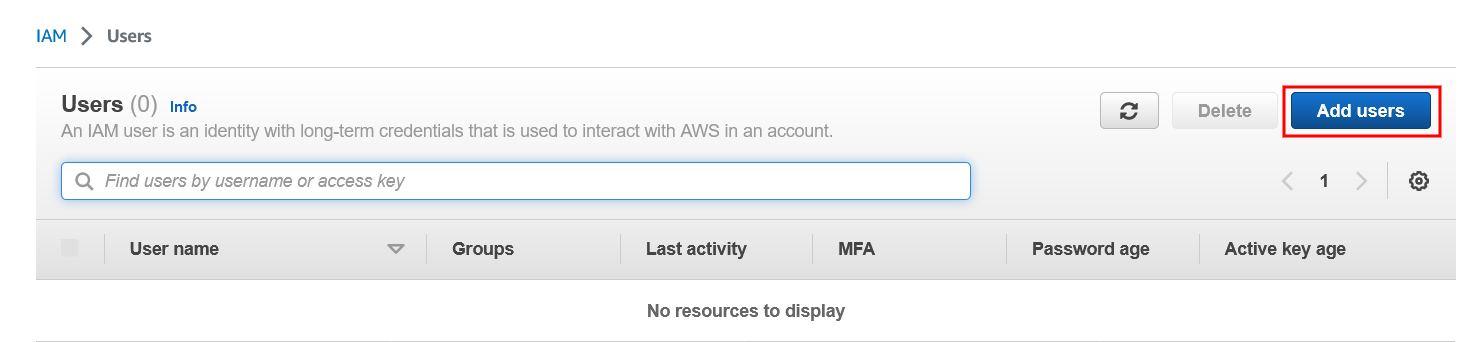
Once your AWS account is ready, set up an Identity and Access Management (IAM) User:
» Navigate to AWS's IAM Users page and click "Add users."
» Navigate to AWS's IAM Users page and click "Add users."
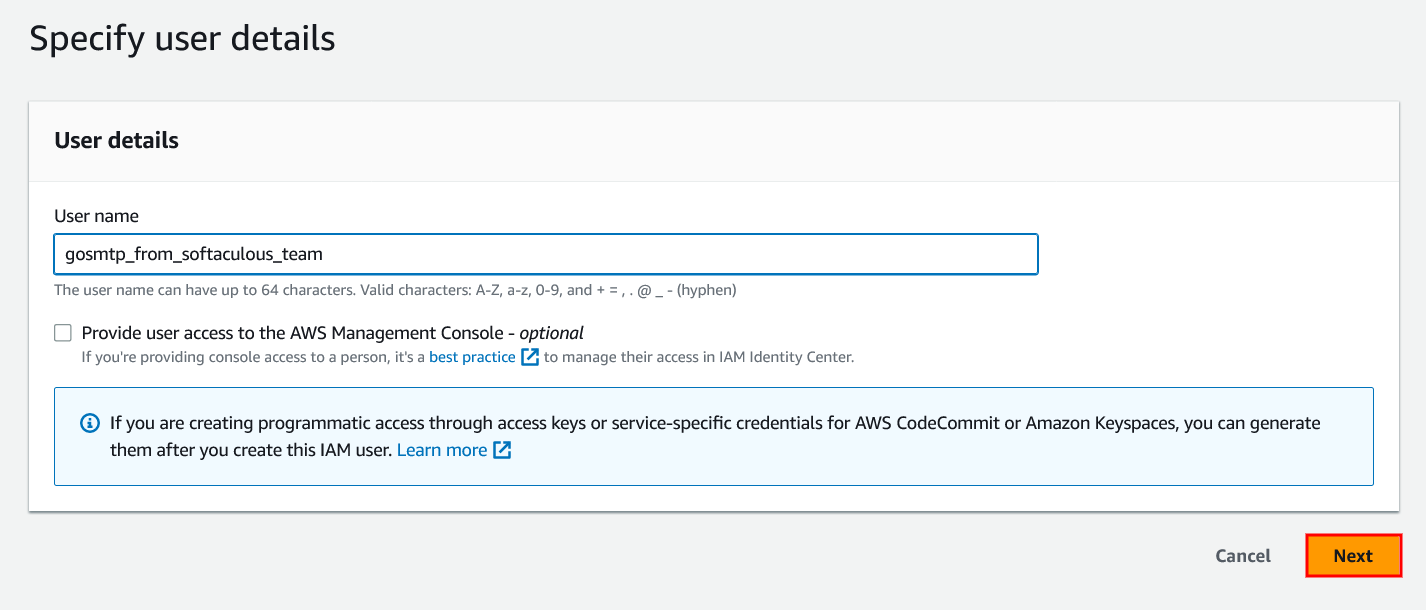
» Set up a new user with a recommended name format: yourdomain_gosmtp and click next.
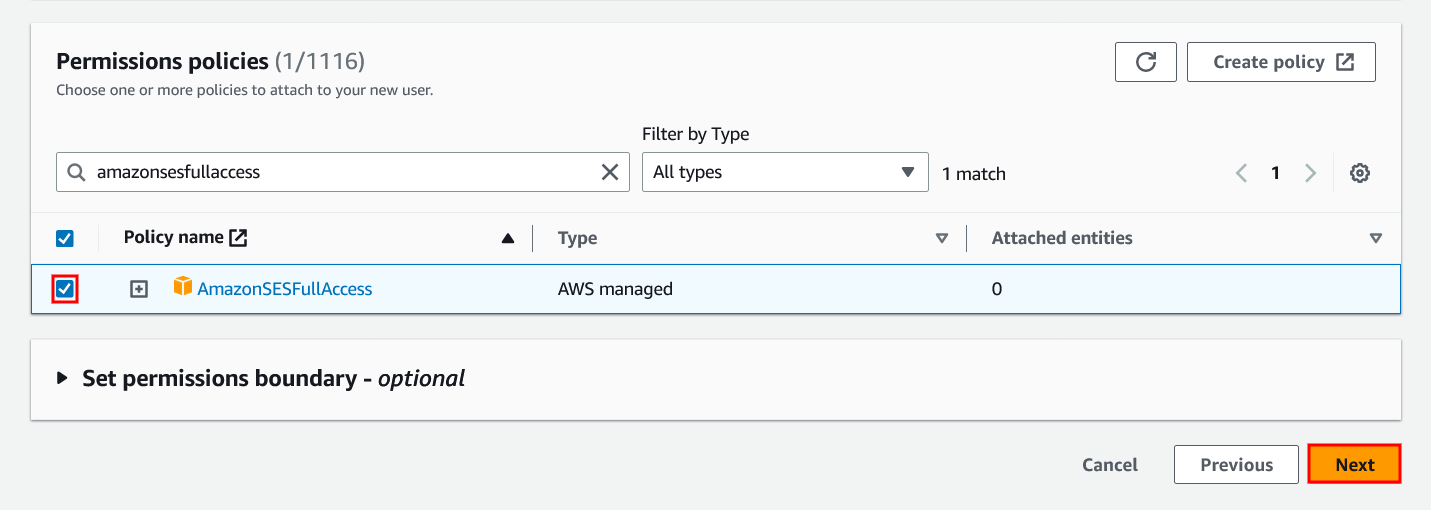
» Select "Attach policies directly".

» Search "AmazonSESFullAccess" in Permission policies section to grant email sending permissions then click "Next".
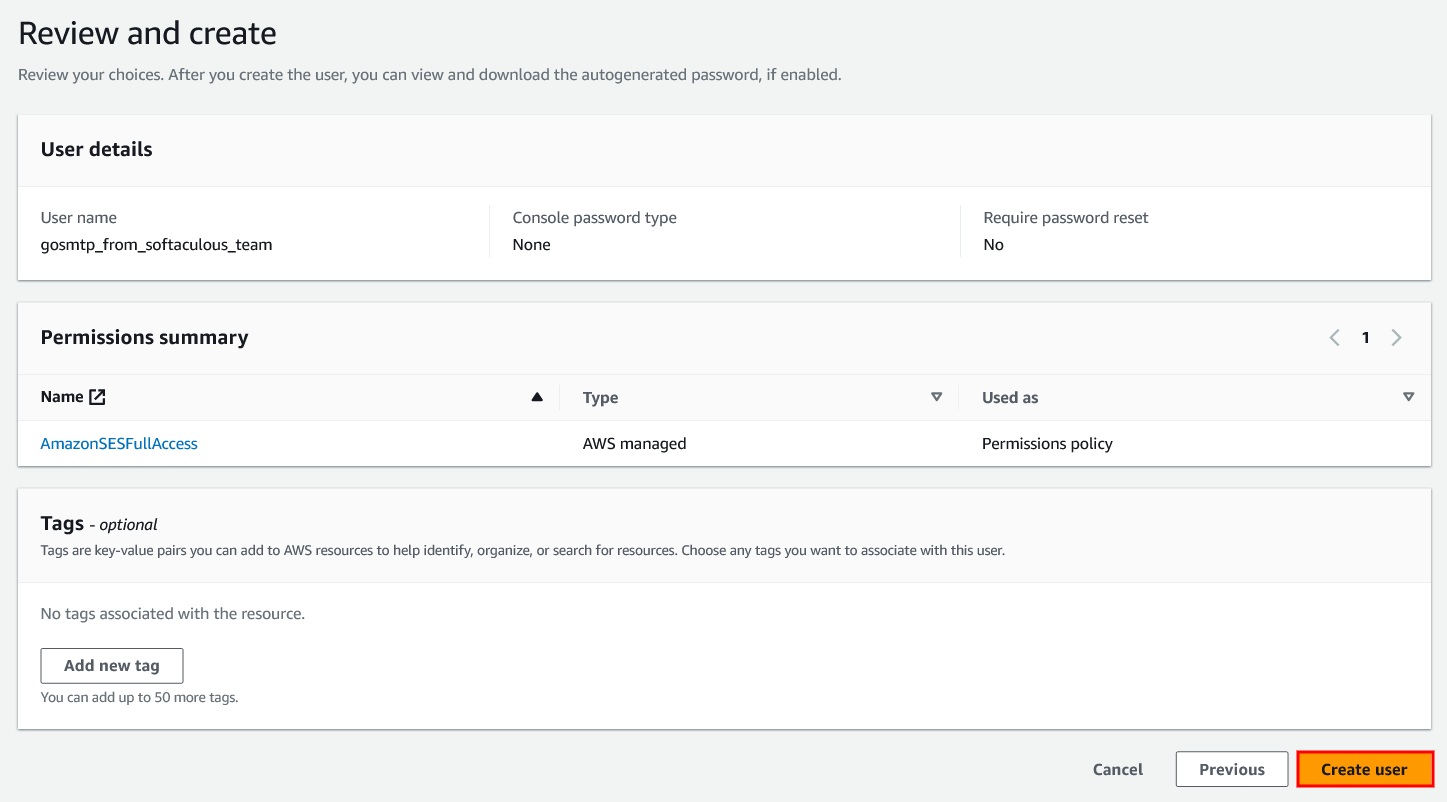
» Review details and create the user.
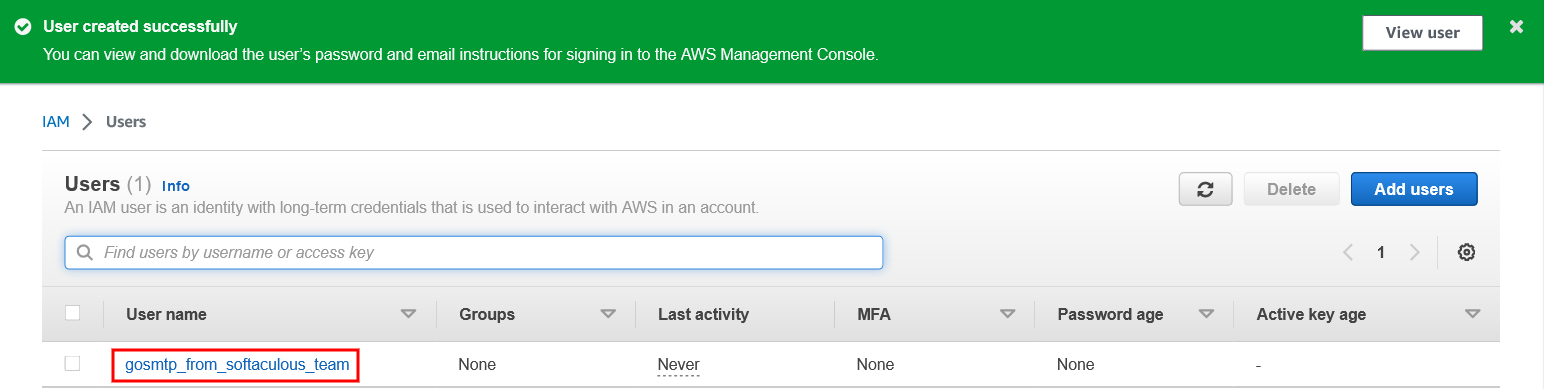
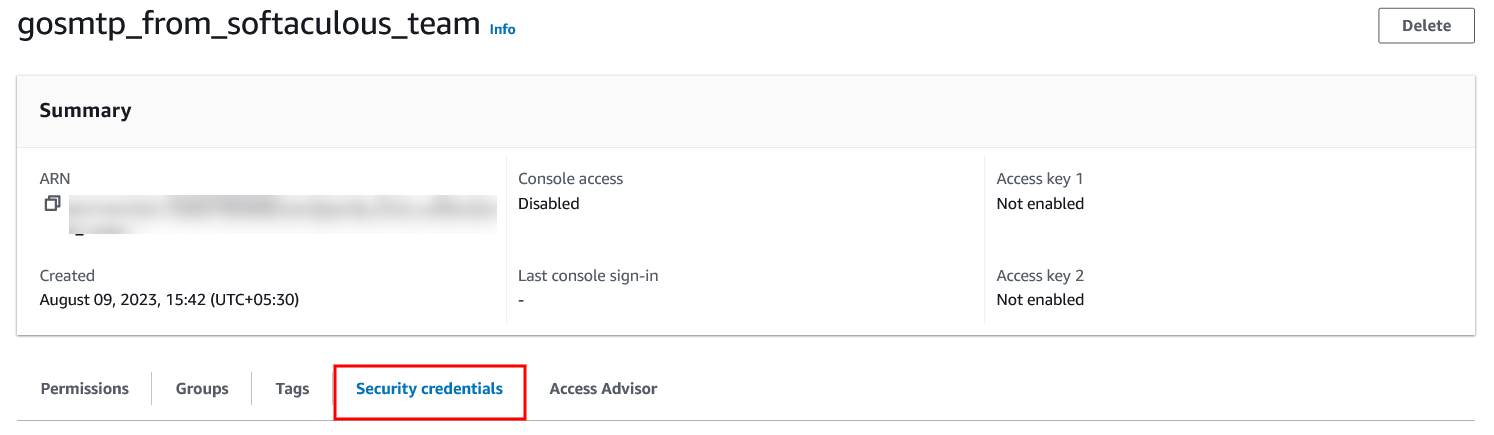
» After successfully creating user you will see list of users in the user page just click on the user's name.
» Navigate to the "Security credentials" tab.
» Under "Access keys," click on "Create access key."
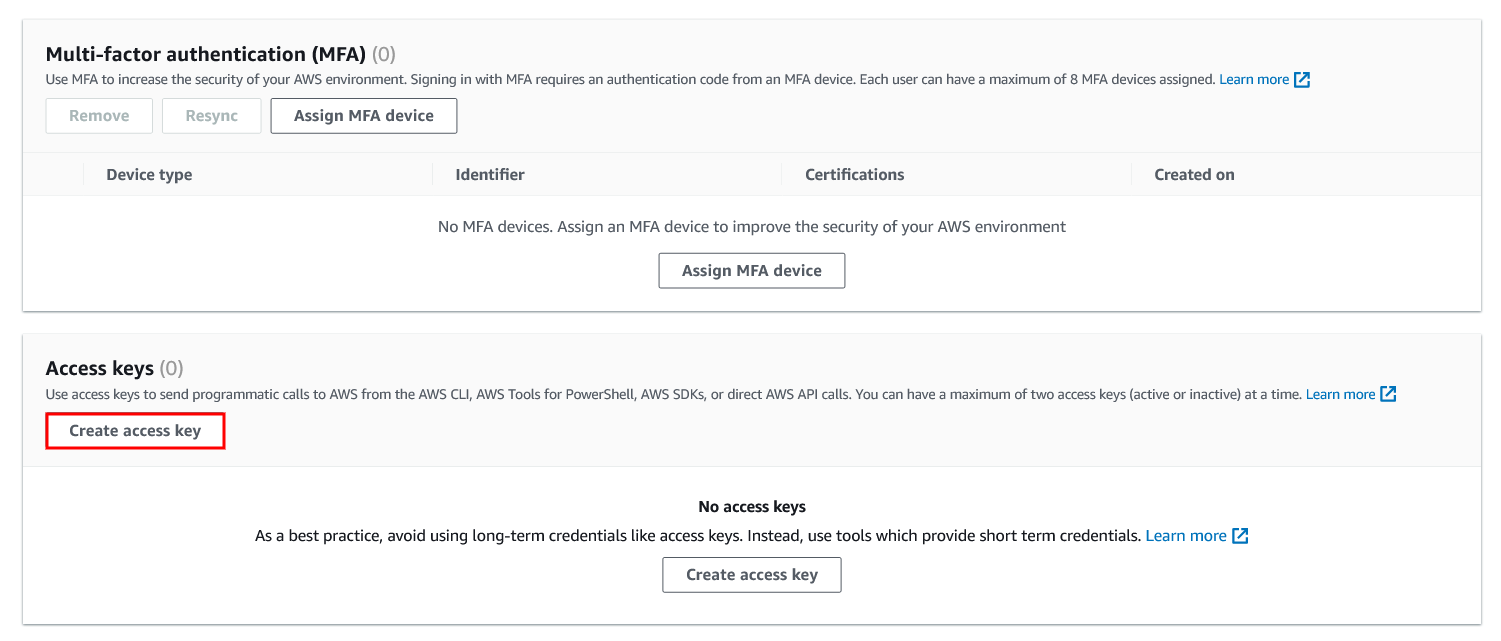
» Opt for "Other" in the Access key best practices & alternatives section.

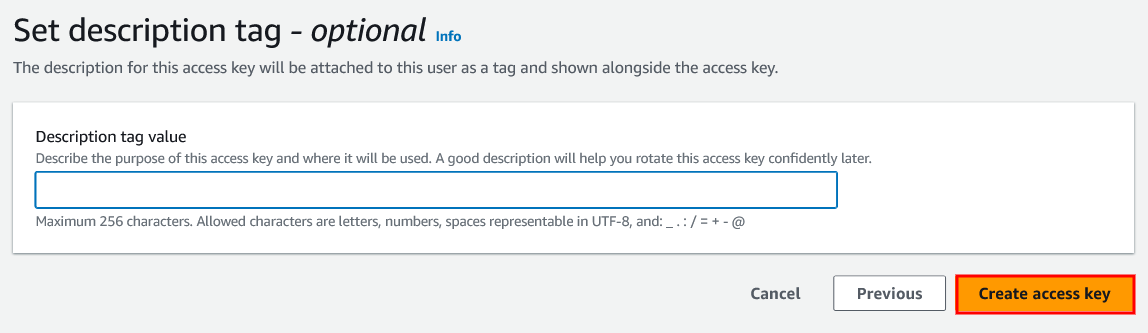
» If you want then enter desciption tag and click on "Create access key" button.
» It's critical to securely save both the Access Key ID and Secret Access Key, as they're indispensable for the integration.
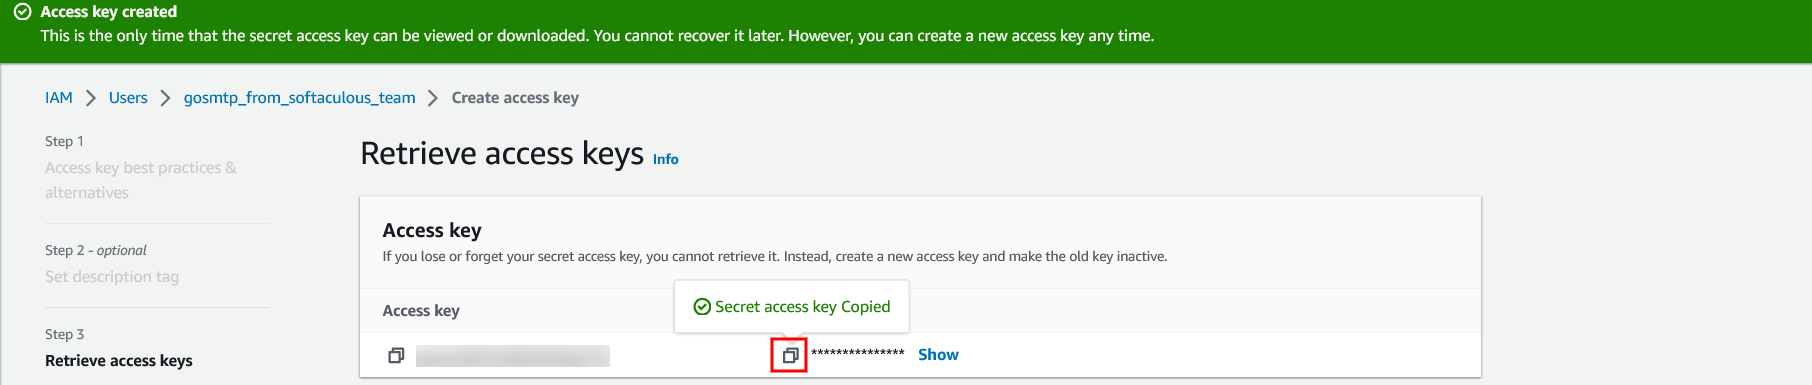
Remember:
Verifying the details
After successfully creating your credentials, it's essential to verify both your domain and email address for optimal delivery rates. Here's a step-by-step guide on how to verify your domain and email address:
Please Note
Navigate to the "Verified Identities" page by clicking on "Verified Identities" under the "Configuration" tab in sidebar.
On the "Verified Identities" page, you'll find the verified status and details of the identities you've verified, click the "Create Identity" button.
On the "Verified Identities" page, you'll find the verified status and details of the identities you've verified, click the "Create Identity" button.
")
In the "Identity Details" section, choose "Domain" for verification and Enter your domain in the provided field. You can leave the other fields blank then click "Create Identity."
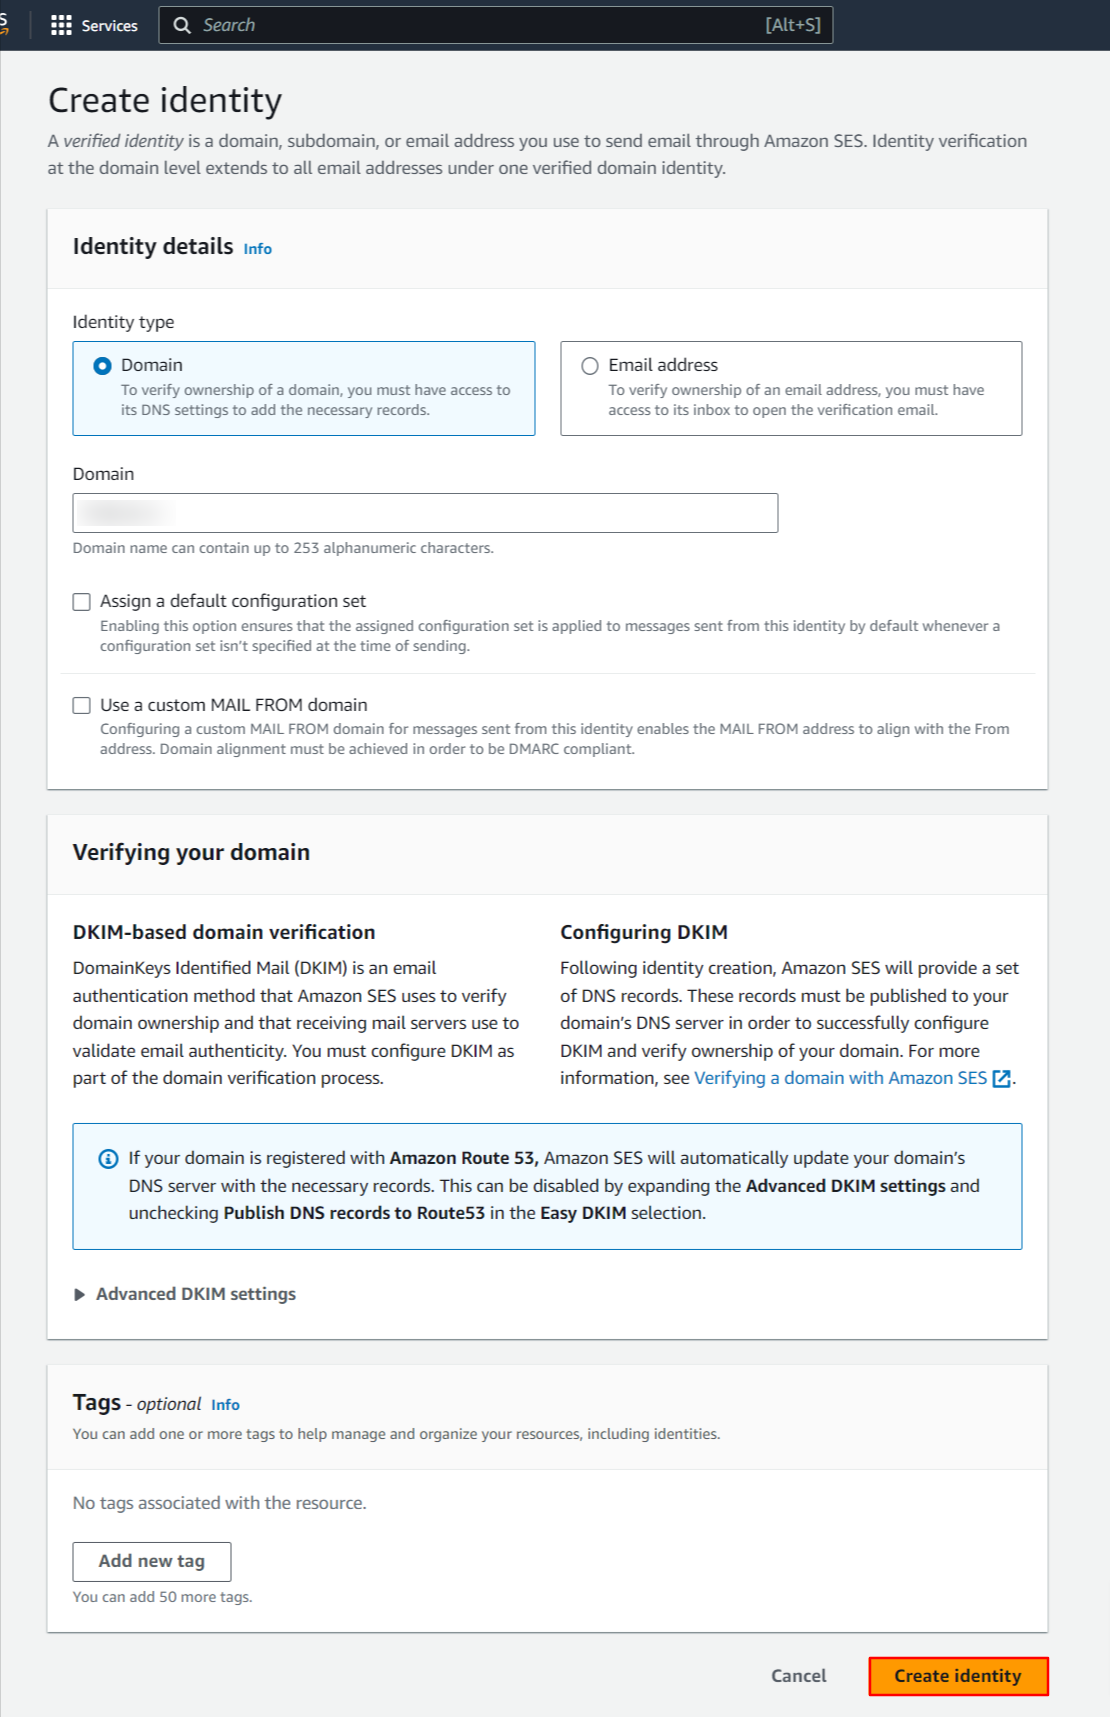
Amazon SES will generate three CNAME records essential for domain verification. These records need to be added to your hosting server's DNS settings. This step requires some time for the changes to propagate across the internet.
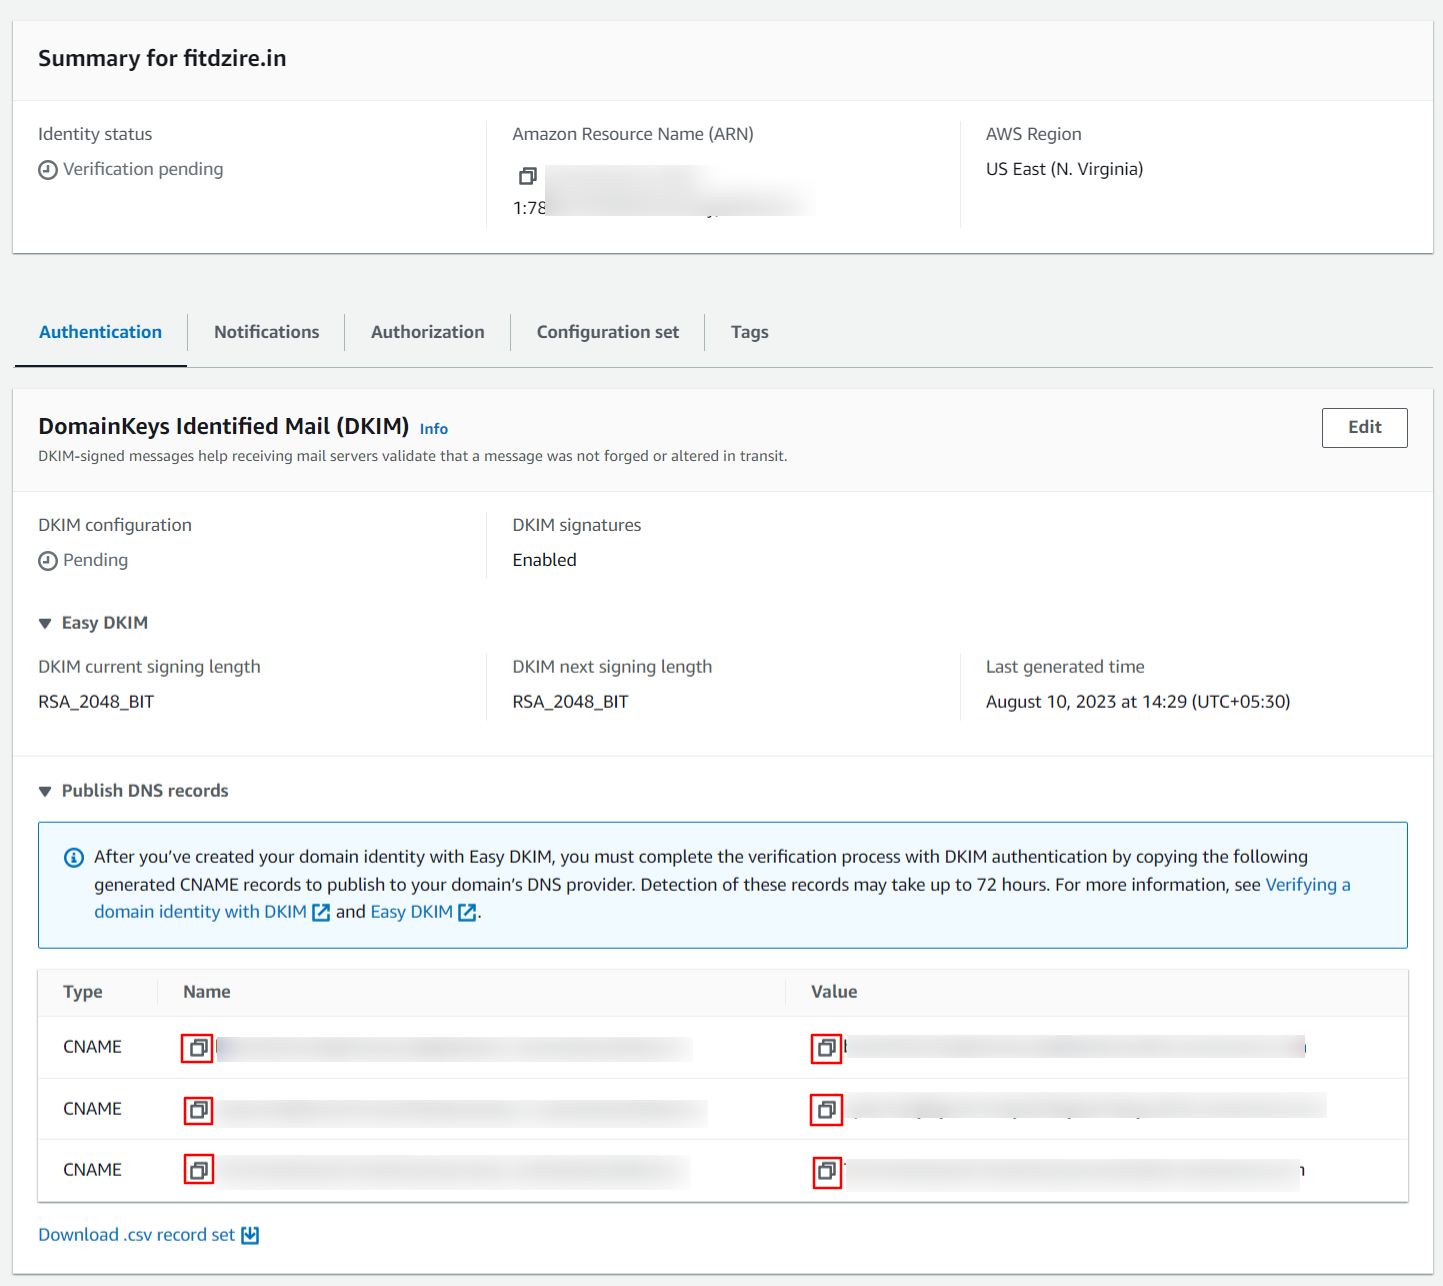
Return to the "Verify Identity" page. Once your domain is successfully verified, a confirmation message will be visible.

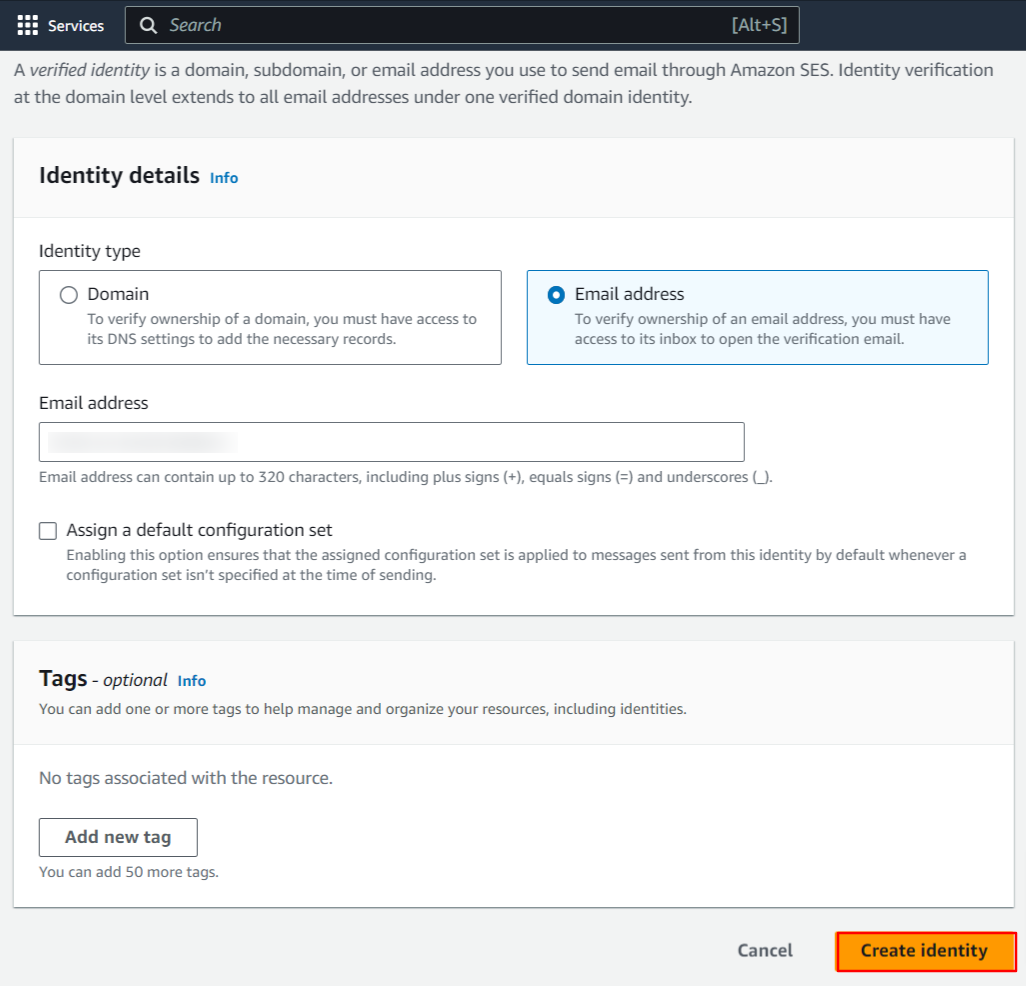
Again, access the "Verified Identities" page by clicking on "Verified Identities" and then clicking the "Create Identity" button.
In the "Identity Details" section, choose "Email" for verification and Enter your email address in the provided field. You can leave the other fields blank, then click "Create Identity."
An email verification mail will be sent to the provided email address. Click on the verification link in the email.
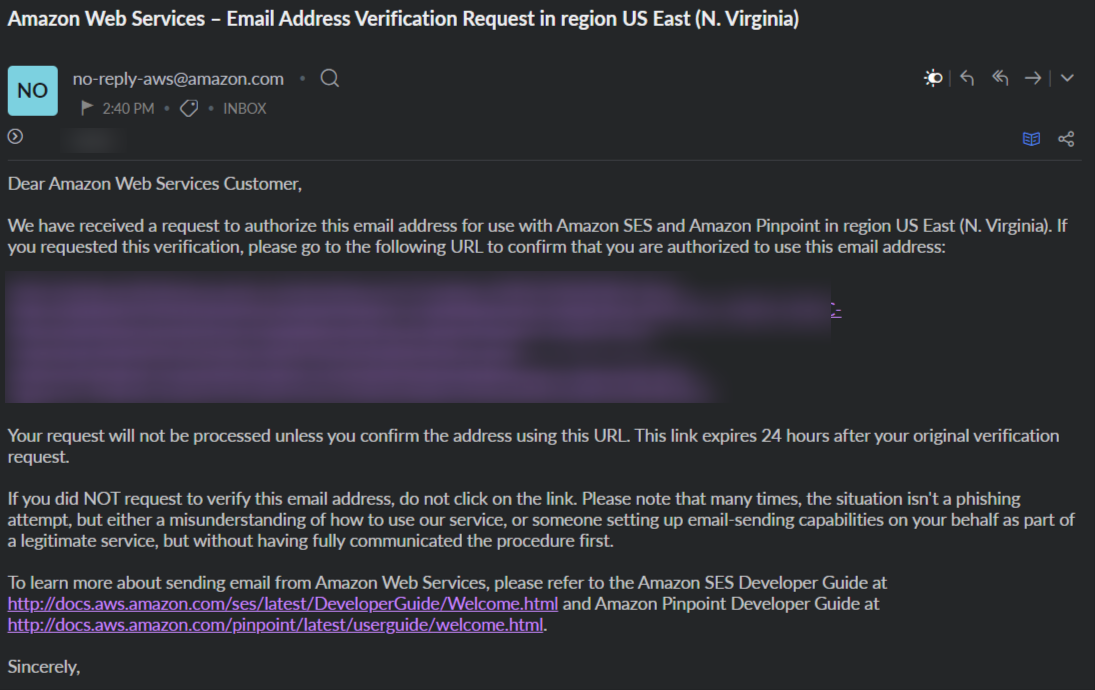
After clicking the link, your email address will be verified. You can check the verification status on the "Verified Identities" page.
")
With both domain and email verification completed, you're now set to send emails through your AWS account via GoSMTP after adding your credentials. By following these steps, you'll have successfully verified both your domain and email address, enabling you to confidently send emails through your AWS account using GoSMTP.
Mailer configuration
Within the settings, locate the field where you need Access Key and Secret Key. Here, you'll paste the Access Key and Secret Key that you previously copied from your AmazonSES account.
After pasting both credentials, click the "Save Settings" button to apply the changes.
Send test Mail
After successfully configuring the mail settings, it's time to test your email functionality. Send a test email to verify whether it will be delivered successfully or encounter any issues. This test will determine whether your mail setup is functioning properly.
Freqently Asked Question
Integrating Amazon SES with GoSMTP enhances your email deliverability, allowing you to send emails more efficiently and with improved chances of landing in recipients' inboxes.
Yes, Amazon SES caters to businesses of all sizes. It's a cost-effective solution that offers flexibility in sending both transactional and marketing emails.
Once you've integrated Amazon SES with GoSMTP and verified your domain and email address, you're ready to send emails. However, it's recommended to start with a gradual sending volume to establish a positive sending reputation.