Get GoSMTP
Home » Elastic Email (Pro)
Elastic Email (Pro)

Introduction

This tutorial will guide you through the process of setting up GoSMTP with your Elastic Email email address.


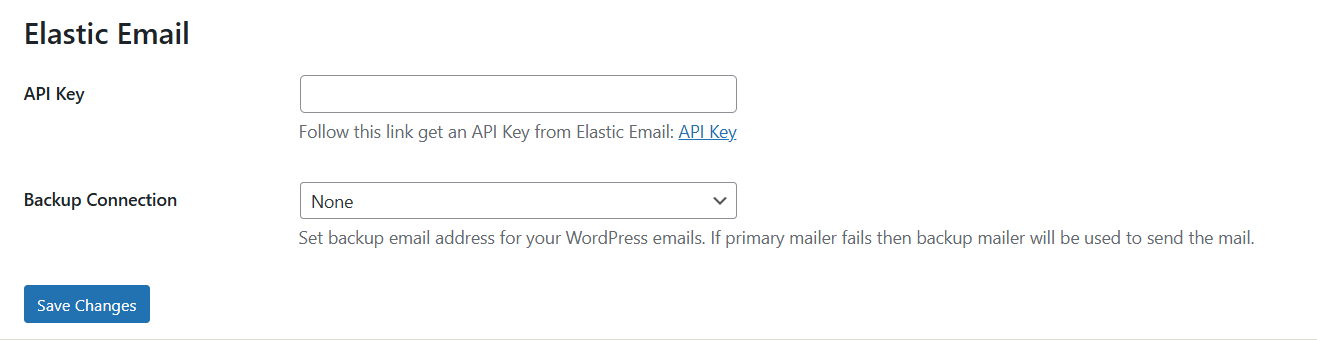
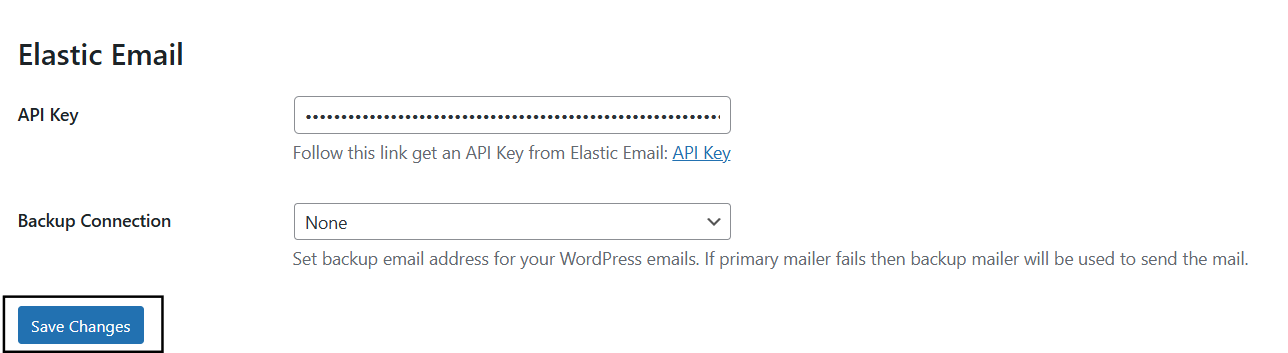
Once you choose Elastic Email as the mailer in GoSMTP settings, you'll find a field to add the API key. Generate the API key in your Elastic Email account and paste it there. This connects GoSMTP with Elastic Email, enabling you to send emails effortlessly using their API.

Installing & Configuration with Elastic Email

To begin, make sure you have installed and activated the GOSMTP plugin.

After verifying your license, you can easily configure the plugin's settings. Just go to GOSMTP » Settings in your WordPress dashboard and navigate to the SMTP Settings tab.
gosmtp_smtp_settings_tab
To get started, follow these steps to configure the GoSMTP plugin in WordPress:

Basic configuration

  • From Email:  Set the email address which is used for sending all emails from your website.
  • Force From Email: Enable force from email, It ignores emails set by other plugins and use the Form Email setting.
  • From Name: Set the from name from which emails are sent. By default, your site name is set as form name.
  • Force From Name: Enable force from, It ignores from name set by other plugins and use the Form Name setting.
  • Mailer: Select Elastic Email option from the Mailer field.
elastic_email_common_field
Once you have chosen "Elastic Email" as the mailer option in GoSMTP settings, you'll come across a field called the "API Key." This field is crucial for integrating Elastic Email with GoSMTP and ensuring seamless email delivery using their API.
elastic_email_save_field

Obtain Elastic Email API Key

Here's a step-by-step guide on how to obtain the API Key from Elastic Email:
To begin, you'll need an Elastic Email account. If you haven't created one yet, simply click on Try Elastic Email for Free to register and set up your new account.
elastic_email_account_creation
  • Choose your product

A product window page will open. Choose the product named Email API.
elastic_email_choose_product
  • Sign Up

The sign-up form will prompt you to enter your Email, Password, First Name, and Last Name. Make sure to tick both agreement checkboxes. Then complete the human verification and click Sign Up to proceed.
elastic_email_signup_form

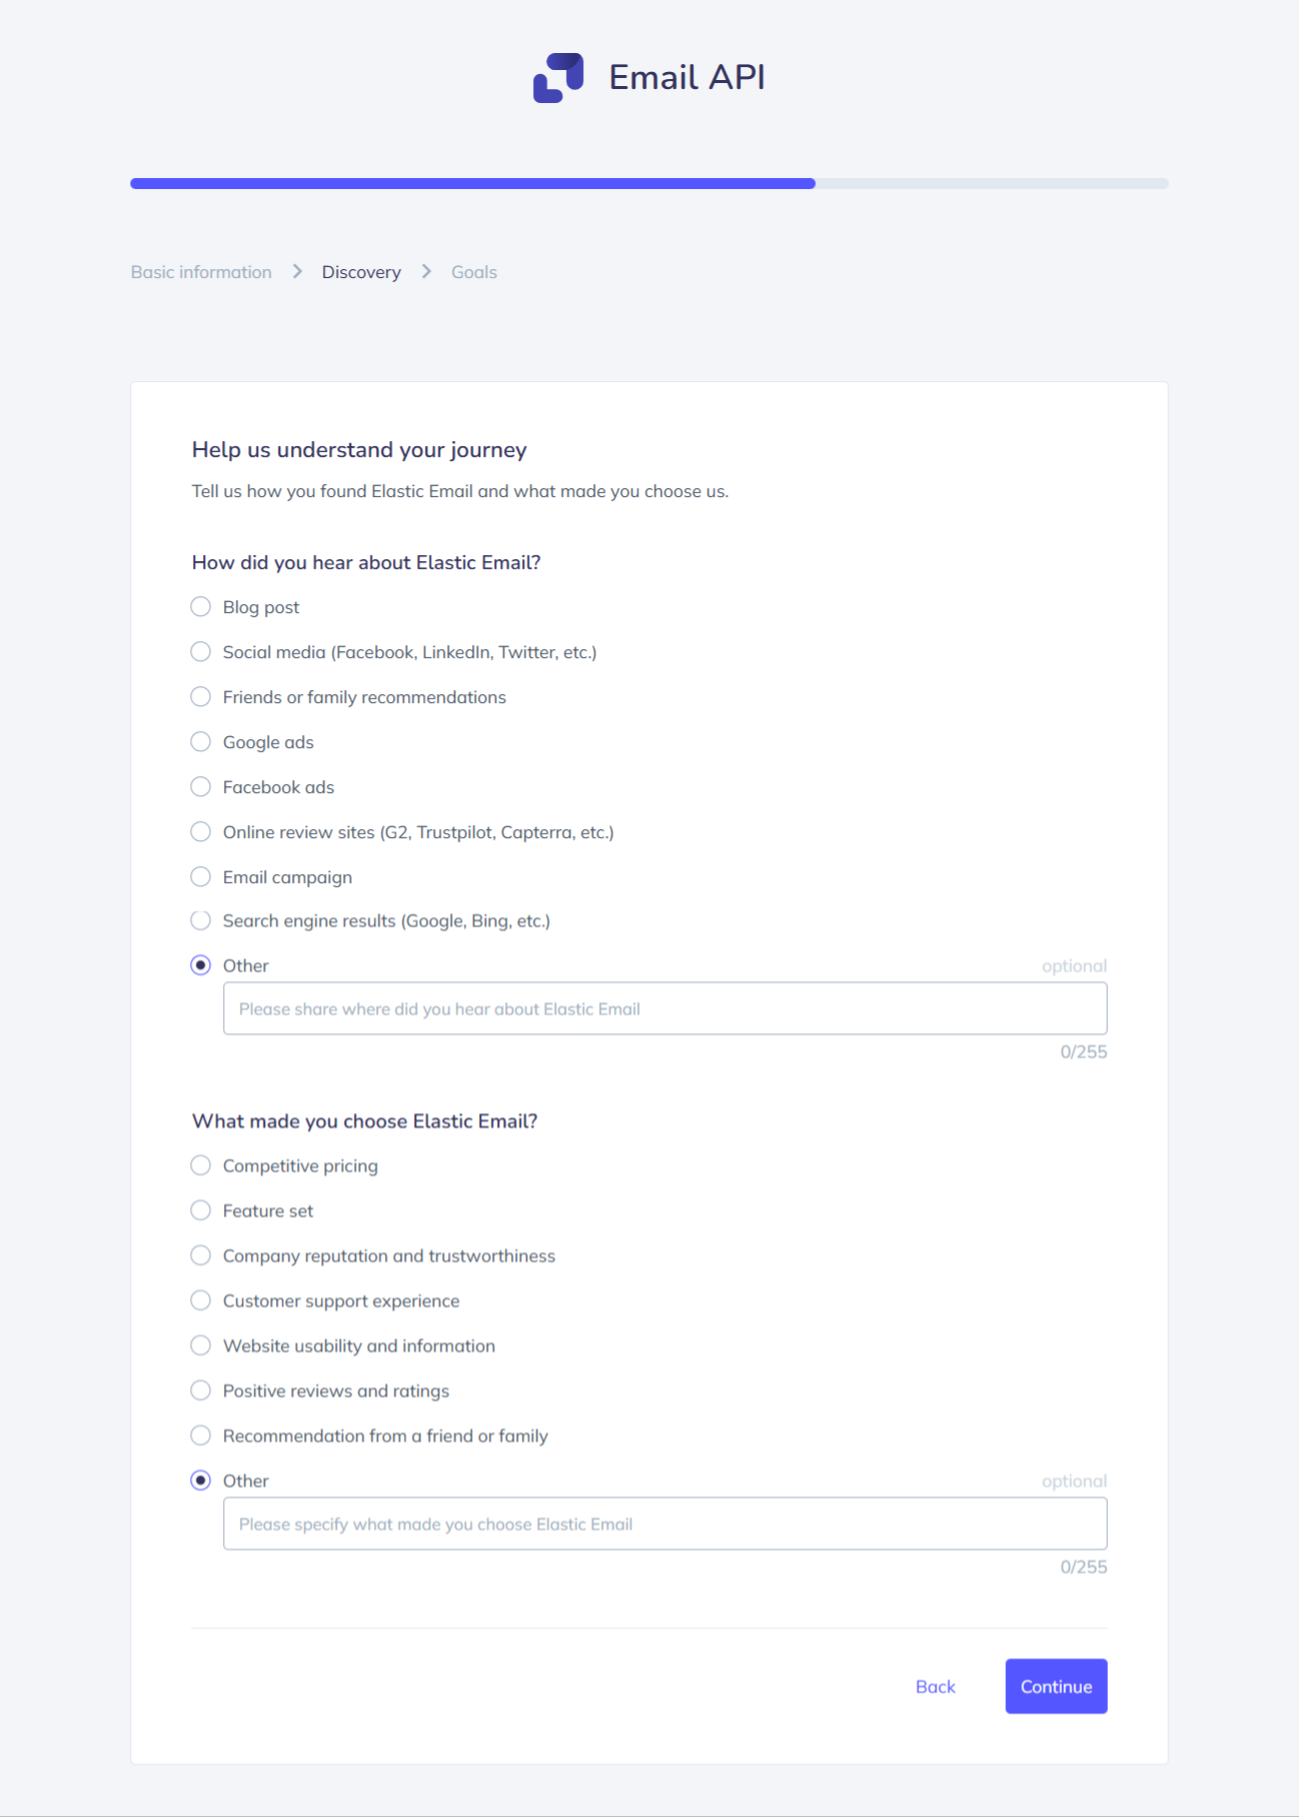
After clicking on Sign Up, you will be taken to the setup screen. This page is divided into a few sections.

To move forward, fill in the required information in each section. Once done, click Continue to proceed.

elastic_email_setup_screen1
elastic_email_setup_screen2
In the Last Section, click on Finish Survey to Proceed.
elastic_email_setup_screen3
Then a welcome page will appear. Click on Let's Start! button to Proceed.
elastic_email_setup_complete
  • Creating an API Key

You will be redirected to the Elastic Email dashboard. On the left side of the screen, click on Settings.

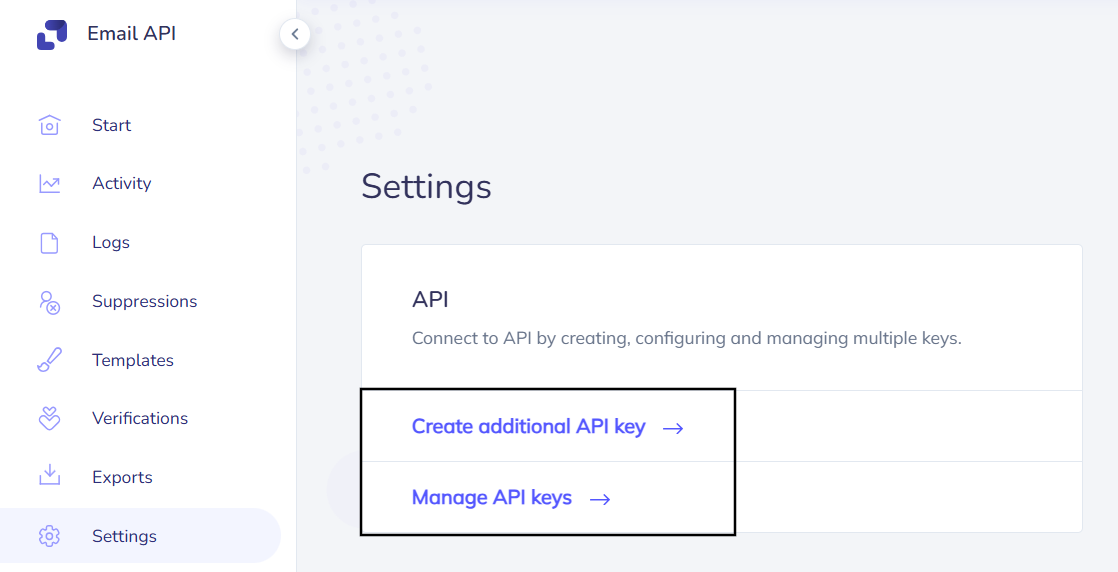
Under the API section, you will find the options Create additional API key and Manage API keys.

To generate a new key, click on Create additional API key.

elastic_email_api_key
Name the API Key, and in Permissions select Full Access. Click on Create.
elastic_email_create_api_key

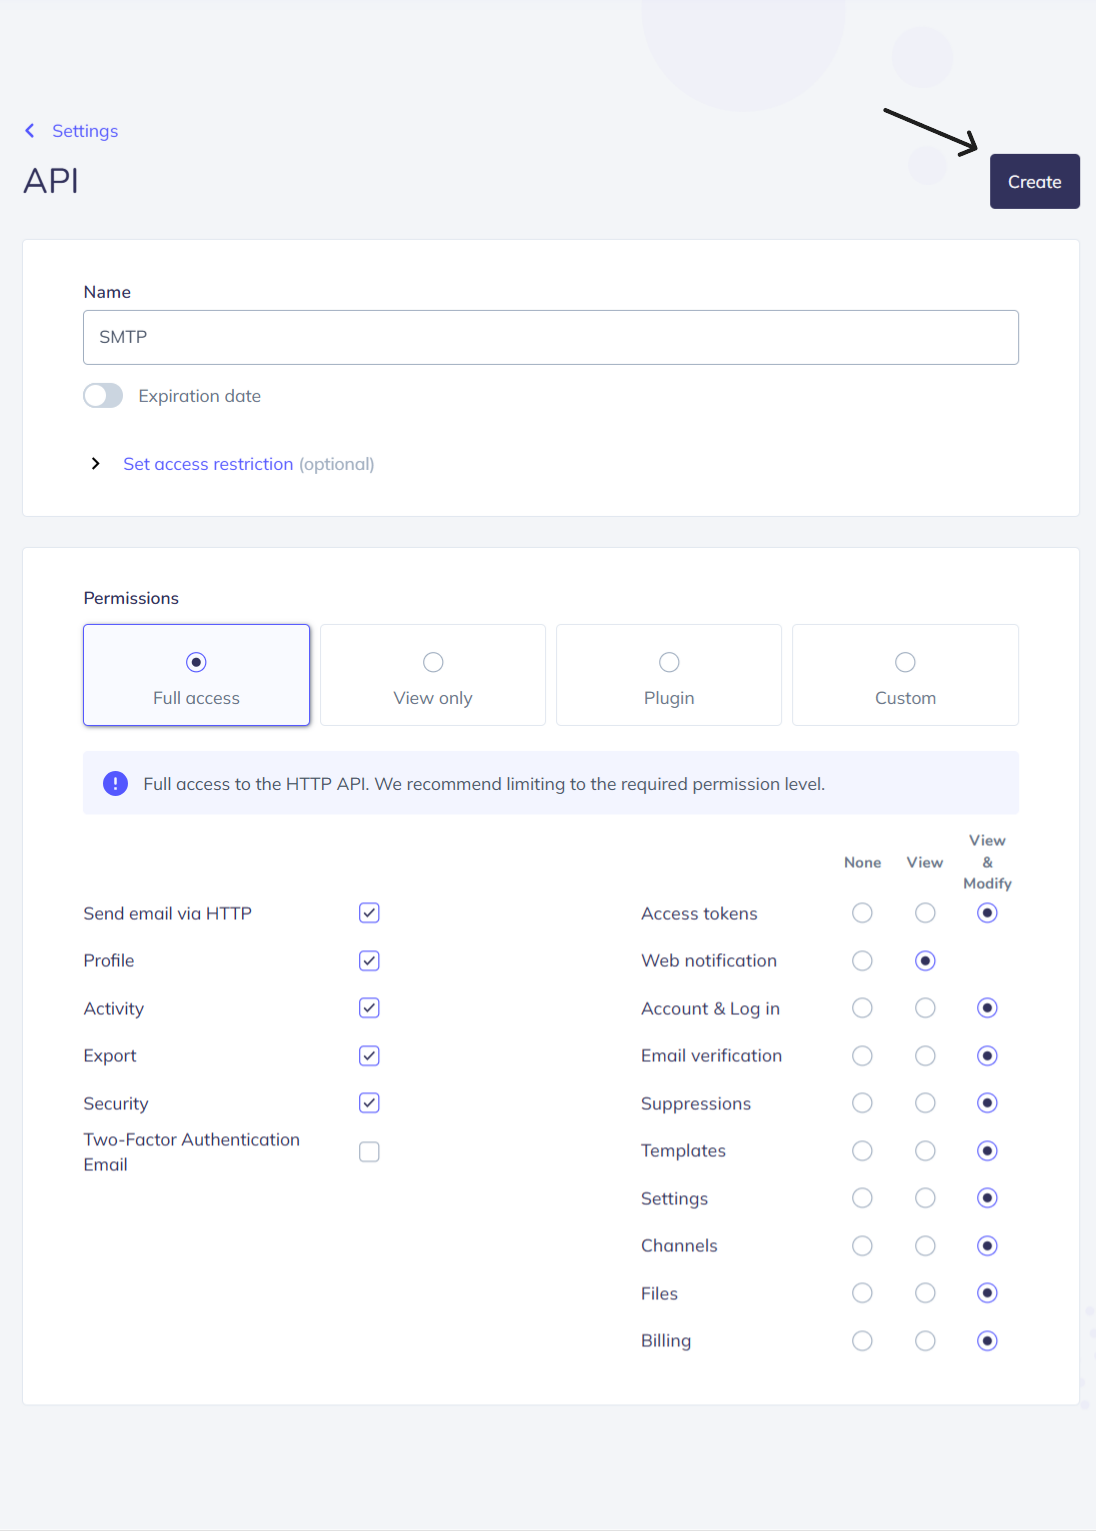
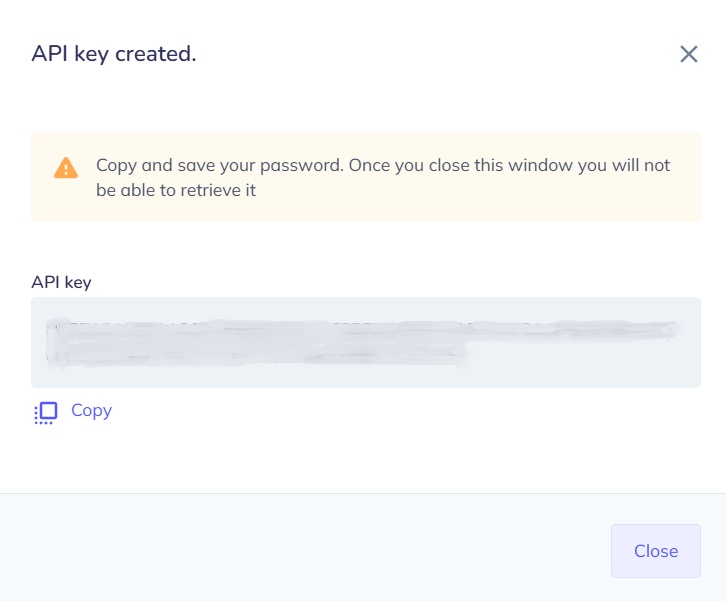
After clicking the Create button, an API Key will be generated automatically. Make sure to copy the API Key for later use.

elastic_email_api_key_created

Mailer configuration

  • Save credentials

Within the GoSMTP settings, find the field where you are required to enter the Elastic Email API key. This is where you'll paste the API key you copied in Step 2. After entering the API key, save the GoSMTP settings to apply the changes.
elastic_email_configuration

Send test Mail

After successfully configuring the mail settings, it's time to test your email functionality. Send a test email to verify whether it will be delivered successfully or encounter any issues. This test will determine whether your mail setup is functioning properly.

Note: If you're using a free Elastic Email account for testing, you can only send emails to the address used to register the account. To send emails to other recipients, you’ll need to upgrade to a paid plan.

Freqently Asked Question

What is Elastic Email, and how does it work?
Elastic Email is a cloud-based email delivery service that allows you to send emails from your website using SMTP or API. It helps ensure your emails reach users’ inboxes reliably and includes features like analytics, suppression management, and bounce handling.
Is there a limit to how many emails I can send with Elastic Email?
Yes, the free plan includes daily limits. If you need to send a large number of emails or want access to premium features, you can upgrade to a paid plan with higher sending limits.
Why are my test emails allowed to be sent to only one specific address?

If you're using a free Elastic Email account for testing, you can only send emails to the address used to register the account. To send emails to other recipients, you’ll need to upgrade to a paid plan.

Can I use Elastic Email for contact form messages and order emails?

Yes, Elastic Email is ideal for sending transactional emails such as contact form submissions, order confirmations, password resets, and other site-generated messages. It's designed to handle these types of emails reliably and at scale.

What do I need to set up Elastic Email with a WordPress plugin like GoSMTP?
To set up Elastic Email with GoSMTP, you'll need an Elastic Email account and an API key (or SMTP credentials). After creating your API key from the Elastic Email dashboard, you can enter it in the GoSMTP settings to start sending authenticated emails from your WordPress site.
    Was this page helpful?
    Newsletter Subscription
    Subscribing you to the mailing list