Introduction
GoSMTP is a user-friendly WordPress plugin that enables you to connect with your Outlook or Office 365 emails and effortlessly send emails through their API. With its fast and secure features, you can rest assured that your email communications are in good hands. The plugin utilizes OAuth2 authentication, making the setup process simple and secure. Here's a step-by-step guide on how to set up GoSMTP with your Outlook or Office 365 emails:
To begin, make sure you have installed and activated the GOSMTP plugin.
After verifying your license, you can easily configure the plugin's settings. Just Go to GOSMTP » Settings in your WordPress dashboard and navigate to the SMTP Settings tab.
After verifying your license, you can easily configure the plugin's settings. Just Go to GOSMTP » Settings in your WordPress dashboard and navigate to the SMTP Settings tab.

To get started, follow these steps to configure the GO SMTP plugin in WordPress:
Basic configuration
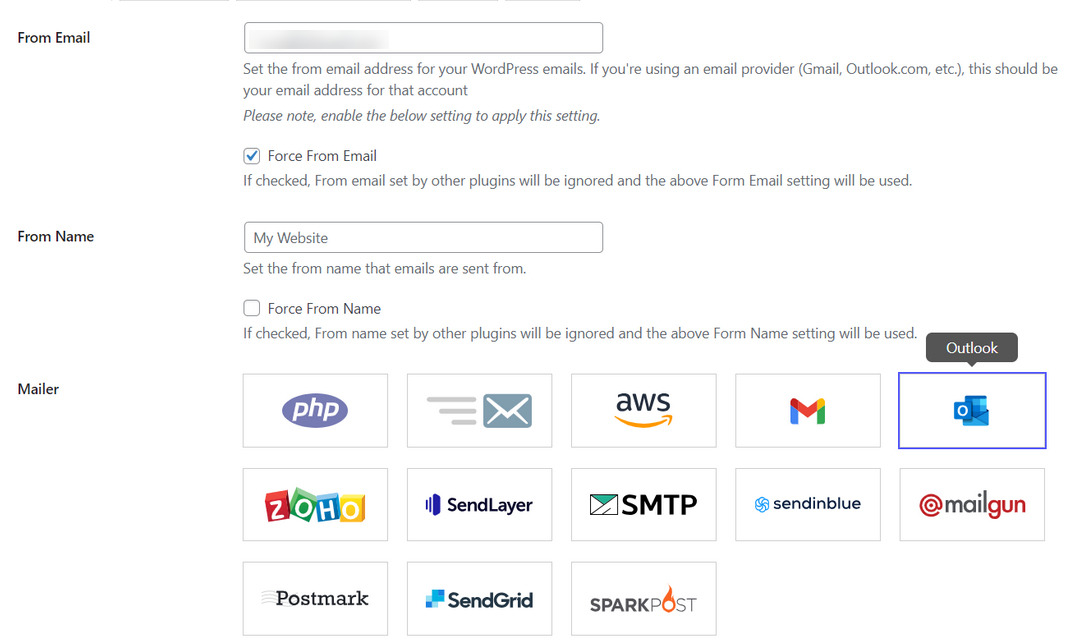
Now that you've chosen the Outlook mailer in the GoSMTP plugin, a new section titled "Outlook" will appear in the plugin settings. In this section, you'll need to enter your Application Client ID and Application Client Secret Key to establish a connection with your Outlook or Office 365 account.
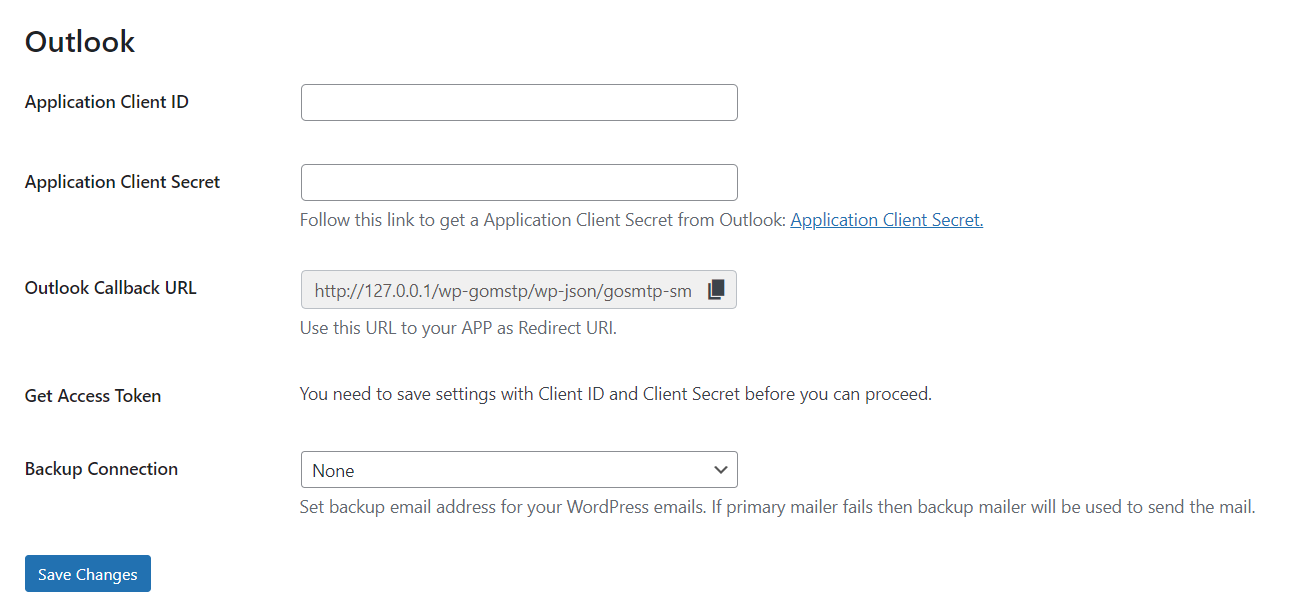
To simplify the process, focus on the callback URI. This is a specific URL that you need to copy.
To simplify the process, focus on the callback URI. This is a specific URL that you need to copy.
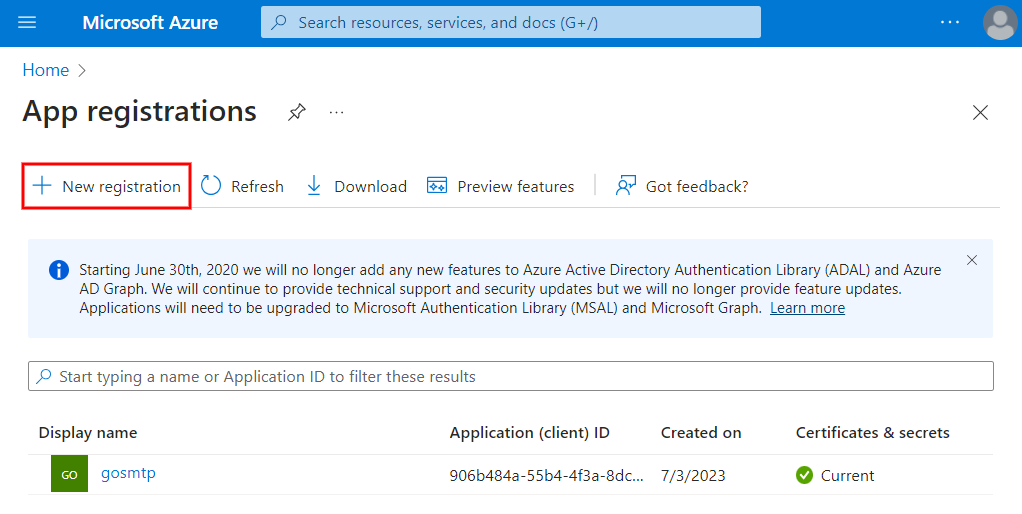
Click on the "New registration" button to create a new app registration.
To obtain the required information for the Outlook fields (Client ID, Client Secret), you'll need to create an Azure app using your Outlook or Office 365 account. Don't worry, no coding is involved, and I'll guide you through the process step-by-step.
Certainly! Here's an extended and simplified guide on obtaining Zoho API credentials and integrating them with GoSMTP:
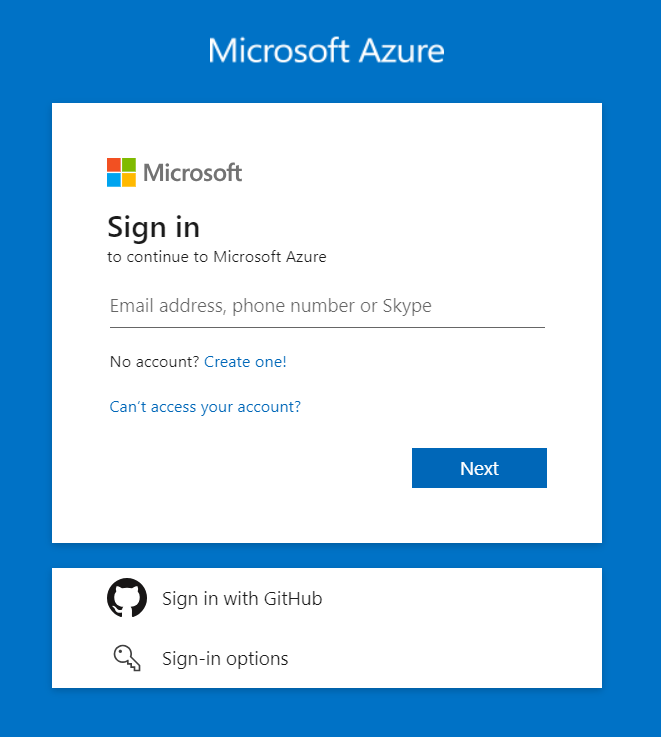
Open your web browser and navigate to the Azure Portal at portal.azure.com. Sign in using your Outlook or Office 365 account credentials to access the Azure dashboard. Once you're logged in, click on "Azure Active Directory" in the left sidebar and select "App registrations" under the "Manage" section.
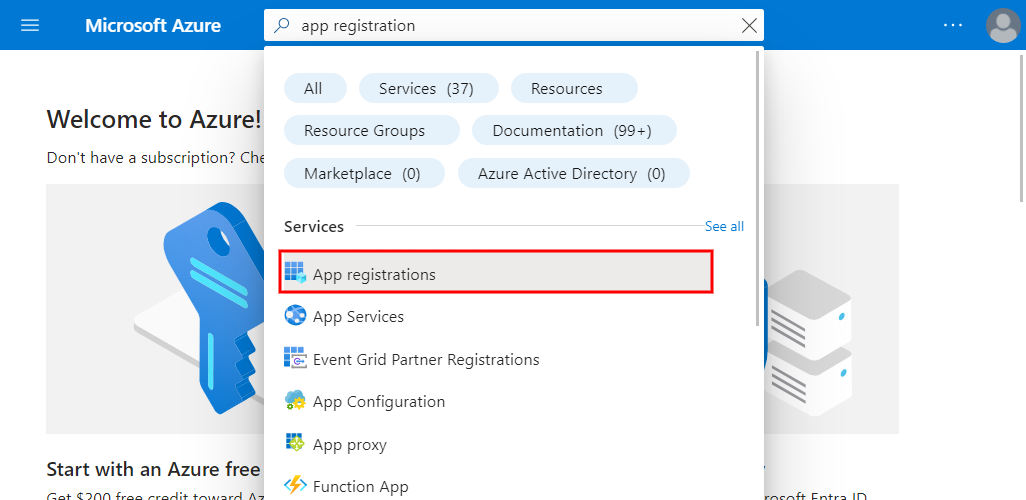
Now, let's search for "app registration" in the top search bar of the Azure Portal. As you start typing, it will suggest a few services, and you need to look for "App Registrations" in the list. Click on it to access the App Registration Dashboard.
Next, click on the "New registration" button to create a new app registration.
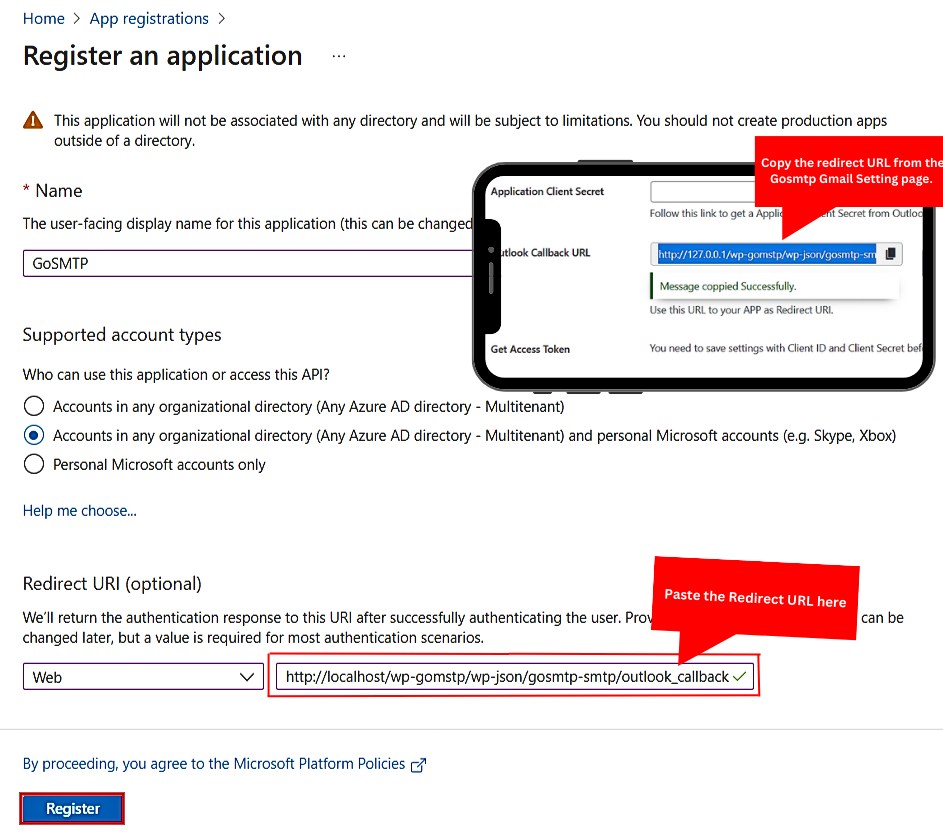
After clicking "Add New Registration," you will see a registration form for Outlook integration. This form is where you can provide the necessary details and create a new registration entry for integrating your application with Outlook.To register your app in Azure, follow these steps:
App Name: In the "Register an application" form, give your app a meaningful name, such as "GoSMTP Outlook Integration."
Supported Account Types: Choose "Accounts in any organizational directory and personal Microsoft accounts." This allows your app to authenticate users from both organizational and personal Microsoft accounts.
Redirect URI: Copy the Outlook Callback URL from GoSMTP's Outlook settings and paste it into the Redirect URI field. This ensures that Outlook can redirect authentication information back to your WordPress site.
Click on the "Register" button to create the app registration. By following these steps, you'll be able to register your app successfully and proceed with configuring GoSMTP for Outlook integration.
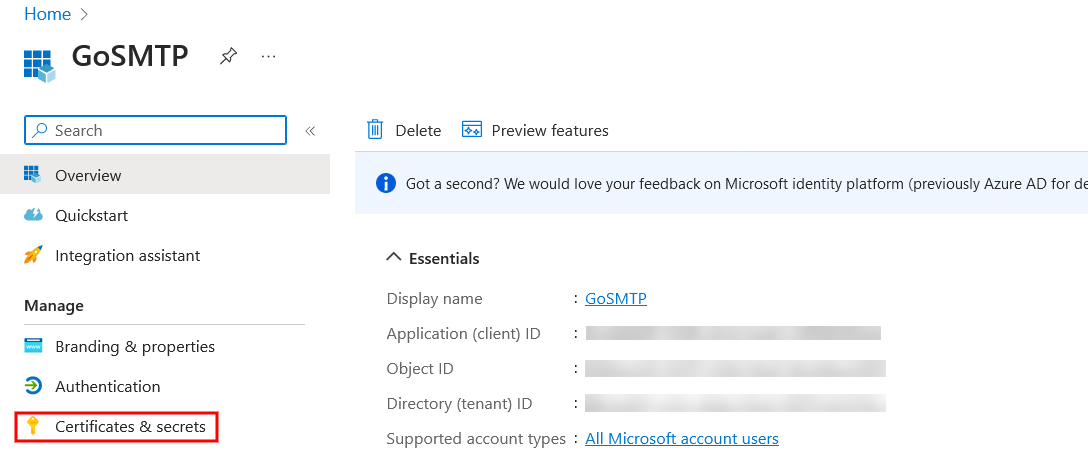
After registering the app, you'll be redirected to the app overview page, where you'll find the "Application (client) ID." Make sure to note down this Client ID, as it will be required later in the GoSMTP configuration.

In the app overview page, click on "Certificates & secrets" in the left sidebar.
Under "Client secrets," click on the "New client secret" button.

Provide a description for the client secret, such as "GoSMTP Integration Secret," and choose an expiration duration, like "1 year" or "Never Expires." Click "Add" to generate the client secret.
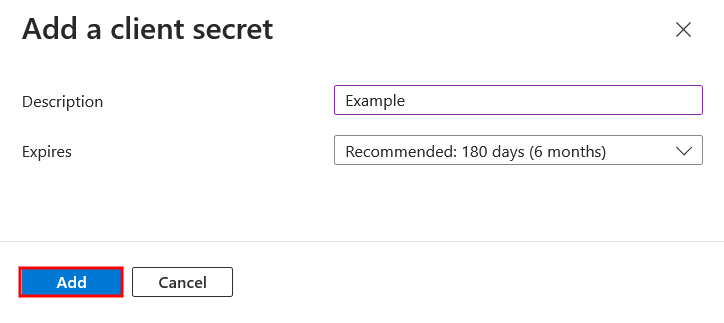
Remember to securely copy the Client Secret and paste it somewhere safe, as you will need it for the Outlook mailer configuration.

Mailer configuration
Once you have your Application Client ID and Secret Key, go to the "Outlook" section in the GoSMTP settings. Input the provided "Application Client ID" and "Application Client Secret Key" into the respective fields and click save.
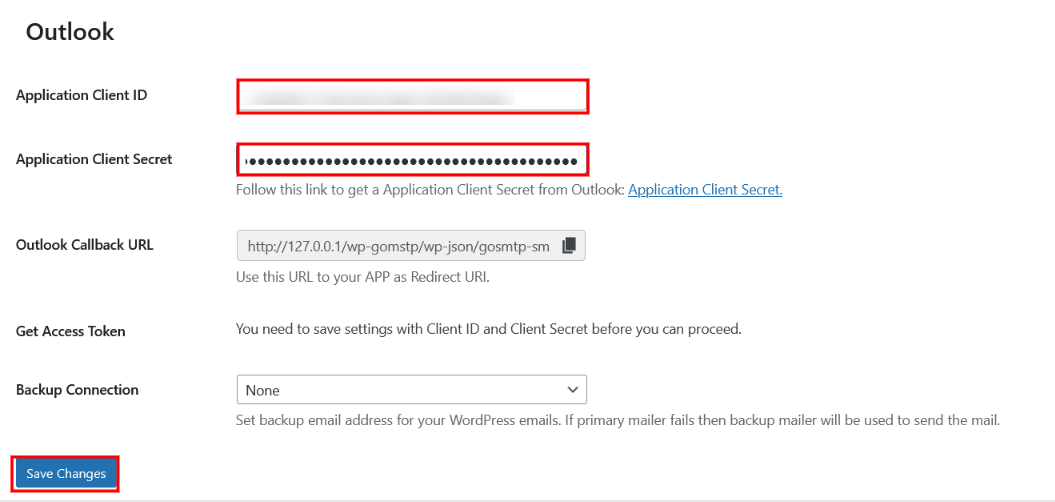
After clicking the "Save" button, you will see the "Authenticate" button appear. To establish a secure connection, click the "Authenticate" button located next to the Client ID field. This will initiate the OAuth2 authentication process.

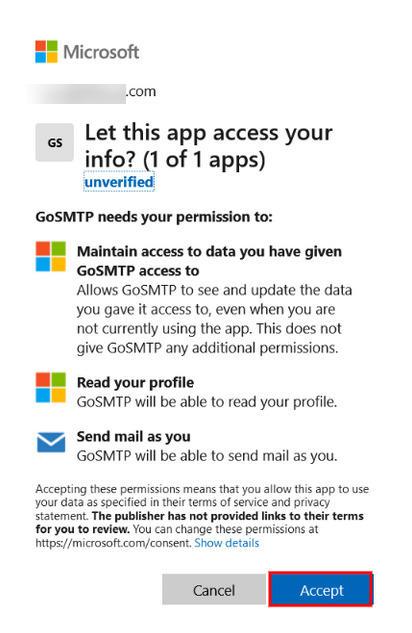
Follow the prompts to log in with your Outlook or Office 365 account and grant GoSMTP the necessary permissions.
You will now receive a "Mail successfully configured" prompt.
Congratulations! You have successfully obtained the required information and configured GoSMTP with your Outlook or Office 365 account. Your email communications are now secure and ready to be sent through the Outlook API.
Congratulations! You have successfully obtained the required information and configured GoSMTP with your Outlook or Office 365 account. Your email communications are now secure and ready to be sent through the Outlook API.
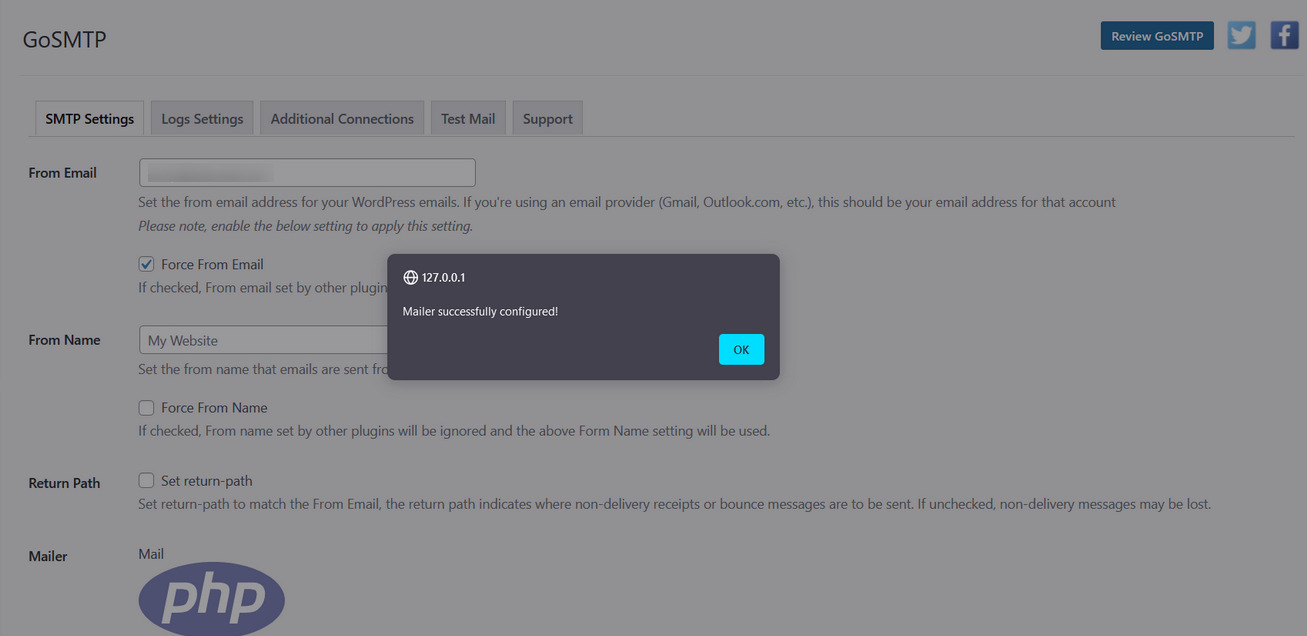
To deactivate your token in the future, just click on the "Deactivate Access Token" option on the screen below.

Send test Mail
After successfully configuring the mail settings, it's time to test your email functionality. Send a test email to verify whether it will be delivered successfully or encounter any issues. This test will determine whether your mail setup is functioning properly.
Freqently Asked Question
Yes, GoSMTP supports both organizational directory accounts and personal Microsoft accounts. During app registration, choose "Accounts in any organizational directory and personal Microsoft accounts" to enable this feature.
The Client Secret is crucial for authentication, and you won't be able to view it again once generated. It's essential to save it securely. If lost, you'll need to generate a new Client Secret in Azure and update it in GoSMTP's settings.
Once authenticated, the connection typically remains active for a long time. However, if there are any changes or issues, you might need to re-authenticate. GoSMTP provides automatic email sync to keep you updated with any new developments.
