
Overview
What Can Your AI Agent Do in WordPress?
How to Connect Your AI Agent to the MCP
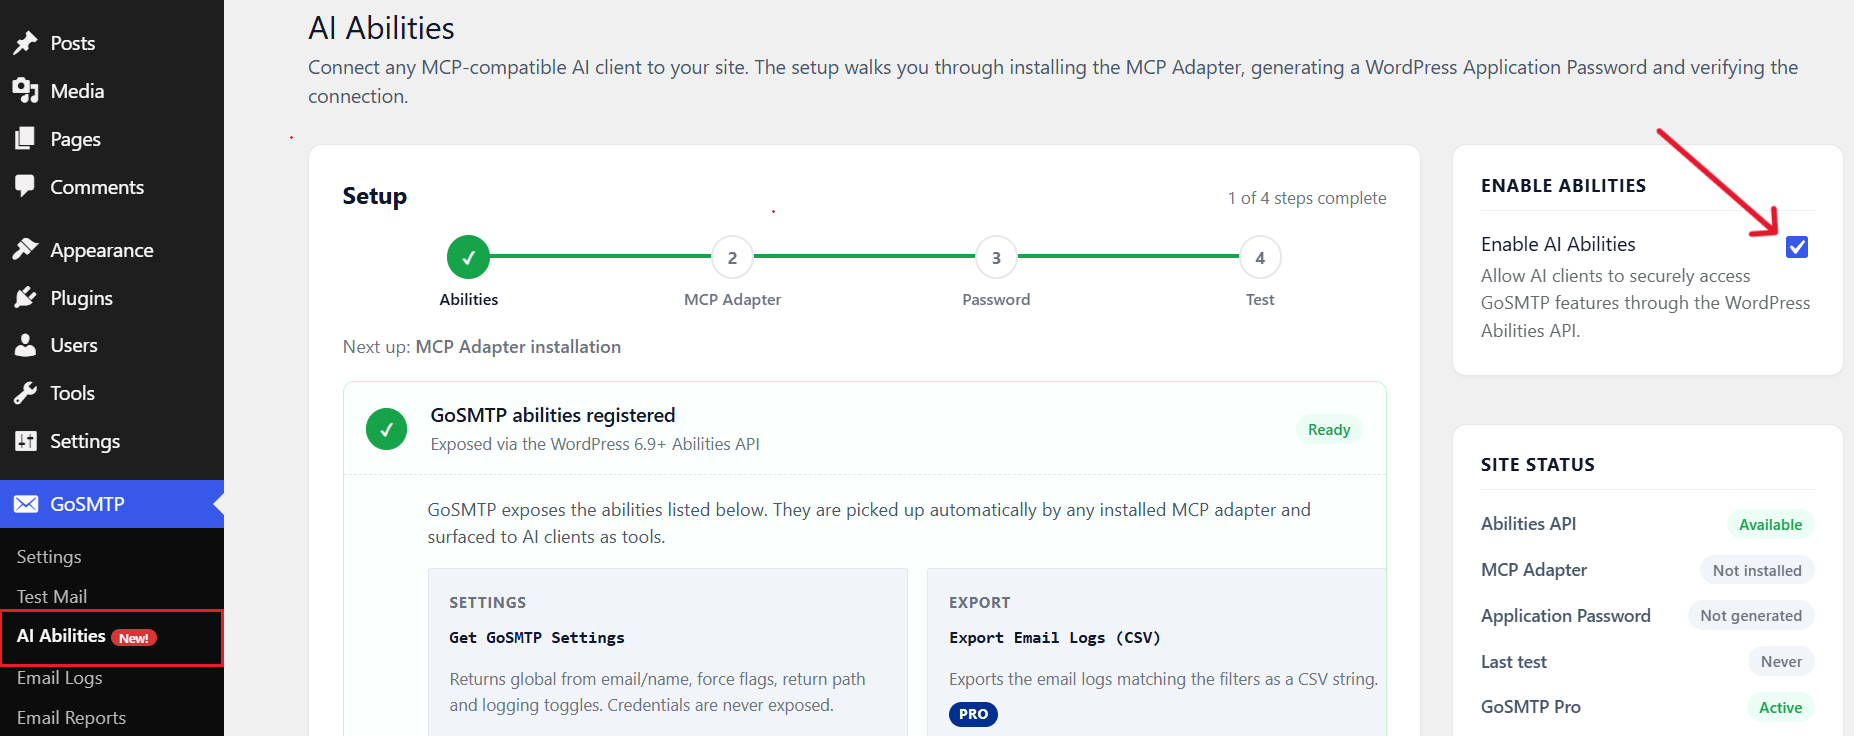
You'll see GoSMTP Abilities registered with a green checkmark.
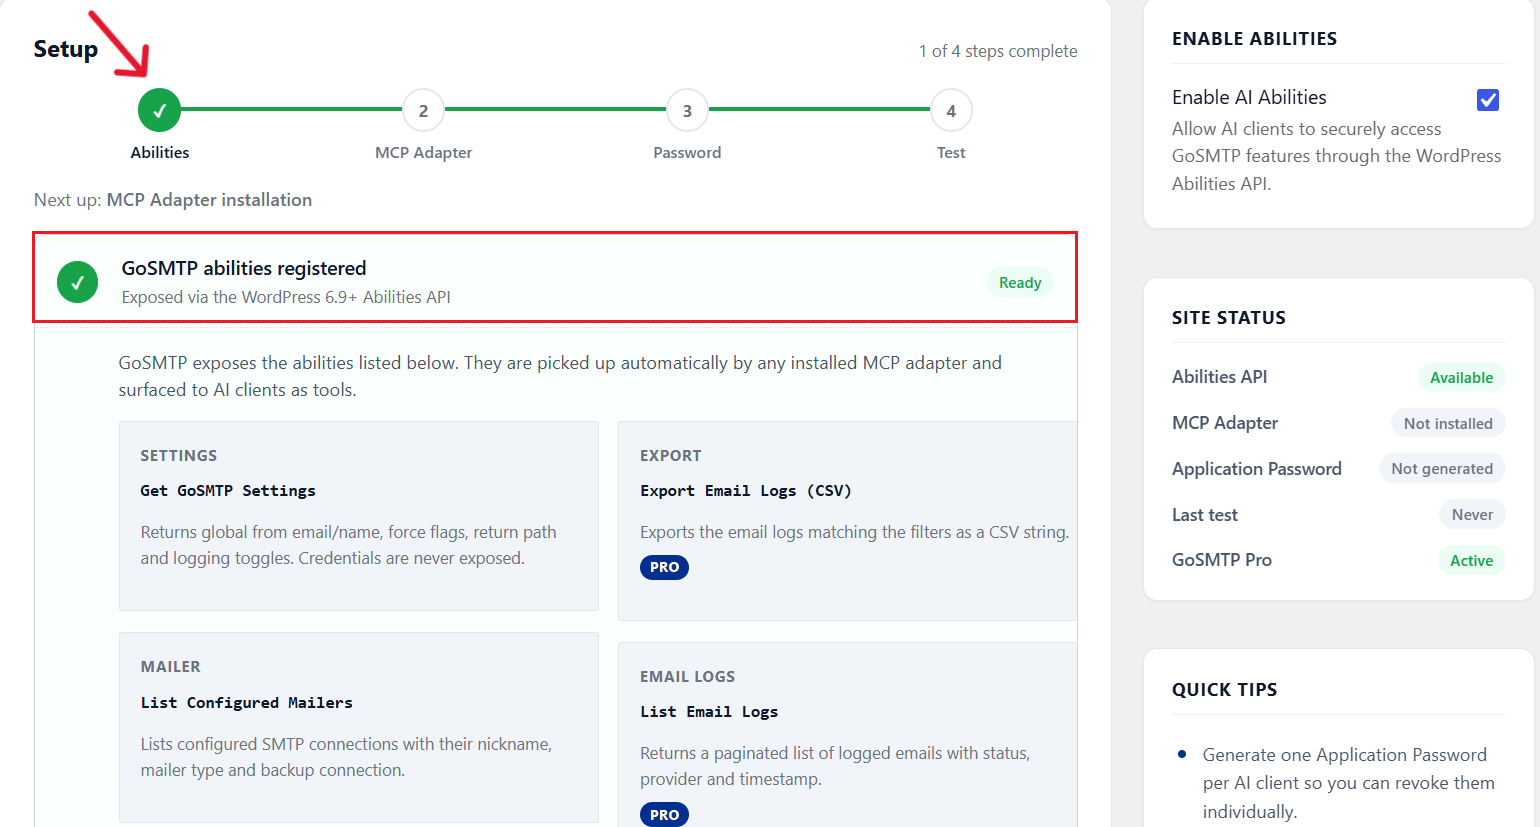
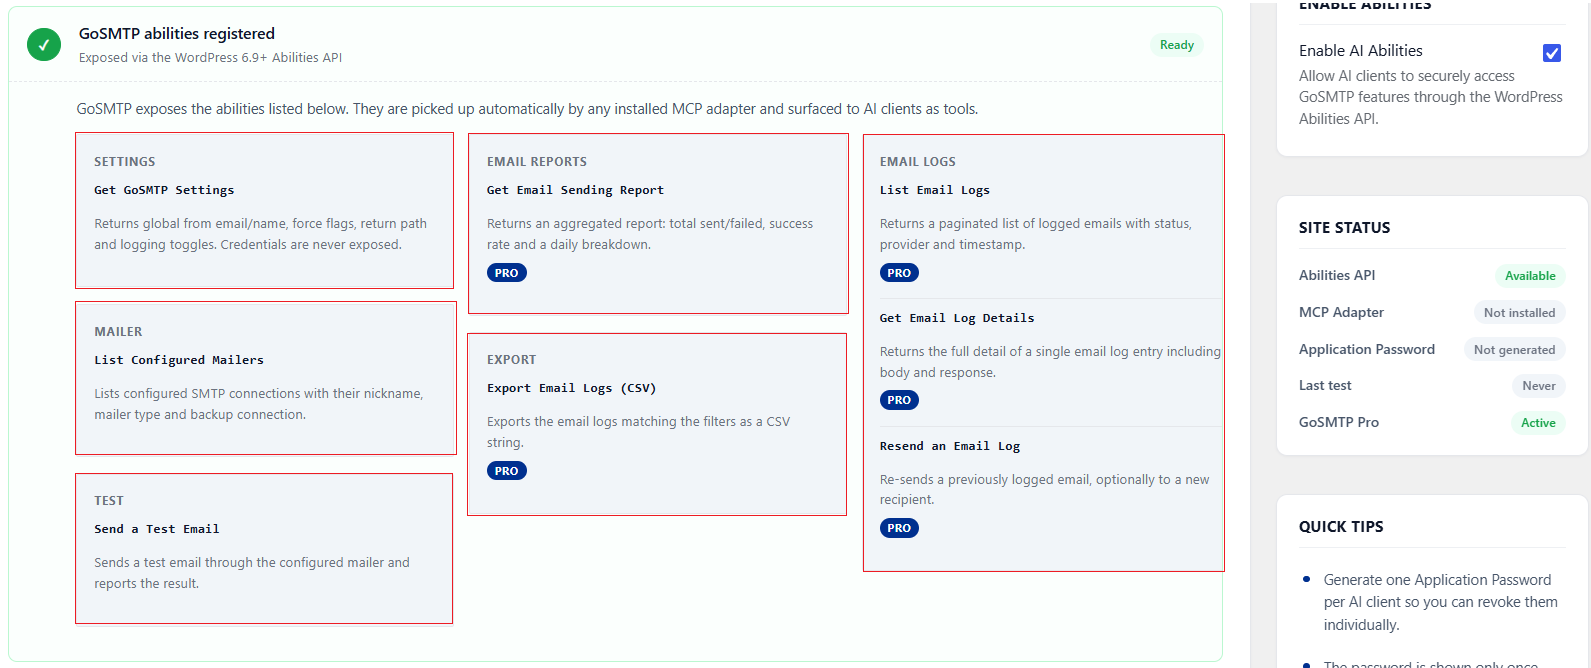
Here, you can browse the entire collection of GoSMTP Abilities at a glance. We recommend reviewing this section to see all the available capabilities and understand exactly how they work.
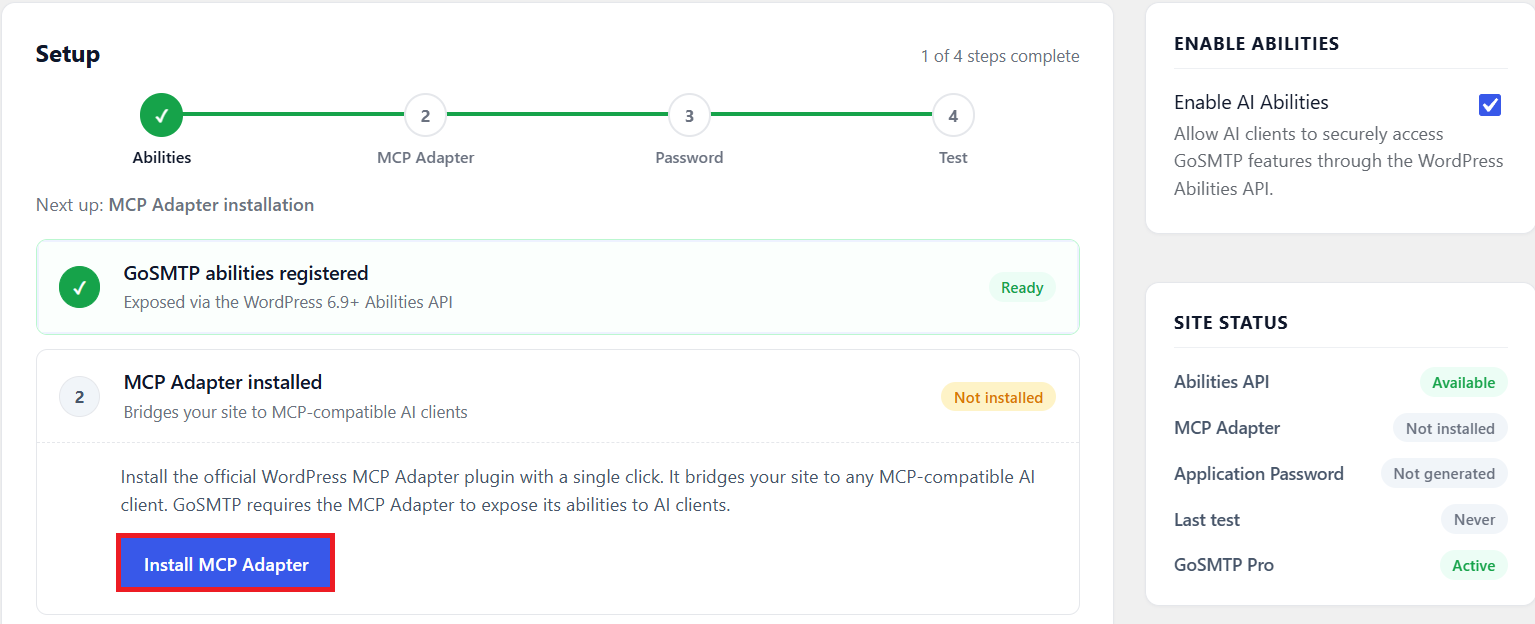
Click Install MCP Adapter, and GoSMTP will handle everything automatically. There's nothing you need to configure manually.
An Application Password provides a secure way for your AI client to authenticate with your website. Unlike your standard WordPress login password, it is a unique, dedicated credential linked directly to your user account. For added security, you maintain full control and can easily revoke this access from your WordPress profile at any time.
Click Generate Application Password. GoSMTP creates the password and pre-fills it into the configuration snippets below.
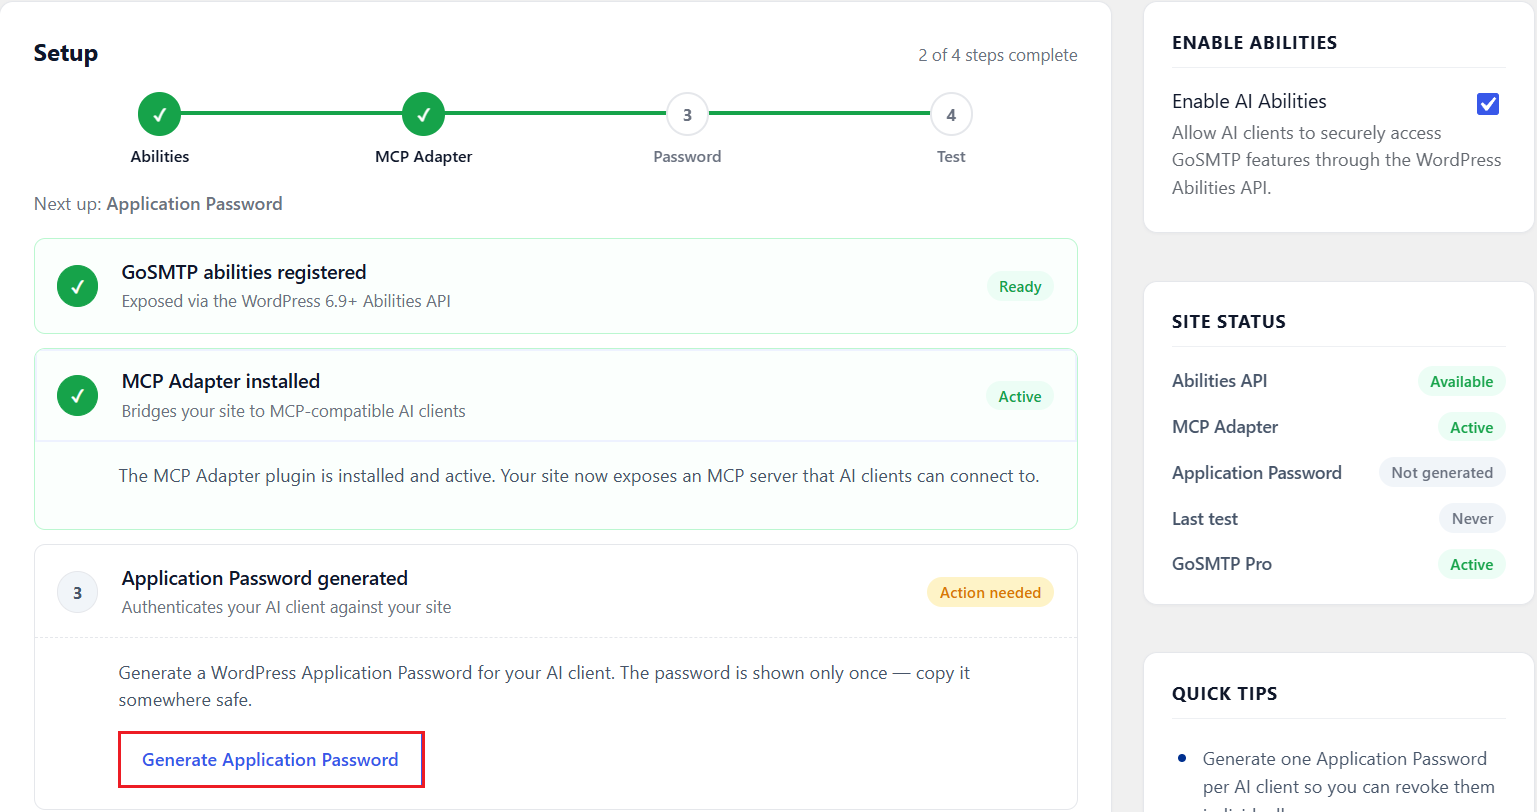
This is what it looks like after it has been generated:
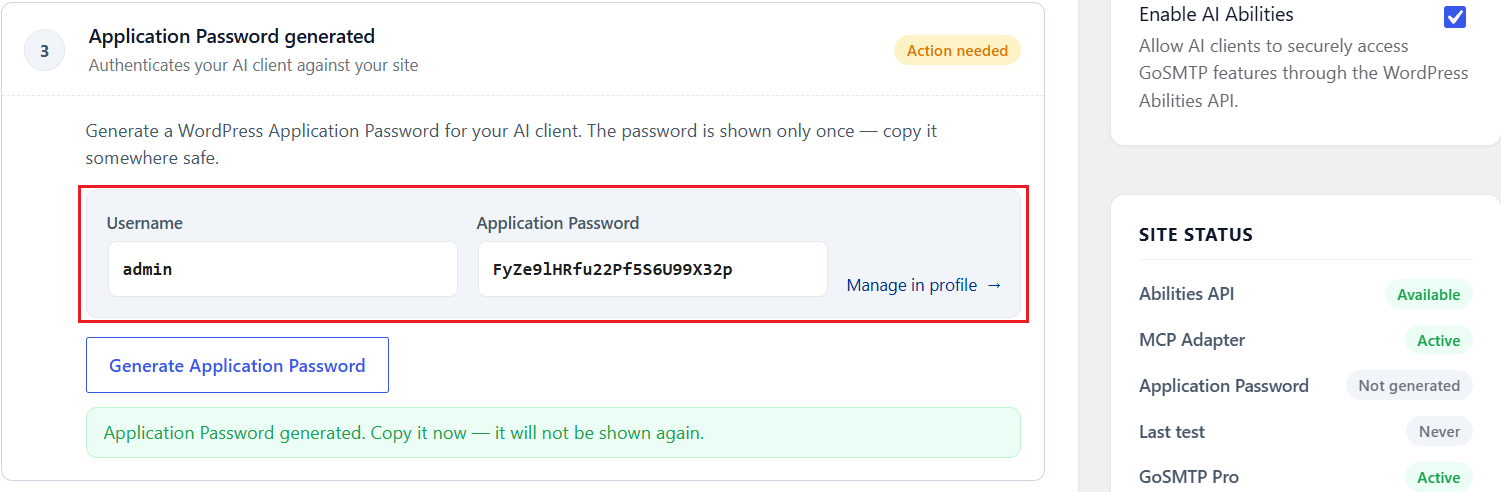
GoSMTP automatically populates this password into the connection snippet in a later step. If you're planning to set up your AI client later, copy the password now, as WordPress hides it once the session ends.
Note: Forgot to copy your Application Password? No problem. You can always generate a new one from your WordPress Admin and revoke any previously generated passwords.
Click Test Connection. GoSMTP will verify your Application Password and ensure your site can access the registered Abilities without any issues.

You'll see "Verified" with a confirmation that the connection is ready.
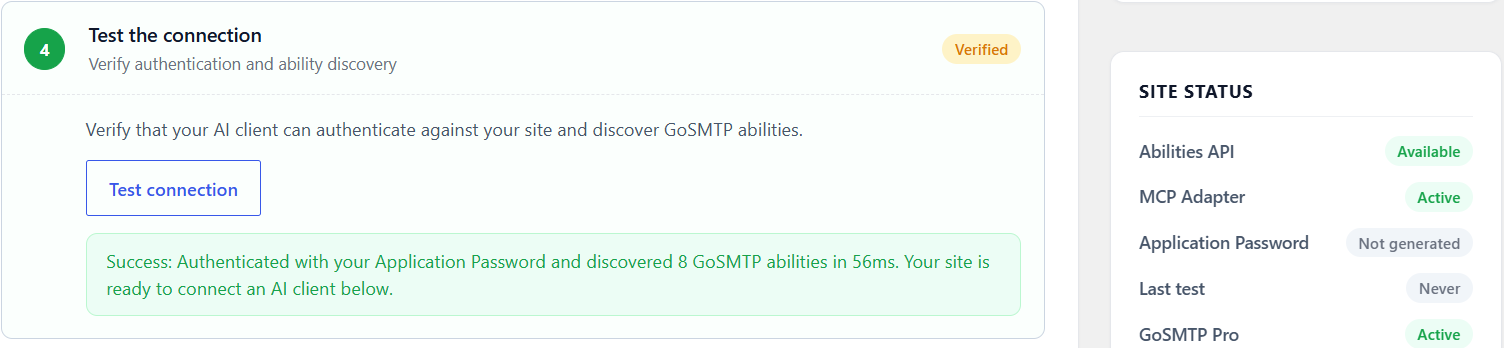
Setup complete! Now for the exciting part, let's see your AI Agents in action.
Here's what a real workflow looks like, from copying the snippet to running your first live email delivery task. I'm using Antigravity below, but the steps are virtually the same for any supported AI client.
Connection Antigravity: A Full Walkthrough
Once you've completed the four steps above, follow these instructions to connect Antigravity to your website. The setup process is virtually identical for other supported AI clients. Simply select your preferred client from the "Connect to AI Client" section and follow the corresponding instructions.
Scroll down to the Connect to AI client section and select the Antigravity tab.
You'll see a configuration snippet with your Site URL and Application password already filled in, assuming you're in the same session in which you generated it. if not, you can always swap in the new password.
Click the "Copy" Button in the top-right corner of the code block to copy the configuration snippet.
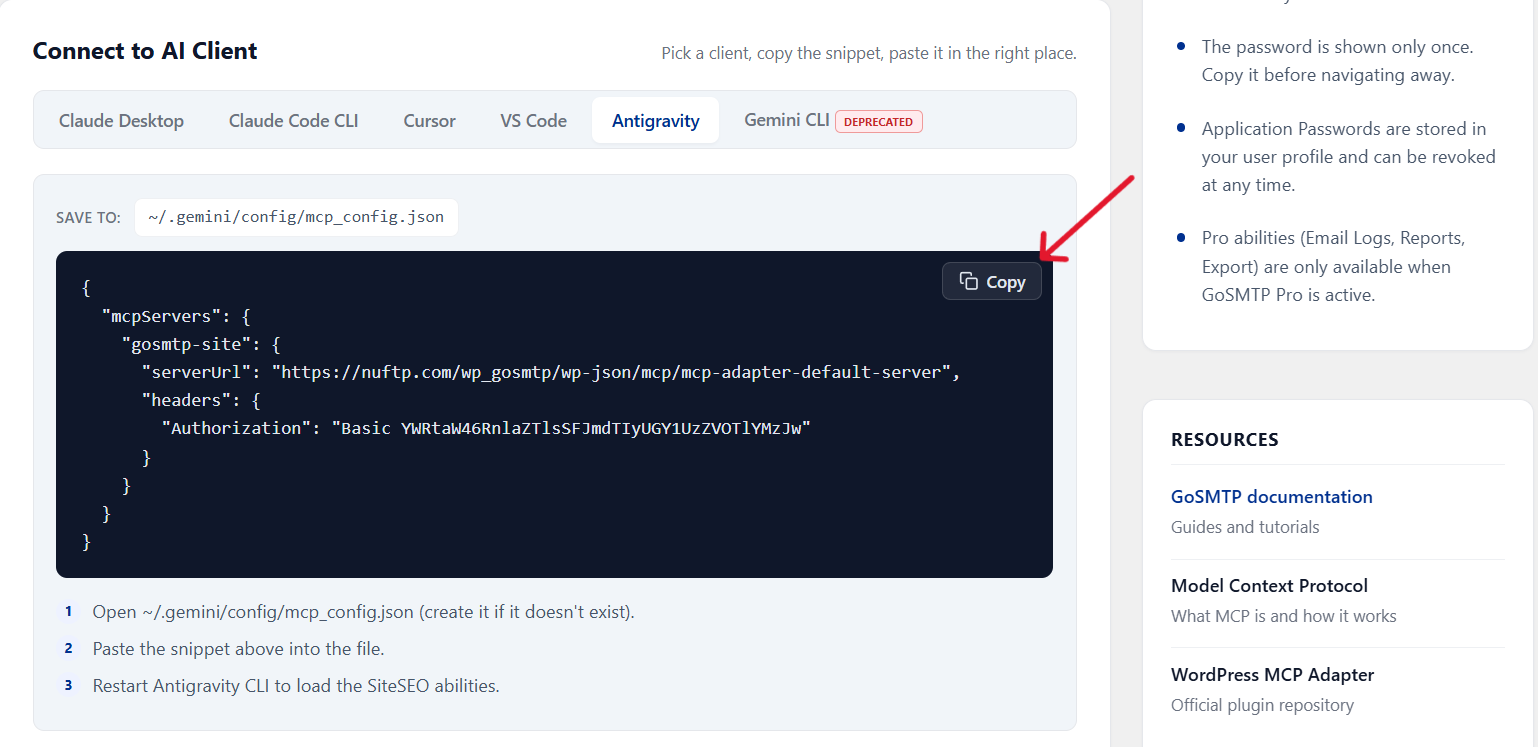
Open your terminal and access the ~/.gemini/config/mcp_config.json configuration file.

Press Enter to open the file in the nano editor, then paste your copied snippet into the file.
To save your changes and exit, follow these quick shortcut:
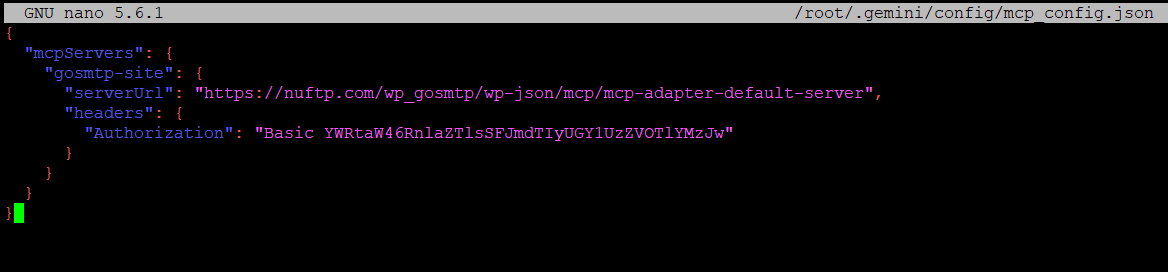
Type 'exit', press Enter, and start a new Antigravity session. GoSMTP Abilities will load automatically when the new session begins.
Tip: You can ask your AI client to list the GoSMTP Abilities at any time. This gives you a clear overview of all the WordPress email tasks you can perform with the AI agent. You can also ask it to explain an ability to help you understand how it works.
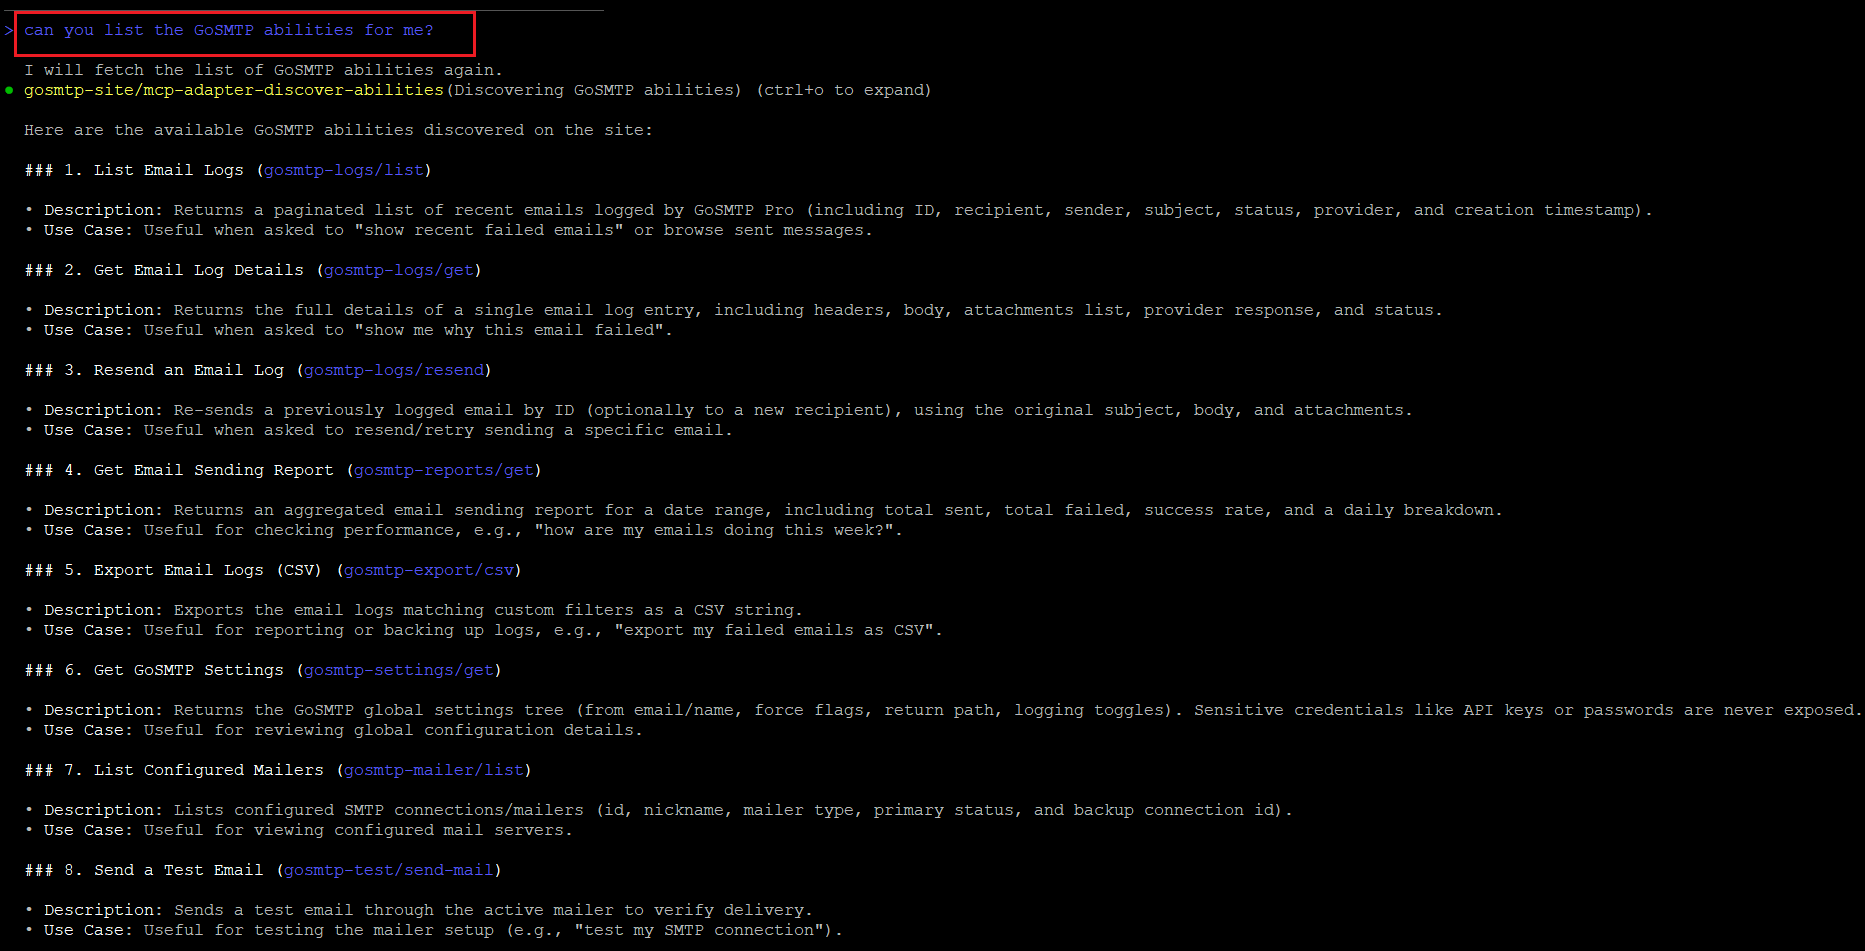
You're connected! Now, you can start asking Antigravity to manage and test your WordPress email delivery.
Let's look at a practical example. I'm going to ask Antigravity to send a test email directly from the AI client to verify our SMTP configuration.
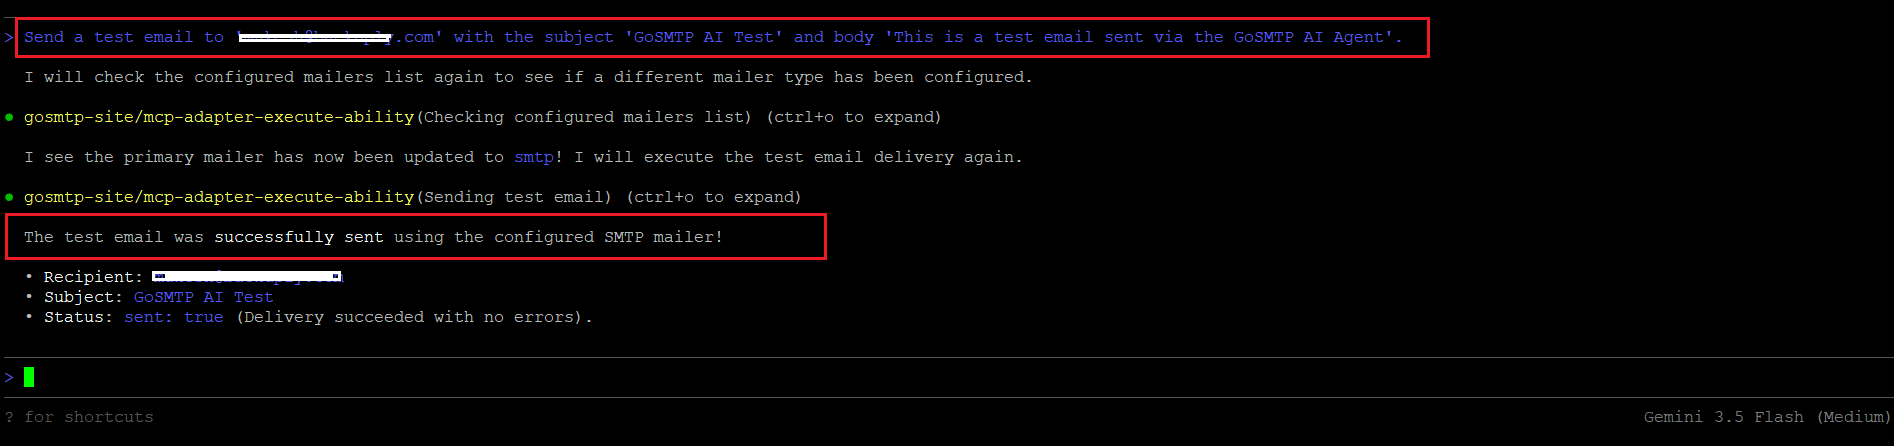
The Test email is sent in real-time. Now, here's where the GoSMTP MCP gets really powerful—you can instantly check your recipient's inbox or verify the delivery details directly inside your GoSMTP email logs.
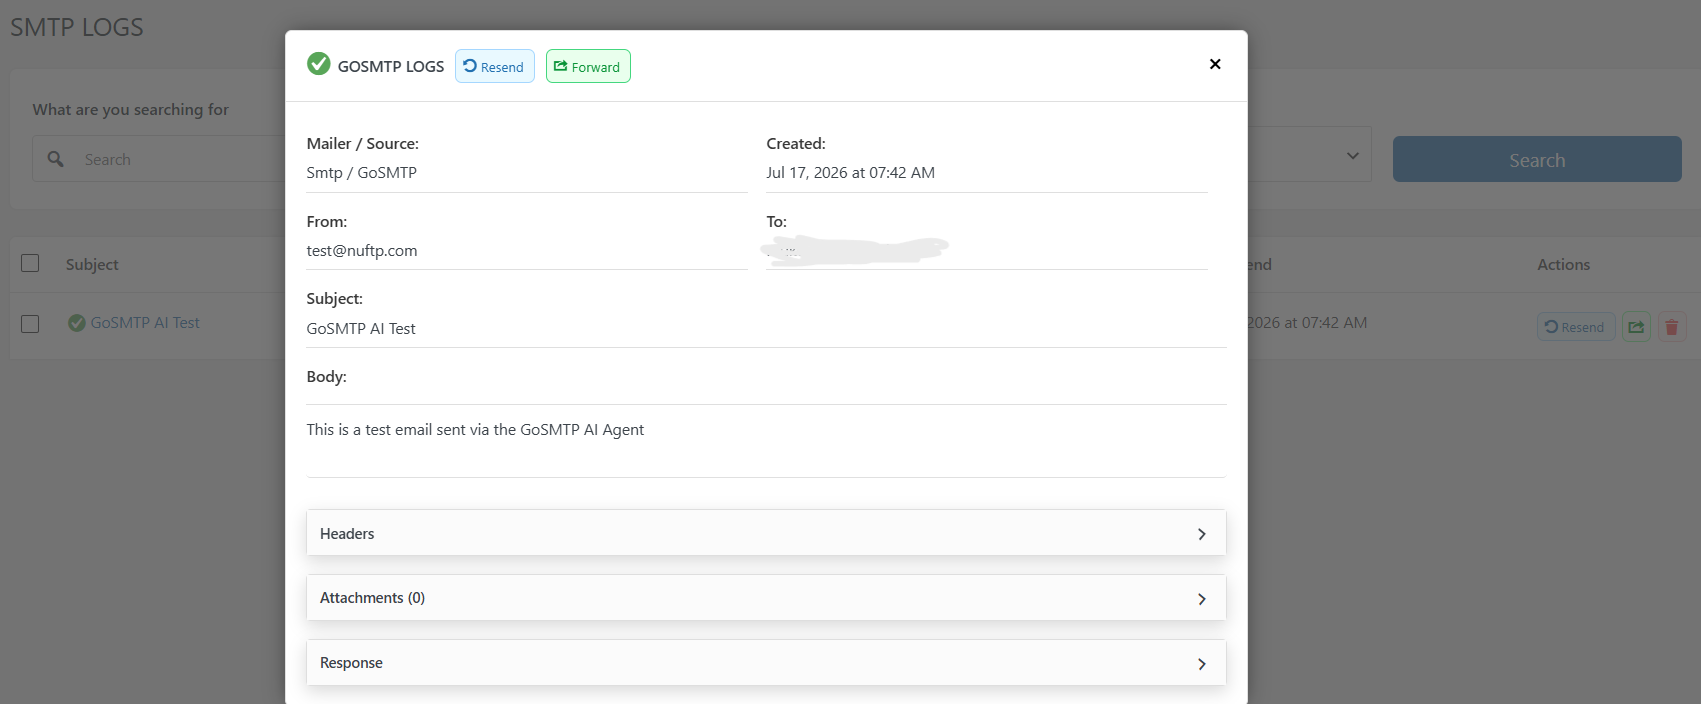
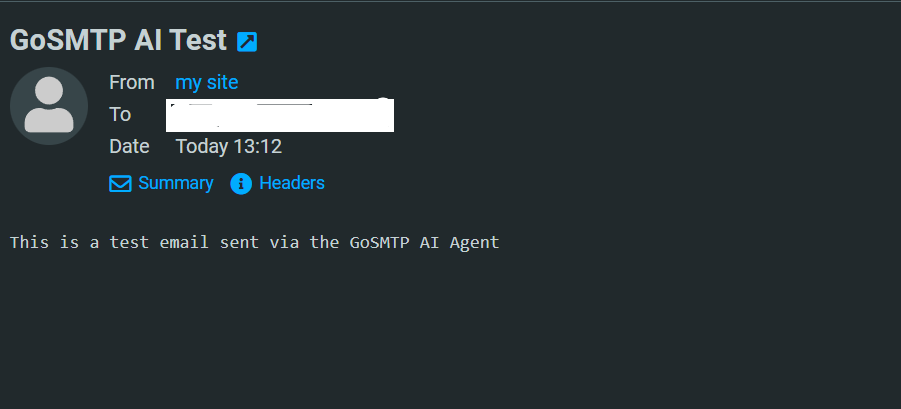
I've got to say, this is one of the most exciting features we've introduced to the plugin so far. AI is already a part of how most of us work every day, and this simply brings that same workflow directly into your WordPress email management. As shown in the images above, you can easily verify successful email delivery by checking both your recipient's inbox and the detailed GoSMTP Email Logs.
GoSMTP AI Abilities are now active. The connection has been fully established, and your AI agent is ready to work. You can now issue direct commands to manage your WordPress email workloads.
If you face any issues while configuration your AI agent with GoSMTP, You can Contact our support team.